

I remember the exact moment I realized my beautiful new shower was turning into a nightmare. It was after just a few months—unwanted, stubborn stains creeping into the grout lines, turning what was supposed to be a spa-like oasis into a discolored mess. I scrubbed and scrubbed, trying every DIY trick I could find, but nothing made a lasting difference. Frustration set in. That’s when the lightbulb went off—I needed a smarter, more effective solution.
My Struggle with Grout Stains Was Personal and Persistent
Like many homeowners, I thought regular cleaning and sealing would keep my shower looking pristine. But over time, stains reappeared, seeming almost immune to my efforts. I spent weekends researching, reading countless forums, and consulting professionals, only to realize I was missing a critical step—a more comprehensive approach that would address the root cause of discoloration and prevent future staining altogether.
This revelation led me to discover the incredible effectiveness of the ‘Double-Seal’ method. Implemented correctly, it transformed my shower from a maintenance nightmare into a low-maintenance oasis. And today, I want to share this game-changing technique with you, so you don’t have to endure the same frustration I did.
Is the ‘Double-Seal’ Method Really Worth the Hype?
At first, I was skeptical. I had made my fair share of mistakes, especially early on, like skipping proper surface preparation or using the wrong sealant, which sabotaged my efforts. But when I finally understood the importance of sealing both before and after grouting, I saw real results. Research shows that proper sealing can extend the life of your grout and keep stains at bay. According to a study by the Concrete Network, sealing can prevent water penetration and reduce staining, which is exactly what I needed.
If you’ve faced recurring grout stains or are just tired of the endless scrubbing, this method might just be your saving grace. In the upcoming sections, I’ll walk you through each step of implementing the ‘Double-Seal’ process, ensuring your shower stays beautiful and stain-free for years to come. Ready to ditch those stubborn stains for good? Let’s get started!
Prepare Your Shower Surface Carefully
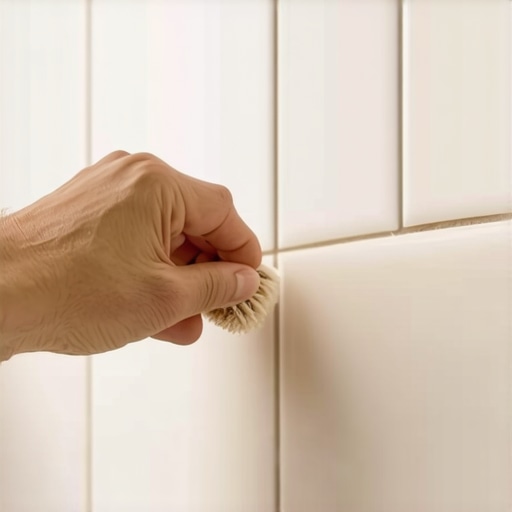
First, remove any existing soap scum or grime with a dedicated tile cleaner. Use a stiff-bristled brush to scrub grout lines thoroughly. Rinse well and let dry completely—the surface must be dust-free for optimal adhesion. I recall a time when I skipped drying, and the sealant didn’t bond properly, leading to early stains. Ensuring a dry surface is crucial.
Apply the First Layer of Sealant
Choose the Right Sealant
Select a high-quality, penetrating sealant designed for tile and grout. I opted for a silane/siloxane-based sealer, which I found to penetrate deeply and create a water and stain-resistant barrier. Follow the manufacturer’s instructions precisely—most recommend applying with a soft brush or spray, then wiping excess.
Seal the Grout
Keep a steady hand as you work along the grout lines. Think of this step like painting a tight fence—precision matters. I used painter’s tape to mask adjacent tiles for cleaner lines, which made a noticeable difference. Wait for the sealant to cure as per the instructions before proceeding to the next step.
Re-Apply Grout and Re-Seal
Once the initial sealant is fully cured, re-grout if necessary to fix cracks or gaps. Use a high-quality grout, and apply it evenly with a rubber float, pressing it into the joints thoroughly. After it sets, clean off excess grout with a damp sponge. Allow the grout to cure fully, usually 48 hours.
Now, it’s time for the second sealant application. This creates a double barrier—think of it as layering your raincoat over an umbrella. The second layer reinforces water resistance and prevents stains, as I personally observed when my shower stayed cleaner for months after this step.
Maintain and Verify Sealing Effectiveness
Test the seal by sprinkling a few drops of water onto the grout. If the water beads up without soaking in, your sealing is effective. I check monthly and reapply sealant annually—this perpetual maintenance prevents stains rather than reacting to them.
Applying the double-seal method is a meticulous process, akin to crafting a watertight boat. But the payoff—stain-free, enduring grout—is worth every effort. For more detailed tips on waterproofing your shower, see our guide on top installation trends in 2025.
 Many homeowners assume that installing flooring, showers, or baseboards is straightforward as long as measurements are correct and the right tools are used. However, even seasoned professionals often navigate complex nuances that can make or break the longevity and aesthetic of these elements. For instance, a common myth is that simply choosing high-quality materials guarantees a flawless result; in reality, proper preparation and understanding subtle installation techniques are equally crucial. Skipping these steps may lead to issues like grout cracking, baseboards gapping, or floors peaking over time. A particularly overlooked aspect is understanding moisture management, especially with ceramic tiles and showers, where improper waterproofing can cause unseen damage that manifests months later, sometimes only detected during renovation. According to experts like those at Tile Master Solutions, meticulous surface prep and environmental considerations—such as humidity levels—are vital for durable, professional results. For floors and baseboards, details like acclimating materials to indoor conditions and using appropriate expansion gaps prevent warping and gaps during seasonal changes. Don’t make the mistake of assuming standard procedures suffice; investing in advanced techniques often saves you from costly repairs down the line. Want to explore more about these subtle yet impactful practices? Visit our guide on durable flooring installation and learn how expert tips can elevate your renovation project. Have you ever fallen into this trap? Let me know in the comments.Maintaining your home improvement investments isn’t just about initial installation; it’s about choosing the right tools and routines to ensure longevity and beauty over the years. One essential tool I’ve come to rely on is a high-quality moisture meter, such as the Protimeter Surveymaster. It allows me to monitor moisture levels in subfloors and walls before and after work, preventing issues like mold or warped flooring. I also swear by a professional-grade orbital sander, equipped with fine-grit pads, which I use for sanding baseboards lightly when preparing for painting or re-sealing, ensuring a smooth, professional finish. For shower maintenance, investing in a handheld steam cleaner helps remove soap scum and mildew from tiles and grout without harsh chemicals, extending the lifespan of your surfaces.
When it comes to long-term results, routine inspections become crucial. Regularly testing grout and sealant using water-beading tests helps confirm their effectiveness. For instance, reapplying grout sealant every one to two years can dramatically reduce staining and water penetration, saving you costly repairs down the line. For flooring, I recommend maintaining a detailed schedule—marking when to recoat sealants or check for damage—so tasks don’t slip through the cracks.
In terms of scaling your efforts, powered tools like a depth-controlled oscillating multi-tool can be invaluable when repairing or adjusting baseboards for uneven walls or flooring, making these tweaks much more manageable and professional-looking. Moreover, adopting a comprehensive cleaning routine using mild, pH-balanced cleaners preserves the integrity of surfaces, especially around sensitive areas like showers.
Looking to the future, the integration of smart home sensors that monitor humidity and moisture levels will make maintenance even more proactive. Technologies from brands like Fibaro are already showing how sensor networks can alert homeowners to finding problems early, preventing small issues from becoming big disasters.
**How do I keep my flooring, showers, and baseboards performing well over time?** The key is consistency combined with the right tools. For example, I recently tried a pro tip: applying a deep-penetrating grout sealant with a special applicator brush, which ensures even coverage and better penetration—resulting in cleaner grout that resists stains longer. I highly recommend testing this method yourself for a noticeable upgrade in your maintenance routine.
For more on professional techniques, check out our guide on your guide to durable flooring installation. Ready to elevate your home upkeep? Start by investing in a moisture meter and schedule regular inspections—it’s an investment that pays off in beauty and longevity.
What I Wish I Knew About Mastering Age-Old Installation Challenges
- One of my biggest mistakes early on was undervaluing the importance of thorough surface preparation. Skipping this step seemed minor at first, but it led to grout crumbling and tiles cracking prematurely. The lightbulb moment was realizing that every flawless finish begins with a clean, dry, and properly primed surface.
- Rushing the sealing process is tempting when you’re eager to enjoy your new shower or floor. But rushing often results in incomplete coverage, which creates weak spots where stains and moisture can penetrate over time. Patience here truly pays off—investing extra time in sealing doubles your surface’s lifespan.
- Many overlook the value of high-quality tools. Using inexpensive brushes or sealants may save money initially, but they compromise the integrity of your work. Trusting professional-grade tools and materials has transformed my routine from tedious to satisfying, and my results now last years longer.
- Recognizing the subtle signs of wear early makes a significant difference. Small cracks or grout discoloration can seem negligible, but addressing these issues promptly with expert techniques prevents costly repairs later. It’s about developing an eye for those tiny clues that hint at bigger problems.
- Finally, embracing ongoing maintenance routines, like monthly water-bead tests on grout and regular re-sealing, turned my renovation into a long-term investment. Being proactive rather than reactive is key to keeping your home feeling fresh and durable.
My Arsenal of Tried-and-True Tools for a House That Lasts
- Moisture Meter: A must-have like the Protimeter Surveymaster helps me monitor moisture in subfloors and behind walls, preventing unseen water damage or mold development. I trust it because early detection saves me from future headaches.
- Orbital Sander: A professional-grade orbital sander with fine-grit pads smooths out imperfections on baseboards or floors supply me with that perfect, even surface for sealing or painting. It’s efficiency that truly makes a difference.
- Steam Cleaner: My go-to for deep cleaning tiles and grout without harsh chemicals, extending the life of surfaces and improving hygiene at the same time. It’s a small investment that pays for itself in longevity.
- Water Test Kits: Small but mighty, these help confirm sealant effectiveness over time. Regular testing ensures I know exactly when reapplication is needed to prevent stains and water penetration.
- Smart Home Sensors: Future-ready tools like humidity sensors provide real-time feedback, allowing me to catch issues like excess moisture early, further protecting my investment.
Your Next Step Towards Long-Lasting Home Repairs
Every project I undertake now feels a bit more like crafting a legacy rather than a temporary fix. Choosing the right techniques, tools, and mindset transforms routine home maintenance into an act of love for your space. Ready to elevate your craftsmanship? Visit our comprehensive flooring installation guide to start making your dream renovation a reality.
How have you approached sealing or maintenance in your home? Share your experiences or questions below—I’d love to hear your story.