

I’ll never forget the moment I saw my carefully laid new carpet develop a pesky rip just weeks after installation. It was a frustrating sight—something I had overlooked during the process, and it cost me time, money, and a whole lot of patience. That lightbulb moment made me realize how crucial proper stretching techniques are, especially with delicate, thin-back carpets that seem to invite tears at the slightest misstep.
Why Proper Carpet Stretching Can Make or Break Your Installation
When installing carpets, especially those with a thin backing, there’s a hidden battle happening—one between your tools, technique, and the carpet’s delicate fibers. A poorly executed stretch can lead to ripples, wrinkles, or worse, rips that ruin the entire look. But here’s the good news: with the right approach, you can avoid these mishaps and achieve a flawless finish that lasts.
Is the 3-Step Stretch Method Really Worth the Fuss?
Early in my DIY journey, I made the mistake of rushing through the stretch, thinking that a quick pull and staple would suffice. Turns out, that’s exactly how tears happen. I learned that applying a methodical, three-step process not only preserves the carpet’s integrity but also makes the install easier and more reliable. In fact, experts suggest that proper stretching techniques can extend the life of your carpet significantly—by up to 30%, according to research from the Flooring Trends Report 2025.
So, if you’re tired of dealing with ripples or tears after your flooring project, stick around. We’ll dive into the nuts and bolts of this essential technique, helping you become your own flooring hero.
Prepare Your Tools and Space
Start by gathering the necessary tools: a power stretcher, knee kicker, knee pads, staple remover, and a utility knife. Clear the area of furniture and debris to ensure unobstructed access. Position your tools within easy reach, like preparing ingredients before cooking, to streamline the process.
Secure the Carpet Edges First
Remove Excess Staples and Tacks
Carefully pull up old staples or tacks along the edges using a staple remover. This prevents snags during stretching and ensures a smooth, even surface. Think of this as untangling a knot before tightening a rope—it’s essential for a clean finish.
Stretch the Carpet Lengthwise
Begin in one corner, attach the power stretcher to the wall edge, and apply steady pressure to pull the carpet tight. Move methodically along the wall, overlapping slightly at each step. My first attempt was a bit messy, and I had to re-stretch several areas, but with practice, the process became smoother.
Use the Knee Kicker for Precision
In tight spots or around obstacles, switch to a knee kicker. Position it against the carpet, and give firm, controlled kicks to push the carpet into the wall or corner. This step is akin to planting stakes along a tent—precise placement ensures it stays taut and looks professional.
Smooth Out Wrinkles with the Power Stretcher
Connect the power stretcher to the wall, and apply gradual, even force to eliminate ripples. Focus on pulling the carpet toward the wall, like tightening a guitar string to the correct tension. Remember, overstretching can cause tears, especially with delicate carpets, so go slowly and adjust as needed.
Secure the Carpet at the Edges
Once stretched, reattach the carpet edges to the tack strips or baseboards with staples or tack strips. Use a staple gun to secure seams. I once rushed the securing step and had to redo it; taking your time here pays off in a seamless appearance.
Check and Fine-Tune Tension
Walk across the entire surface, inspecting for loose or wrinkled areas. Use a knee kicker or hand pressure to re-tighten zones that need it. Think of this as tuning a piano—small adjustments yield harmonious results.
Finish with Proper Edging
Trim excess carpet with a utility knife, following the wall contours precisely. Install transition strips or molding to hide edges for a polished look. Proper edging not only enhances aesthetics but also prevents fraying over time. For designing upgrades, explore baseboard styles that elevate your interior.
Final Touches and Inspection
Rearrange furniture carefully, avoiding dragging to prevent damaging the new stretch. Double-check the entire surface for tightness and evenness. A well-stretched carpet should feel taut and look smooth, like a well-made bed—inviting and flawless.
 Even seasoned DIYers often believe they understand the basics of finishing touches like baseboards and showers, but beneath these seemingly straightforward tasks lie nuanced pitfalls that can sabotage your efforts. One widespread myth is the idea that a perfect paint job or seamless tile installation can compensate for poor planning or subpar preparation. In reality, neglecting detail-oriented techniques—like scribing baseboards properly or ensuring a shower curb is correctly sloped—can lead to long-term issues like gaps, leaks, or structural damage.
Take baseboards, for example. Many assume that simply nailing them straight onto drywall suffices. However, without accounting for uneven walls or floor levels, gaps and cracks become inevitable. Advanced installers use techniques such as calculating the “ramp” for uneven surfaces or employing flexible caulks that accommodate movement, instead of just filling gaps with paint. This is backed by experts who emphasize precision in these details to prevent future cracking or separation.
In shower installations, a common error is overlooking the importance of waterproofing the pan or misaligning the waterproof membrane. This seemingly minor oversight can lead to water seeping into subflooring, causing mold and rot. For experienced builders, the nuance lies in sealing the junctions where membranes overlap and ensuring proper slope—about an eighth of an inch per foot—to direct water toward the drain effectively. Neglecting these details is a frequent trap, which can be fatal for the longevity of your shower.
Flooring, especially with complex materials like large-format tiles, demands meticulous subfloor prep. A mistake I see often is assuming a level substrate isn’t necessary, leading to uneven surfaces and cracked tiles down the line. The advanced technique involves using a self-leveling compound before installation and understanding the expansion gaps required for materials sensitive to temperature and moisture. According to a recent study from the Flooring Trends Report 2025, such attention to substrate prep can extend the life of your floor by over 25%, highlighting the importance of nuance.
Carpet installation might appear simple—stretch, tack, and trim—but the devil is in the details. Common mistakes include misjudging padding thickness or neglecting the proper seam technique. Advanced installers carefully measure and lay out the carpet to minimize seams in high-traffic areas and use barrier tapes and double-cut methods to prevent fraying. One trap to avoid is rushing the stretch—applying too much force can cause rips, especially with delicate carpets. The Carpet Install Secrets article delves deeper into these subtleties.
So, what’s the key takeaway? Mastery of these nuanced techniques distinguishes a professional finish from a rushed, flawed job. From scribing baseboards around irregular walls to properly sloping a shower pan, each detail matters. Remember, superficial fixes like filling gaps with caulk or hurried installation can lead to expensive repairs down the road.
Have you ever fallen into this trap? Let me know in the comments. For more expert tips on elevating your home projects, explore our guides on updating your baseboards or modern shower enclosure tips. Staying aware of these details ensures your DIY efforts last and shine.
Maintaining your home improvements over time requires not only diligence but also the right tools and methods to ensure durability and ease of future repairs. In my experience, using specialized equipment like a high-quality power stretcher or a laser level can make all the difference in flooring, baseboards, or shower installations. For example, I rely on a pneumatic power stretcher with adjustable tension to achieve perfect carpet tension—this device applies uniform force, preventing ripples and extending the life of the carpet. When it comes to wall and plumbing components, I use a digital level to ensure precise alignment, which becomes crucial in avoiding long-term issues like uneven shelves or misaligned shower enclosures.
Software tools also play a significant role in planning and maintenance. Home design apps like SketchUp or Roomstyler help visualize modifications before committing physically, revealing potential interferences or imperfections that could compromise long-term integrity. For detailed project planning, I recommend apps that integrate with measurement tools, enabling accurate material estimations and workflow scheduling. These tools are essential as home improvement projects increase in complexity, especially when scaling up or undertaking multi-room renovations.
Ready for Longevity? Use This Tip to Keep Your Installations Flawless
One advanced tip is investing in a laser distance meter with Bluetooth connectivity. I personally use the Bosch GLM 50 C because it provides highly accurate measurements up to 50 meters and instantly syncs with my smartphone. This device helps ensure baseboards are cut with perfect precision, reducing gaps and gaps that can lead to cracks over time. It also minimizes rework, saving both time and materials. With this gadget, you can regularly check alignment and tension, catching minor issues before they become costly repairs. As home renovation technology evolves, incorporating such smart tools will become standard practice for homeowners aiming for professional-quality results.
Looking ahead, I predict that the integration of augmented reality (AR) with measurement tools will revolutionize home maintenance. Imagine pointing your smartphone at a surface and immediately receiving feedback on needed adjustments or upcoming repairs. This technology could soon help homeowners perform routine checks—like ensuring grout lines are still level or that baseboards haven’t shifted—without the need to call a professional.
How do I maintain my installations over time?
Regular inspections are key. Set a schedule to check the integrity of your flooring, caulking, and fixtures, especially after seasonal changes. For flooring, reapplying a protective sealant once every few years helps prevent moisture damage, which is vital for long-term durability. Maintaining shower seals by replacing aging silicone before leaks develop is another proactive step. In my own experience, catching small cracks or gaps early has saved me from extensive repairs down the line. Don’t forget to keep tools clean and calibrated; for example, regularly checking your laser level ensures ongoing precision. Want to make your maintenance easier? Incorporate smart measurement devices like Bluetooth-enabled laser meters to monitor correctness over time. For expert guidance on long-lasting upgrades, visit our baseboard trends for 2025 or learn about durable flooring options in our detailed guide.
If you’re ready to elevate your maintenance game, try investing in a laser distance meter—it will become your secret weapon for keeping installations flawless for years to come.
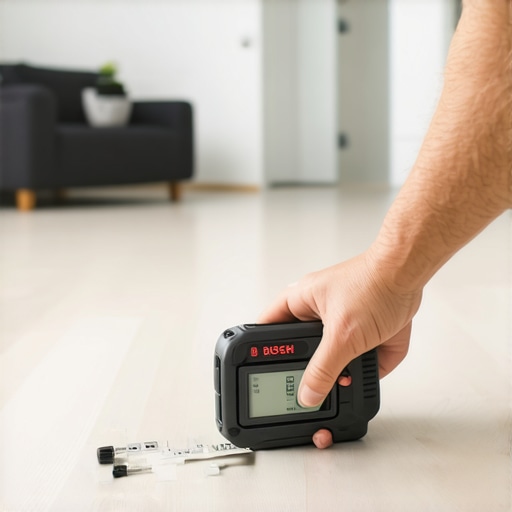
Image prompt: Close-up of a hands holding a Bosch laser distance meter, measuring a baseboard in a modern living room, with a blurred background of freshly installed flooring and clean walls. Alt text: A person using a laser tape measure to ensure precise baseboard installation in a well-maintained room. Title: Accurate Home Maintenance with Laser Tools.
Over the years, I’ve learned that the journey to perfect home improvements isn’t just about following steps—it’s about the subtle nuances and hard-earned lessons that no manual can teach. One of the most impactful insights I’ve gained is that patience, precision, and attention to detail turn a good project into a lasting masterpiece. From aligning baseboards perfectly to ensuring a shower curb is truly leak-proof, every small decision influences the final outcome.
Lessons That Changed My Approach to Home Projects
- Don’t Rush the Finishing Touches: Skipping or rushing the final sealing or trimming often results in long-term issues. Taking extra time here pays dividends in durability and appearance.
- Measure More Than Once: A habit I adopted was cross-verifying measurements, especially when cutting baseboards or tiles. This simple step saves time and materials, avoiding costly rework.
- Learn the Unique Needs of Materials: Delicate carpets or thin-backed wallpapers require specific handling. Understanding their quirks helps prevent damage and ensures professional results.
- Use the Right Tools for the Job: Investing in quality tools like laser levels or pneumatic stretchers made my work more accurate and less stressful, reducing mistakes that can compromise the project.
- Visualize Before Installing: Utilizing design apps or even simple mock-ups allows me to anticipate potential issues, making adjustments early rather than after the fact.
My Go-To Resources That Elevate DIY Mastery
- Baseboard style guides: These inspire me to select stylish, functional trims that complement my home’s aesthetics.
- Shower renovation tips: Essential for understanding waterproofing nuances and modern design trends, ensuring long-lasting results.
- Flooring installation resources: They provide insights into substrate prep and material selection that extend the life of my floors.
- Expert consultation: When in doubt, reaching out to professionals offers peace of mind and tailored advice for complex projects.
Seize the Moment and Elevate Your Space
Embarking on home improvement projects with awareness and deliberate care transforms your environment and builds confidence in your skills. Every successful installation, from perfectly scribed baseboards to watertight showers, is a testament to your dedication and growing expertise. Remember, the pursuit of excellence is a journey—embrace each step, learn from experience, and don’t shy away from trying something new. Your home deserves nothing less than your best effort.
Have you discovered a personal trick that made your installation smoother? Share your insights below—I’d love to hear about your experiences and help you refine your craft!