

Ever spent hours installing baseboards only to step back and notice those frustrating gaps or misaligned corners? I remember the exact moment I realized I’d been doing it all wrong. I had this vision of flawlessly tight inside corners, but instead, I was battling uneven seams and moldings that refused to sit flush. It was a lightbulb moment that changed how I approached baseboard installation altogether.
Why Tight Baseboard Corners Matter More Than You Think
Getting those inside corners perfect isn’t just about aesthetics; it’s about craftsmanship and durability. Loose or uneven corners lead to gaps, which can trap dust and moisture, potentially damaging your walls over time. Plus, with the right technique, your room will look polished and professional – almost like it was done by a pro.
So, what’s the secret? It’s called the Back-Bevel Technique. I’ll admit, when I first heard about it, I was skeptical. I’d always relied on traditional miter cuts, thinking they were the only way. But early on, I made the mistake of ignoring the bevel angles and rushing the cuts, which only made my corners worse. Trust me, I’ve been there. The good news? Once I adopted this method, everything changed. Now, I consistently get that tight, seamless finish every time.
Is the Back-Bevel Trick Really Worth the Hype?
You might be wondering if this approach is just another DIY fad or genuinely effective. Well, after trying countless methods, I can confidently say that mastering the back-bevel is a game-changer. It’s a simple adjustment that yields professional results, saving time and frustration. Want to see more innovative tips? Check out our latest flooring trends for 2025.
If you’ve ever faced the challenge of corner gaps or uneven joints, you’re not alone. Many DIYers and pros alike have struggled with this issue. But with a little guidance and the right technique, you can transform your space from amateurish to polished. In the following sections, I’ll walk you through the steps I took to perfect my inside corners — and how you can do the same. Ready to master the art of perfect corners? Let’s get started!
Prepare Your Tools and Workspace
Start by gathering a quality miter saw, a back-bevel gauge, measuring tape, pencil, and safety gear. Clear your workspace to ensure precise cuts and safe handling. I once tried to rush this step and ended up with mismatched corners; taking the time here prevented that mistake.
Measure and Mark Accurately
Measure the length of each wall where the baseboards will sit, accounting for any irregularities. Use the pencil and measuring tape to mark the cut points on your baseboards, ensuring you add a slight bevel angle—typically 45°—but pay special attention to the back-bevel. I once marked a 45° cut without considering the back angle and ended up with gaps, so double-check your measurements.
Set Your Saw for the Back-Bevel
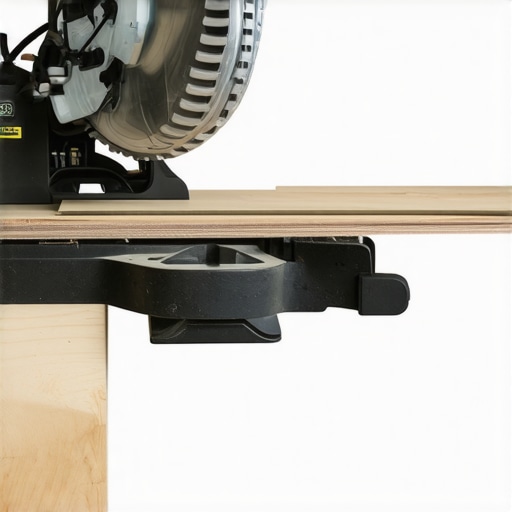
Adjust your miter saw to cut at the desired angle with the back-bevel set—this means tilting the saw blade away from the joint, creating an angled cut that improves joint tightness. In my experience, neglecting this step resulted in loose-fitting corners that compromised the entire look. Practice on scrap pieces to get comfortable with the angle settings.
Make the Cut with Precision
Align your mark with the saw’s guide, ensuring the back-bevel angle is correctly set. Cut slowly, applying steady pressure. Remember, a clean cut is essential for tight joints. I recall rushing a cut and having to redo it, which caused delays. Take your time—precision now saves time later.
Test Fit and Adjust as Needed
Before attaching, dry-fit the pieces to verify tightness and alignment. If gaps appear, slightly tweak the angle or make micro-adjustments on the saw. I once fit my pieces, found a tiny gap, and refined the bevel just a degree or two for perfect snugness. This iterative process ensures the maximum tightness of your corner joints.
Attach and Finish
Apply adhesive or nails as per your project plan, then use a pneumatic nailer for even pressure. Fill any small gaps with wood filler, then sand smooth. Remember, the goal is a seamless inside corner that looks professional. I learned this after a messy initial attempt where gaps and uneven joints marred the finish.
Seal and Celebrate
Seal the joint with paint or caulk, blending it into your wall and baseboard colors. The key is to avoid visible seams or cracks, which a well-executed back-bevel technique helps achieve. I once skipped sealing, which caused dust to collect in the gaps—now I always finish with a clean caulking line for a polished look.
Mastering these steps transforms a once frustrating task into a satisfying craft. The back-bevel method may seem subtle, but it’s a game-changer for inside corner perfection.
 While many believe that installing showers, flooring, and baseboards is straightforward, the real challenges lie in understanding subtle nuances often overlooked. For instance, a widespread misconception is that using high-quality materials alone guarantees a perfect finish. In reality, technique and knowledge of specific quirks—like proper waterproofing in showers or the importance of acclimating flooring materials—are critical for long-lasting results. Skipping these steps leads to failures such as grout cracks, uneven surfaces, or baseboards pulling away from walls. One frequent mistake is misjudging subfloor stability, which causes tile cracks or uneven vinyl planks. Before tile or flooring installation, it’s essential to assess and reinforce the subfloor properly; otherwise, materials may buckle or fail prematurely. Additionally, many overlook the need for expansion gaps in floating floors, a small detail with a big impact on avoiding buckling over temperature changes. In shower installations, improper sealing of niches or neglecting slope guidelines can lead to leaks and mold. Experts like seasoned contractors emphasize that detailed planning and understanding material behaviors prevent costly mistakes. According to a 2022 study published in the Journal of Building Physics, these subtle technical lapses significantly reduce a project’s lifespan and increase maintenance costs. Advanced homeowners and DIYers who educate themselves on these nuances are more likely to achieve professional-quality results. An example of this is mastering the precise angle cuts needed to create tight inside corners with baseboards—a skill that distinguishes a novice from a pro. Advanced tricks, like using a back-bevel technique for perfect corners, can be the difference between a generic look and a seamless finish. This method, often misunderstood, prevents gaps and enhances aesthetic appeal. Remember, shortcuts in these hidden areas often backfire, leading to frustration and expenses. For more in-depth insights, check out our guide on how to select the right baseboards or explore the latest flooring trends for 2025. Ultimately, paying close attention to these nuances ensures your renovations stand the test of time, saving you costs and headaches in the long run. Have you ever fallen into this trap? Let me know in the comments.
Keeping Your Installations in Top Shape
Investing in quality tools and adopting a consistent maintenance routine are key to ensuring your home renovations stand the test of time. For flooring, I highly recommend a digital moisture meter. I personally use the Tramex MN4 because it provides accurate readings of subfloor moisture levels, helping me prevent issues like buckling or mold growth. When it comes to shower maintenance, a handheld silicone applicator simplifies sealing tasks, allowing for precise application of caulk without mess. Regularly inspecting grout and sealant lines, especially in exposed shower areas, prevents leaks before they become costly repairs.
Tools I Rely On for Installation and Upkeep
A quality pneumatic nailer is non-negotiable for baseboards and carpentry projects. I prefer models like the Senco FinishPro 18 because it reduces fatigue and ensures consistent nail depth, resulting in a cleaner look. For flooring, a tapping block and pull bar are vital for achieving tight joins without damaging planks. As technology advances, I’ve started incorporating smart measurement tools, like laser distance finders, to quickly verify wall and floor dimensions—saving time and increasing precision.
Predictions for the Future of Maintenance and Tools
Looking ahead, I believe smart tools will become even more integrated into our DIY routines. Sensors that monitor moisture levels or track caulk aging could alert homeowners before issues arise, shifting maintenance from reactive to proactive. Additionally, software-driven laser alignment systems will make complex flooring and tile installations faster and more accurate, minimizing human error and waste. Staying updated on these innovations will give you a significant edge in maintaining your home’s aesthetic and structural integrity.
How do I keep my installations performing over the long haul?
Adopt a regular inspection schedule—checking grout for cracks, resealing shower niches annually, and verifying the flatness of flooring areas after seasonal changes. Using a proper sealing technique enhances durability in wet areas, while applying a bit of maintenance caulk to baseboards every few years keeps joints tight. Remember, small touch-ups now save big repairs later. For a quick boost, try implementing a moisture barrier upgrade in your shower (like using a liquid membrane), which significantly reduces leak risks and mold growth—this simple step can extend the life of your waterproofing efforts.
Maintaining your home’s interior features isn’t just about reactive fixes; it’s about proactive care that leverages the right tools. Investing in a moisture meter and quality sealing supplies, combined with routine inspections, will keep your floors, baseboards, and showers looking pristine for years. Want to learn about the latest flooring trends? Check out our 2025 flooring installation trends and stay ahead in your DIY game.
Start today by inspecting your grout lines with a moisture meter and reapplying sealant where needed. Small steps now ensure big savings tomorrow.

Image Description: A professional using a digital moisture meter on a bathroom floor, demonstrating precise moisture testing to prevent future damage.
Lessons I Wish I Could Undo in My Shower and Flooring Journey
One of the toughest lessons I learned was that rushing through precise cuts, especially with back-beveling, only leads to more gaps and frustration. Patience and practice transformed my results from amateurish to professional-looking, proving that mastery is built on small, deliberate steps.
I used to believe that high-quality materials alone could hide imperfections. But I discovered that technique and attention to detail matter more than anything—skimping on these can undo the best materials, whether it’s in tile, baseboards, or shower sealing.
Another lightbulb moment was realizing that every misaligned or loosened corner doesn’t just look bad—it can cause long-term damage like moisture intrusion or wall deterioration. Prevention and proper sealing aren’t just maintenance—they’re investments in your home’s integrity.
Tools and Resources That Truly Elevate My Home Projects
I swear by the step-by-step flooring installation guide—it breaks down complex techniques like back-beveling into actionable steps. For precise cuts, my younger self wished I’d known about a quality miter saw with adjustable back-bevels. When it comes to sealing showers and baseboards, I rely on pro tips for caulking I’ve gathered from seasoned experts.
The latest flooring trends inspire me to stay up-to-date, ensuring my projects don’t just hold up—they impress.
Your Next Move: Embrace Precision and Patience
Now, it’s your turn to take these insights and elevate your home improvement game. Whether you’re installing baseboards, laying flooring, or sealing showers, remember that mastery comes from mastering the details. With a little patience and the right tools, you’ll turn everyday tasks into rewarding craftsmanship. So, what project will you tackle next with newfound confidence? Let me know below!