

Have you ever installed baseboards and then stepped back to admire your work, only to notice an awkward gap or misaligned miter in the inside corner? I used to tackle this with just a miter saw and hope for the best, but more often than not, the corners ended up looking crooked or bulky. One lightbulb moment changed everything for me—and it’s all about that little technique called the back-beveling trick. It sounds simple, but mastering it can make your inside corners seamless and professional-looking.
Why This Trick Makes All the Difference
Getting tight, clean inside corners with baseboards has always been a sticking point for DIYers and pros alike. When I first started, I was frustrated by gaps and uneven miters that just wouldn’t sit right. After some trial and error, I discovered that the key lies in the way the cuts are made and how you finish the corners. The back-beveling trick helps you avoid the dreaded miter-squeeze or the need for filler—saving time and ensuring a flawless finish every time. Plus, with more and more homeowners embracing modern interior styles, clean corners are more important than ever. You don’t want your efforts to be marred by visible gaps or sloppy cuts, especially with the trend toward minimalist and sleek aesthetics.
Is Overworking Your Corner Joints Actually Worth the Fuss?
Early on, I made the mistake of thinking I could simply cut two perfect miters and call it a day. Spoiler alert—if your wall is even slightly out of plumb, those miters can open gaps or cause the corners to look crooked. Employing the back-beveling technique might seem like an extra step, but it drastically improves the fit and appearance. According to industry experts, precise cuts and proper scribing are essential for high-quality finish carpentry, especially in tight corners (source). If you’ve ever been frustrated by uneven corners, I promise this method will change your game. Stay tuned—next, I’ll walk you through how to do it step-by-step so you can finally nail those inside corners with confidence.
Start with Precise Measurements and Markings
Before making any cuts, measure the length of each wall segment and mark your baseboard pieces accurately, accounting for the corner angle. Use a combination square or a carpenter’s square to draw your cut lines clearly. I remember a time I rushed this step and ended up with mismatched lengths, resulting in crooked corners. Taking the time to double-check measurements prevented that mistake and saved me time during installation.
Set Your Saw for the Correct Angle
Adjust your miter saw to the desired angle—typically 45 degrees for inside corners. Keep in mind, for complex or non-standard angles, you may need to tweak the miter angle slightly, or employ a back-bevel to get a perfect fit. I once struggled with a tight corner in a room with a strange wall angle; adjusting the saw to cut a slight back-bevel made the pieces fit seamlessly, avoiding gaps.
Cut with the Back-Edge Technique
Instead of cutting straight through the baseboard, tilt the saw to create a back-bevel—meaning the cut edge is angled toward the wall. This allows the joint to close tightly even if the wall or corner isn’t perfectly plumb. For example, I once cut a miter on a wobbly wall, and the back-bevel trick allowed the joint to snugly fit the uneven edge, resulting in a flawless appearance.
Align and Test Fit Each Piece
Before nailing, dry-fit the baseboard pieces around the corner to check the fit. Push them into place, and look for gaps or misalignments. Slight adjustments with your saw can improve the fit. I recommend using clamps to hold pieces together during the test fit, especially in tricky corners. This step ensures your cuts are accurate and saves you from surprises once nails go in.
Use a Coping or Scribing Method for Perfect Corners
For inside corners, coping can be more forgiving than miters. Cut one piece at a standard 45 degrees, then use a coping saw to shape the edge to match the adjacent wall. This method compensates for uneven walls and reduces gaps. I once used coping on a bowed wall, and the result was nearly invisible joints, elevating the overall look. Combining this with the back-bevel cuts enhances your ability to handle imperfect walls.
Finish Strong with Proper Nailing and Caulking
Once satisfied with the fit, nail the baseboard in place, spacing nails every 16 inches and ensuring they secure both the stud and the trim. Follow up with a quality caulk to fill any minor gaps. When I first started, I underestimated the importance of caulk, but it helps hide tiny imperfections and creates that seamless, professional finish. Smooth the caulk with a damp finger or a finishing tool for the best appearance.
Final Touches Include Sanding and Painting
Sand any rough edges or nail holes, then paint or touch up the baseboards. Proper smoothing makes the joint look flawless. I once neglected to sand the edges, and visible seam lines appeared after painting—so don’t skip this step if you want your work to truly stand out.
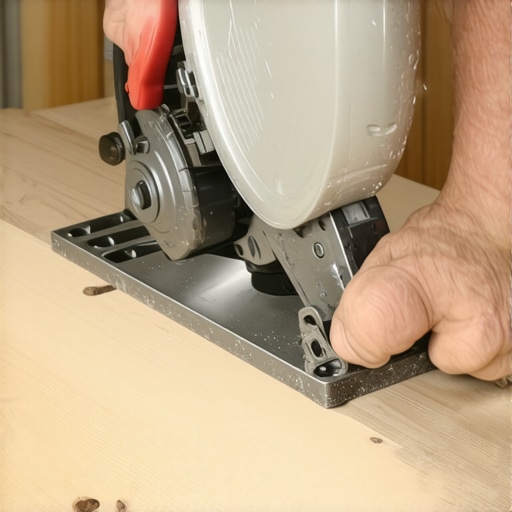 While many homeowners focus on the visible aspects of installation, such as choosing the right trim or tile pattern, there’s a wealth of subtle nuances and misconceptions that can trip up even seasoned DIYers. For instance, a prevalent myth is that simply cutting at 45 degrees guarantees seamless corners, but in reality, wall irregularities and wall thickness variations often require advanced techniques like back-beveling and coped joints for a truly polished look. One advanced mistake I frequently see is ignoring the importance of proper subfloor preparation before flooring installation; it can lead to squeaks, gaps, and uneven wear over time, despite flawless initial placement. According to industry experts, neglecting moisture barriers during floor or tile installation can cause long-term issues like warping or mold, especially in humid environments. Have you ever fallen into this trap? Let me know in the comments.
When it comes to showers, many assume that a high-quality membrane installation guarantees leak-proof results, but overlooking proper slope and sealant application can lead to persistent leaks and water damage. For example, using silicone exclusively instead of a combination of waterproof membranes and proper caulking often results in failure over time. Additionally, a common misconception is that grout is maintenance-free; in fact, improper sealing and cleaning can cause discoloration and mold buildup, reducing longevity. For those seeking a truly durable and aesthetic bathroom, understanding these hidden intricacies is essential. Want to dive deeper? Check out our comprehensive guide on [shower repairs and longevity](https://tilecraftsmens.com/shower-repairs-when-to-fix-vs-replace-for-longevity) for expert tips.
Exploring the finer points of baseboard installation unveils that wall irregularities, such as bowed or uneven surfaces, demand specialized techniques like the application of shims or the use of flexible caulks, rather than relying solely on accurate cuts. Additionally, many people underestimate the importance of matching baseboard height and style with overall interior design; a high-traffic hallway might benefit from durable, low-profile designs, whereas elegant living rooms could call for intricate, detailed moldings. Interestingly, trends for 2025 are shifting towards minimalist profiles, emphasizing clean lines that require precise measurement and sometimes custom modification—this is where understanding the latest [baseboard styles and installation trends](https://tilecraftsmens.com/baseboard-trends-in-2025-fresh-styles-for-every-room) can elevate your project.
Lastly, advanced DIYers should be cautious about over-relying on simple tools or shortcuts. For example, rushing the sanding process before painting can leave rough edges visible, diminishing the professional appearance. Similarly, ignoring the importance of expanding gaps for flooring can lead to buckling or warping as materials expand and contract. Incorporate proper techniques like expansive gap planning and using quality sealants to prevent these issues from becoming costly repairs down the line.
In sum, understanding these hidden nuances and debunking common myths enhances your craftsmanship, results in a longer-lasting finish, and saves you money. If you’re serious about mastering home improvement, exploring detailed guides on flooring installation, shower waterproofing, or carpentry can further sharpen your skills. Remember, careful planning and attention to detail are your best tools for achieving professional-quality results every time.
Investing in the Right Tools for Durable Results
To ensure your flooring, baseboards, and shower installations stand the test of time, quality tools are non-negotiable. I personally swear by a good digital angle finder—such as the Bosch Digital Angle Finder—because it allows me to set precise miter angles, especially when dealing with complex wall corners that aren’t perfectly plumb. This device is invaluable for confirming angles, preventing gaps, and reducing the need for extensive sanding or filling later. Additionally, a cordless finish nailer with adjustable depth settings streamlines baseboard installation, ensuring nails sit flush without damaging the wood or drywall. I prefer models with a quick-clear nose, like the Ryobi HP for Finish Nailer, which I find reduces downtime between shoots and keeps projects moving smoothly.
Essential Maintenance Practices for Longevity
Maintenance is often overlooked, yet it’s crucial for long-term performance. For example, regularly inspecting and resealing grout joints in showers prevents water intrusion and mold buildup, which can degrade tile adhesive over time. Experts recommend using a penetrating sealer like Miracle Sealants 511 Impregnator every 1-2 years, depending on usage. For flooring, keeping humidity levels stable minimizes expansion and contraction, reducing gaps or buckling. Installing a high-quality dehumidifier in湿 humid areas preserves your flooring and walls. In the case of baseboards, periodically checking for nail pops or cracks allows timely repairs, preventing larger issues. I like to use a small pry bar and a mallet for gentle adjustments; this keeps the trim looking pristine without causing damage.
Scaling Up Projects with Confidence
When tackling larger or evolving projects, the right tools and routines become even more critical. For flooring installations in expansive rooms, a laser-guided leveling system, such as the Bosch GSL 2 Professional, ensures consistent height and flatness across the entire space. This prevents future uneven wear or squeaks—a common problem with large areas. Moreover, employing modular paint sprayers for walls and ceilings accelerates touch-ups and coatings, offering even coverage that holds up over years of use. As trends shift towards sustainable and durable materials, keeping updated with industry innovations is essential. For instance, choosing modular flooring that allows for easy replacement or adjustments minimizes future disruptions and repairs. A recent study by industry experts highlights how integrating tools that facilitate adjustments and maintenance can save both time and money in the long run.
How do I maintain my installation tools over time?
Regular cleaning, proper storage, and timely calibration are key to extending the lifespan of your tools. I recommend wiping down cordless tools after each use, storing them in a dry, padded case, and checking calibration settings periodically with precision checkers. Lubricant application on moving parts, as per manufacturer instructions, also ensures smooth operation. These small habits prevent breakdowns and keep your equipment performing at peak levels, saving you from costly replacements.
Looking to master maintaining your home project tools? Try the tip of regularly calibrating your laser level before each large flooring or tile project. This small step guarantees accurate measurements and seamless results, reflecting a professional standard that last years. For more advanced strategies and updates, explore our latest flooring trends for 2025.
Throughout my journey with home renovation, I’ve come to realize that it’s the little details—like flawlessly mitered corners or perfectly caulked seams—that truly elevate a space from good to professional. The back-beveling trick, in particular, has been a game-changer, allowing me to achieve clean, tight corners that stand up to close scrutiny. If you’re aiming for that polished look in your baseboard or flooring projects, mastering these subtle techniques can make all the difference.
The Hard Lessons That Changed My Approach
- Assuming 45-degree cuts Are Enough: I used to cut miters at a standard 45 degrees and hoped for perfect corners. When walls were out of plumb, gaps appeared, and I learned that adjusting the miter angle or employing a back-bevel creates a much better fit.
- Skipping Dry Fits: Rushing to nail everything in place often resulted in misalignments. Testing the fit beforehand reveals hidden issues, saving time and frustration.
- Ignoring Wall Irregularities: Walls are rarely perfect. Using coping or scribing helps accommodate imperfections, ensuring seamless joints regardless of surface inconsistencies.
- Overlooking Caulking and Sanding: Proper finishing is about more than just cuts. Filling gaps with caulk and sanding smooth transforms rough joints into invisible seams, elevating the overall look.
- Underestimating Tool Quality: Investing in a quality miter saw and angle finder proved essential. Precise tools make it easier to achieve those intricate cuts and perfect corners, especially in complex projects.
Gear Up With the Right Resources
Having reliable tools and trusted sources makes all the difference. For precise angle settings, I swear by a digital angle finder—it streamlines complicated cuts and guarantees accuracy. Also, to stay ahead with the latest trends in interior design, checking out current style guides keeps my projects fresh and stylish. Books like Fine Woodworking’s Carpentry Techniques have deepened my understanding of advanced finishing methods, turning simple projects into showpieces.
Bring Your Craftsmanship to Life
Believe me, the journey toward perfect inside corners and flawless finishes is ongoing, but every small victory builds confidence. Incorporate these techniques into your workflow, and you’ll notice a difference not just in the look, but also in your own satisfaction with each project. Don’t be afraid to experiment with new tools or methods—every successful project starts with a step forward. If you’ve faced challenges in achieving that seamless corner or finishing your last baseboard, share your story below. Your experience might inspire someone else on their home transformation journey.