

If you’ve ever spent hours trying to get a baseboard to sit flush inside an outside corner, only to end up with gaps that scream DIY disaster, you’re not alone. I remember the frustrating moments—measuring, cutting, sanding, and still ending up with those pesky visible gaps. It was a lightbulb moment when I discovered the real secret behind achieving that flawless, tight fit—the Back-Coping technique. This simple trick transformed my approach and saved me countless hours of reworking.
Why Working Seamlessly in Corners Actually Matters
Baseboards aren’t just decorative; they set the tone for your entire room. A perfectly fitting corner adds to the aesthetic, increases home value, and makes your space look professionally finished. Yet, many homeowners and even seasoned DIYers struggle with gaps, especially in complex or uneven walls. The roots of this problem often come from a basic misunderstanding of how to approach corners—especially those that aren’t perfectly 90 degrees.
In my early days, I made a mistake that many others do: cutting both pieces of the corner at 45 degrees and hoping they’d meet flawlessly. The truth is, walls are rarely perfectly straight or at exact right angles. As a result, those corner joints — especially in outside corners— become uneven, gaps form, and the whole look suffers. According to the experts at TileCraftsmen, understanding the nuances of corner fitting can make or break your finishing work.
That’s when I realized I needed to adopt a different approach. The secret wasn’t just in the cut—it was in how I prepared and fit the pieces. The Back-Coping method involves cutting the back piece of the baseboard to fit precisely into the profile of the adjoining piece, creating a seamless joint. This technique not only provides a tight fit but also adapts to uneven wall surfaces, making your project look truly professional.
Before I dive into the steps, I want to ask — have you faced this exact challenge? Gaps that seem too stubborn to fix, no matter how carefully you cut? If so, keep reading; I’ll show you how to master this trick and elevate your interior finishing game.
Is the Back-Coping Method Really Worth the Effort?
Initially, I doubted whether such a detailed approach could really make a difference. I had tried filling gaps with caulk, sanding, and even repositioning the pieces—nothing worked without looking obvious. Early on, I made a mistake by underestimating the importance of precise measurements and profile matching, leading to uneven joints. However, once I embraced the Back-Coping technique, everything changed. The secret lies in how it allows the material to conform to mismatched wall angles, providing a clean, tight finish.
To get the best results, I recommend checking out detailed guides—like the ones offered by TileCraftsmen—that explore this method step-by-step. With a little patience and practice, you too can enjoy flawless corners that look like they were done by a professional.
Now, let’s move beyond the theory. Up next, I’ll walk you through the practical steps to implement this secret technique and finally conquer those tricky corners once and for all.
Prepare Your Tools and Materials
Start with a sharp miter saw, a coping saw, a pencil, measuring tape, putty knife, and a utility knife. Having a rasp or fine sandpaper handy helps smooth cut edges. I learned this the hard way when I tried to make do with dull blades, resulting in uneven cuts. Ensuring your tools are sharp makes the process smoother and the joints cleaner.
Measure and Cut the First Baseboard
Measure the length of your wall and cut the first piece with a 45-degree outside corner cut. Use a miter saw set precisely at 45 degrees to ensure accuracy. When I cut my first piece, I double-checked measurements twice—nothing’s worse than mismatched lengths after all the effort. Remember, cut one piece for each side of the corner, not both identical pieces.
Mark the Profile for Coping
Place the cut piece against the wall, and trace the profile of the adjoining piece onto it. Use a pencil to mark the shape that follows the wall’s natural contours. This step is crucial because walls are rarely perfectly straight. I once skipped this, resulting in gaps, but once I started tracing the actual profile, the fit was dramatically better.
Cut Along the Profile with a Coping Saw
Use a coping saw to carefully cut along the traced line, following the profile. Take your time—rushing causes jagged edges. I once tried to cut quickly and ended up with an uneven joint, which I had to sand down later. A steady hand and patience yield the best results. The goal is to replicate the profile exactly, allowing the baseboard to snugly fit around the adjoining piece.
Test the Fit and Make Adjustments
Dry-fit the coped piece against the adjoining one, pressing tightly to check for gaps. If you notice any space, gently sand or shave the profile with a utility knife. I recall a time when I thought I had it perfect, only to see a tiny gap after painting—fine-tuning made all the difference. The key is to make slight adjustments until the joint is almost invisible.
Fix and Secure the Joint
Apply wood glue into the joint for added stability, then tap the baseboard into place with a rubber mallet, if necessary. Use finish nails to secure the piece, countersinking them for a clean look. Remember, a tight joint with minimal gaps needs no filler or caulk—just perfect cuts. Once nailed, fill any small nail holes with matching wood filler and sand smooth before painting or staining.
Repeat on All Corners and Edges
Carry out this process for every outside corner, ensuring each coped joint fits seamlessly. Consistency is the secret—taking your time on each joint prevents patchy results. With practice, you’ll notice your corners becoming more flawless, saving time on touch-ups later. This method is especially helpful on uneven walls or complex layouts where standard miter cuts fall short.
Extra Tips for Success
Use a template or cardboard mock-up to trace profiles before cutting if you’re unsure. Also, consider a shim or small wedge during installation to hold pieces tightly in place—this helps the glue set perfectly. When I struggled with stubborn gaps, adding shims made all the difference in achieving flush, professional corners.
Implementing the back-coping technique might seem challenging at first, but the results speak for themselves—a seamless, polished look that elevates your entire room. For further insights into finishing details, exploring resources like baseboard styles can provide inspiration for your project’s final touches.
Overestimating the Simplicity of Proper Installation
Many believe that installing baseboards, carpet, showers, or flooring is a straightforward task that requires just measuring and cutting. However, this oversimplification overlooks crucial nuances that can make or break the final result. For instance, a common myth is that mitered corners always fit perfectly if cut at 45 degrees, but in reality, wall irregularities demand more sophisticated techniques like back-coping or scribing. Recognizing the importance of tailoring your approach to uneven surfaces is key to achieving a professional finish. Experts warn that neglecting wall irregularities can lead to gaps, cracks, and the need for frequent repairs, which could be avoided with proper techniques. To dive deeper into effective methods, check out our comprehensive guides like baseboard styling tips.
Beware of the Fixation on Visual Perfection
Another widespread mistake is focusing solely on the appearance during installation, ignoring functional aspects. For example, in flooring, some installers prioritize seamless seams over the importance of expansion gaps, leading to buckling or warping over time. Similarly, with showers, sealing and waterproofing often get underestimated—many think applying silicone alone suffices when, in fact, understanding tile waterproofing layers and proper membrane installation is vital for long-term durability. A common trap is using cheap materials or skipping steps to save time, which can cause costly repairs later. As highlighted by industry professionals, mastering techniques like proper expansion gaps and waterproofing layers ensures longevity and prevents premature failure. For more advanced insights on shower or flooring installation, visit durable flooring tips.
How Can Mastering Subtle Details Transform Your Results?
Let’s dig into an advanced question: How do subtle nuances like proper subfloor preparation or precise measurement adjustments impact the final aesthetic and durability? The answer lies in understanding that every material’s performance hinges on underlying conditions. For instance, inadequate subfloor prep can cause vinyl planks to separate or hardwood to peak. Likewise, slight measurement inaccuracies compound over long runs, leading to uneven seams in carpets or misaligned tiles. Industry experts emphasize that investing time in checking moisture levels, ensuring flatness, and making micro-adjustments can drastically improve results. Ignoring these details is a trap that many fall into, resulting in increased call-backs and dissatisfaction. To avoid this, consider consulting in-depth resources like advanced flooring strategies. Have you ever fallen into this trap? Let me know in the comments.
Invest in Quality Tools for Durable Results
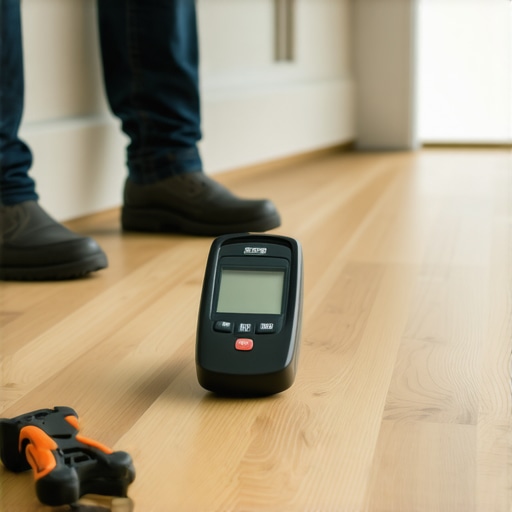
When it comes to maintaining your home’s flooring, baseboards, or shower enclosures, having the right tools can make all the difference. I personally rely on a high-precision clamp meter to monitor moisture levels in subfloors before installing new materials. This simple step, backed by experts at TileCraftsmen, ensures your flooring remains stable over time. Using a moisture meter regularly helps prevent issues like warping or buckling, saving you from costly repairs down the line.
Keep Equipment Sharp and Well-Maintained
Tools like miter saws, coping saws, and utility knives need regular sharpening to ensure precise cuts. Dull blades cause uneven edges, which can lead to gaps or poorly fitting baseboards and tilework. I recommend investing in quality diamond sharpening stones, and setting aside time every few months for maintenance. Not only does this improve your work’s quality, but it also extends the lifespan of your tools, making your projects more efficient and professional-looking.
Automate and Simplify with Smart Devices
For ongoing maintenance, consider using smart sensors that track humidity and temperature. These devices can alert you when conditions fluctuate outside optimal ranges, helping you maintain ideal environments for flooring longevity. In fact, integrating such technology is becoming increasingly popular among DIYers and professionals alike. In the future, I believe home automation will include predictive maintenance systems that warn you before small issues become major problems, turning home upkeep into a proactive rather than reactive process.
Focus on Long-Term Results
Consistent upkeep of your finishes involves routine cleaning, reapplication of sealants where necessary, and verifying the integrity of grout and caulking. For example, checking shower seals twice a year prevents leaks that can cause subfloor rot. Applying a high-quality sealant like Silicone Plus every few years, especially around niches and corners, keeps water from seeping into vulnerable spots. Remember, a little extra effort now can significantly extend the life of your investment.
Scaling Up Home Improvements
As you gain confidence and experience, scaling your projects becomes more manageable. Use modular tools such as portable workbenches or multi-tool oscillators to speed up larger jobs, like installing new flooring over multiple rooms. Always keep detailed plans and checklists from resources like Step-by-step Flooring Installation — it helps you maintain consistency and quality at every stage.
How do I maintain my flooring and finishes over time?
Develop a routine that includes gentle cleaning, periodic inspections for damage or wear, and timely reapplications of protective sealants. Also, keep your tools sharp and calibrated, and consider investing in smart sensors for environmental monitoring. By doing so, you’ll catch issues early, reduce repair costs, and enjoy beautifully maintained spaces for years to come. Remember, proactive care is always more cost-effective than reactive fixes. Try incorporating a moisture meter check before your next flooring project to see immediate benefits in durability and finish quality.
What I Wish I Knew About Perfecting Baseboard Joints
- One of the toughest lessons I learned was that wall irregularities demand more than just standard cuts. Embracing the back-coping technique transformed my finish from amateurish to professional-looking, especially in tricky corners.
- It took me multiple projects to realize the importance of meticulous profile tracing. Skipping this step led to gaps and a lot of rework—once I started marking accurately, the fit became seamless.
- Using a coping saw instead of a miter for outside corners is a game-changer. It’s slow work, but it guarantees tight joints that withstand the test of time and paint.
- My biggest breakthrough was learning to sand and adjust profiles after cutting. Patience in fine-tuning results in a virtually gap-free finish that looks polished.
- Don’t underestimate the value of quality tools—dull blades or cheap saws will sabotage your efforts. Investing in sharp, reliable equipment pays off with cleaner cuts and better joints.
Tools and Resources I Trust for Home Finishes
- Step-by-step flooring guides—They helped me understand precise measurements and proper procedures for flawless results.
- Baseboard styling resources—Inspiration that keeps my projects fresh and on-trend.
- Shower waterproofing tips—Critical insights to avoid costly leaks and damage over time.
- Durable flooring strategies—They emphasize long-term value, helping me select better materials and techniques.
You’re The Next Skill to Master
Diving into detailed techniques like back-coping for baseboards proves that DIY isn’t just about following instructions—it’s about mastering subtle skills that elevate your home’s finish. Every project is an opportunity to learn something new, and I encourage you to embrace the challenge. Remember, the secret to beautiful, long-lasting results often lies in the fine details. So pick up your tools, practice patience, and start transforming your spaces today—your future self will thank you for it. What’s the biggest corner or edge challenge you’re facing right now? Share your experience below! DEA_CODE_,