

It was a morning like any other when I accidentally cracked a beautifully laid porcelain tile trying to drill a standard hole for my shower fixtures. The frustration hit hard—there I was, staring at a jagged mess where a smooth, perfect circle was supposed to be. That moment was my lightbulb: why was I struggling so much with this seemingly simple task? Turns out, achieving clean, round holes in porcelain tiles isn’t as straightforward as just grabbing a drill—especially if you’re like me, a DIY enthusiast eager to get things right on the first try.
The Struggle of Drilling Perfect Circles in Porcelain
For months, I wrestled with cracked tiles, uneven holes, and the constant fear of damaging an expensive piece. I tried different bits, coolant sprays, and even improvised with makeshift guides, but nothing delivered the flawless results I envisioned. That’s when I discovered the trick that changed everything—using a piece of cardboard as a makeshift jig for my drill. suddenly, my hole-cutting process became precise and stress-free. The key was understanding the unique properties of porcelain and how to control the drill’s movement without breaking the tile.
Is a Diy Hack Actually Reliable for Perfect Circles?
Early on, I made the mistake of thinking that the most expensive drill bit would do the job alone. I didn’t realize that the technique was just as important. And trust me, I’ve seen many try to wing it and end up with costly damages. Using cardboard templates isn’t just a quick fix; it’s a proven method to guide your drill evenly around the circle—saving both your tiles and your sanity. If you’ve ever faced the daunting task of drilling a perfect hole and wondered whether there’s a foolproof way without risking your tile, you’re not alone. Now, let’s explore how this simple material—cardboard—can become your best friend in perfecting those tricky holes. Ready to transform your tile projects? You’ll find the step-by-step process in the upcoming sections, along with tips to avoid common mistakes and ensure professional results.
Prepare Your Tools and Workspace
Start by gathering a high-quality carbide-tipped drill bit designed for porcelain, a variable-speed drill, painter’s tape, a pencil, and a piece of cardboard. Clear your workspace of debris and set up good lighting to see your markings clearly. An organized area minimizes accidents and helps maintain control during drilling.
Create a Precise Template
Use a compass or a circular object to mark the desired hole size on the cardboard. Cut out this circle with scissors and secure it over the tile’s intended drilling spot using painter’s tape—this prevents the drill from slipping. In my experience, this step is crucial; during my first attempt, neglecting this caused the drill to wander and damage the tile.
Mark the Drilling Spot Clearly
Trace the cardboard’s circle onto the tile with a pencil through the cutout. Confirm the position aligns with plumbing or fixture placements. Precision here saves time and avoids costly rework, especially when working with expensive tiles.
Adjust Your Drill Settings
Set your drill to a low to medium speed—going too fast causes overheating and cracking. Use a steady, gentle pressure; pressing too hard can crack the tile, while too little pressure prolongs drilling. Practice on a scrap piece of porcelain to refine your technique before working on the real tile.
Begin Drilling Carefully
Start by creating a shallow indentation at the center of your marked circle, guiding the drill with your hand. Keep the drill perpendicular to the tile surface. Apply light pressure and let the drill do the work; avoid forcing it. Periodically, lift the drill to clear debris and prevent heat build-up.
Use Cooling Techniques
To prevent overheating, spray water or apply coolant around the drill bit frequently. During my first project, I used a spray bottle to keep the bit cool, which significantly reduced cracking risks and extended the bit’s lifespan.
Complete the Hole and Smooth Edges
Continue drilling slowly until the bit passes through the tile. If you encounter resistance, pause and reapply coolant. Once through, lift the drill and lightly sand or smooth the hole’s edges with a fine-grit sandpaper to eliminate sharp edges and prepare for fittings or fixtures. This detail ensures safety and a professional finish, which I learned after a few rough attempts.
Verify and Clean Up
Check the hole’s size and adjust if necessary. Remove any debris around the area and clean the tile surface. Proper cleanup prevents dust from settling into grout or sealant, ensuring a cleaner and longer-lasting finish.
By following these detailed steps, you minimize the risk of cracks and achieve a clean, perfect circle—saving time, money, and frustration. Remember, patience and preparation are your best allies in precise tile work. For more tips on bathroom upgrades, visit this guide.
When embarking on home upgrade projects like installing baseboards, showers, flooring, or carpet, many homeowners fall prey to misconceptions that can sabotage their results. Let’s cut through the myths and explore the nuanced pitfalls that even experienced DIYers overlook, ensuring your renovation stands the test of time.
Are You Falling for Oversimplified Myths? Some believe that choosing the most popular material or the cheapest option guarantees success. However, materials like baseboards or flooring require a thorough understanding of their installation nuances—simply selecting a trendy style or budget choice can lead to gaps, warping, or premature wear.
For instance, many assume that all flooring types can be installed the same way. But, as discussed in this comprehensive guide, each material has specific preparation and installation requirements. Ignoring these can result in uneven surfaces or damage over time.
Beware of the Hidden Traps During Installation
One common mistake is underestimating the importance of proper surface preparation. In flooring, even a slight unevenness underlayment or moisture problems can cause significant issues later, like buckling or mold growth. Similarly, when installing showers, rushing the waterproofing step often leads to costly leaks and mold infiltration, despite the common misconception that sealing is enough. To avoid this, always double-check moisture levels with tools like the plastic sheet test, as recommended in this article.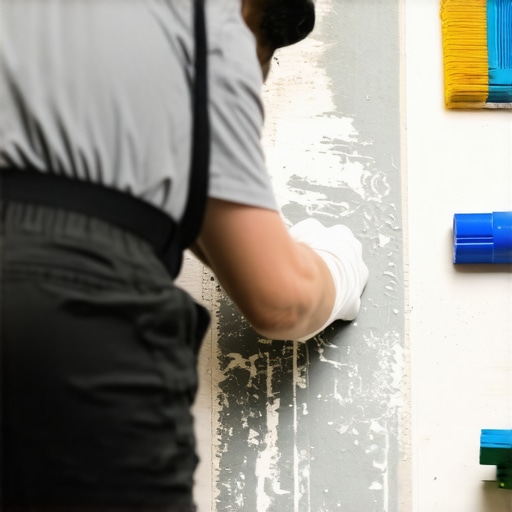
Inaccurate baseboard measurements can cause unsightly gaps or overcuts. Using proper tools and techniques yields a seamless look and prevents gaps from widening over time, as outlined in this tip.
Keep It Running: Tools I Recommend for Professional Results
One of the keys to successful home upgrades lies in using the right tools. Over the years, I’ve found that investing in durable, purpose-built equipment pays off exponentially. For installing baseboards, I swear by a pneumatic nail gun with adjustable power settings—it greatly speeds up the process and ensures consistent, flush nail placement without damaging the trim or wall. For precise cuts, a fine-tooth miter saw with laser guide helps achieve perfect corners, saving hours of sanding and filler later. When it comes to flooring, a high-quality floor float with a beveled edge makes smoothing out thinset or leveling compounds effortless, preventing uneven patches that ruin the visual flow.
For waterproofing showers, I rely on a professional-grade vapor barrier tape that adheres firmly and resists mold growth; a cheap alternative often fails over time. For long-term durability, a moisture meter like the Tramex Moisture Encounter pinless reader lets me verify that substrates are properly dried before tiling or laying flooring—this prevents future warping or mold issues. Personally, I also recommend a reliable digital level, such as the Bosch Digital Spirit Level, which displays precise measurements and helps ensure everything from baseboards to shower niches remains perfectly level, reducing rework and call-backs.
Maintaining What You Build
Tools alone aren’t enough—maintenance extends the lifespan of your work. Routine inspections of grout joints and caulking in showers prevent leaks and water damage. Re-sealing grout every few years can keep mold at bay and preserve the aesthetic appeal. A simple but powerful tip is to keep a spray bottle of diluted vinegar and water solution handy; this natural mixture safely dissolves soap scum and mineral deposits that can degrade your tile surfaces.
For flooring, keeping an eye on high-traffic areas and promptly addressing scratches or dents prevents gradual deterioration. Use touch-up kits for laminate or vinyl to maintain seamless appearances. Upgrading your toolbox with a cordless, variable-speed rotary tool with a gritting attachment enables quick smoothing of rough edges after cutting or drilling—saving time and avoiding injuries from sharp edges.
How do I keep my renovation projects in top shape over time?
Proactively scheduled checks, such as inspecting for loose baseboards or cracks in grout, can prevent minor issues from escalating into costly repairs. Applying a quality sealant around bathroom fixtures and edges maintains water resistance and preserves your work. When properly maintained, your home improvements will not only look great but also stand the test of time. As the trend towards smart home integration grows, consider installing moisture sensors connected to your home automation system, which can alert you to leaks or humidity issues before they cause damage. Incorporating these practical maintenance practices ensures your renovation investment remains a source of pride and comfort for years to come.
If you’re ready to take your maintenance routine a step further, try using a digital level to double-check your baseboard installation—accuracy now prevents headaches later. This small step can significantly enhance the overall professionalism of your project and save you from rework down the line.
What I Wish I Knew Before Starting Home Renovations
One of the most valuable lessons I learned was the importance of thorough surface prep. Skipping this step in flooring or shower installations often led to misalignments or leaks later, costing me time and money. Now, I always double-check moisture levels and surface smoothness—trust me, it saves headaches down the line.
Another lightbulb moment was realizing that the right tools can make or break a project. Investing in a quality miter saw or a digital level transformed my baseboard and crown molding work from amateurish to professional-looking. The little things, like a good nail gun, took my craftsmanship to the next level.
Patience isn’t just a virtue in DIY; it’s a necessity. Rushing through tile cuts or hurriedly sealing a shower niche almost guaranteed mistakes. Taking my time, practicing on scrap materials, and methodically working through each step ensured that my results were not only beautiful but durable.
My Tools for Success in Home Upgrades
The tools I trust most include a high-accuracy laser level and a reliable cordless miter saw. The laser ensures perfectly straight lines for baseboards and tiles, while the saw’s precision reduces waste and chipping. For grout and caulk work, a quality caulking gun with a smooth trigger keeps lines clean and professional. Additionally, a moisture meter is indispensable for preventing mold and warping, especially when installing flooring or prepping bathroom surfaces.
Finally, I recommend investing in a set of good-quality personal protective equipment—safety glasses, ear protection, and a comfortable dust mask. Your well-being is paramount, and these small investments pay off in comfort and peace of mind during intensive projects. Check out this contact page to find recommended tools and suppliers I personally vouch for.
Step Into Your Home’s Future, Today
Every project I undertake builds confidence and brings me closer to a home I love. Whether you’re installing seamless baseboards, tackling shower upgrades, or laying new flooring, remember that patience, the right tools, and preparation are your best allies. Your dream home is within reach—start with small, manageable steps and keep that momentum going.
What’s the next upgrade you’re eager to try in your home? Share your plans or ask for advice below—I’d love to hear about your journey to a better living space!