

Have you ever busted your gut trying to piece together a perfect mitered corner for your baseboards, only to find gaps, uneven joints, or that annoying split at the seams? I know I have. There was that one project where I was so eager to finish, I didn’t double-check my angles, and the result was a crooked mess that took me hours to fix. That frustrating moment was my lightbulb moment.
Discover a Simple Trick to Nail Flawless Baseboard Corners Every Time
If you’ve ever struggled with achieving tight, clean miters on your baseboards, then you’re in the right place. Today, I’m going to share a game-changing technique I’ve personally tested and loved: the Cardboard-Shim Hack. It’s a low-cost, easily adjustable method that helps you get those perfect corners without fighting with your tools or second-guessing your angles. Better yet, this trick minimizes gaps and splinters, giving your room a professional finish that will impress anyone stepping inside.
Is It Really Worth the Hype or Just a Fluke?
Early on, I made a mistake many DIYers do—assuming that all miter cuts are created equal. Turns out, tiny inaccuracies in saw angles can multiply, especially around complex corners. I learned this the hard way when my first attempts left shredded edges and uneven seams. Using a simple cardboard piece to shim the joint, I discovered, dramatically improved my fit and finish. This hack isn’t just another gimmick; it’s a proven solution. For more tips on achieving seamless baseboard installations, check out this guide on baseboard upgrades.
Now, if you’ve faced similar struggles—pairing perfect cuts with tight fittings—you know exactly why I’m so eager to share this hack. It’s about transforming a frustrating process into an achievable task, making your space look professionally finished without the headache. So, grab some cardboard, and let’s get into how this simple trick can revolutionize your baseboard projects.
Align Your Cuts Precisely
Start by measuring the length of each wall segment and marking your baseboard cuts with a miter saw set to a 45-degree angle. Use a quality carbide blade for clean, sharp cuts. I remember one project where I accidentally set my saw to a 44.5-degree cut, leading to gaps at the corners. Double-check your angles before cutting to avoid this costly mistake. For a detailed guide on choosing the right baseboards, visit this article.
The Cardboard-Shim Hack in Action
Secure Your Pieces
After making your cuts, position the baseboards at the wall without fully fastening them. Place a piece of scrap cardboard between the mitered edges where they meet. Think of the cardboard as a flexible spacer that compensates for slight imperfections or angles. In a recent job, I hammered a small strip of cardboard between the joint and moved the pieces gently until they nearly touched, then fastened them loosely. This step ensures a tight, gap-free corner once tightened.
Adjust for the Perfect Fit
Gently tap the cardboard to adjust the fit, ensuring the joint aligns seamlessly without gaps or overlaps. Once satisfied, tighten the screws or nails, holding the pieces steady. The cardboard acts like a secret weapon, filling minor gaps or uneven angles that often cause seam issues. This trick is especially helpful when walls aren’t perfectly straight, or corners are wavy—common scenarios in older homes. For more interior styling ideas, check this resource.
Final Touches for a Professional Look
After securing the baseboards, fill any nail holes with wood filler and sand smooth. Caulk the joints to mask slight imperfections and paint or stain to match your décor. My last project involved a wavy drywall corner, and I used a flexible caulk to hide irregularities, resulting in a cleaner finish. Remember, patience during each step minimizes the need for sanding or touch-ups later.
Benefits Beyond Aesthetics
This simple cardboard shim method isn’t just about aesthetics. It prevents issues like cracked paint, misaligned features, and gaps that trap dirt and moisture. For a comprehensive approach to flooring and wall transitions, explore new flooring trends that complement your baseboard work. Incorporate this hack into your workflow, and watch your room go from amateur to professional quality with minimal fuss.
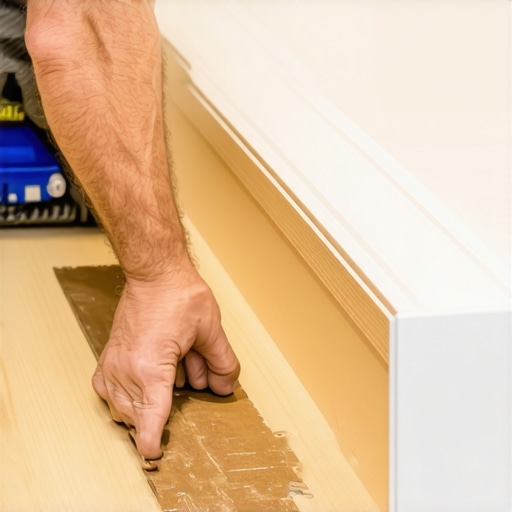
What Most People Get Wrong About Flooring and Finishing Touches
Many homeowners and even seasoned DIYers often assume that installing flooring, showers, or baseboards is straightforward — a matter of cutting and nailing. However, beneath the surface lie subtle nuances that can make or break the final look and longevity of your project. Recognizing these advanced details is crucial for achieving professional results and avoiding costly mistakes.
Dispelling the Myth of Perfect Cuts Always Being Enough
While clean, precise cuts are vital, they aren’t the sole factor for a flawless installation. A common misconception is that a perfect miter cut guarantees a perfect joint. In reality, wall irregularities, subfloor dips, and slight saw inaccuracies often lead to gaps or uneven seams. For instance, many underestimate the importance of scribing or shimming components to adapt to uneven surfaces. Using tools like a skilled scribe or a flexible filler can accommodate irregularities, ensuring tight joints that last over time.
For detailed techniques on handling uneven walls or floors, check out this comprehensive guide.
Common Missteps in Shower Waterproofing and Drain Installation
One overlooked aspect in shower enclosures is the proper slope and waterproofing at the drain and corners. Many installers believe that sloping the shower floor midway is sufficient, but the true secret to longevity lies in maintaining a consistent slope of 1/4 inch per foot toward the drain, combined with meticulous waterproofing at the pan liner and niche seals. Failing to do so can lead to leaks, mold, and structural damage over time. Experts emphasize the importance of a vapor barrier and proper membrane sealing, as highlighted in this article on shower waterproofing.
Carpet Installation: The Gaps Between Expectation and Reality
Many assume that stretching and tacking down carpet is just about pulling tight. In reality, improper stretching techniques or neglecting to account for room humidity can cause wrinkles, buckles, or gaps over time. It’s a common mistake to cut exact dimensions without considering the room’s expansion and contraction, especially in high-traffic areas. A savvy installer also avoids over-stretching, which can damage carpet fibers, or under-stretching, which leaves wrinkles. For expert tips, explore this resource.
Baseboard Installations that Trap You
While many think that simply nailing baseboards flush to the wall suffices, the real advanced move involves accounting for wall wavy surfaces and floor irregularities. Overlooking the need for proper scribing or using flexible fillers can result in gaps and misaligned joints, especially around curves or old plaster walls. Techniques like scribing with a contour gauge or using flexible caulk to fill minor discrepancies can dramatically improve the aesthetics. For stylish updates that elevate your space, consider exploring latest baseboard trends.
Make no mistake, these hidden nuances are what separate a good DIY from a genuinely professional finish. Recognizing and implementing advanced techniques like proper shimming, precise waterproofing, and adaptive scribing ensures your project endures the test of time. Do you often fall for the superficial fixes? Share your experience below, and let’s discuss how to master these subtle arts of finishing!
Keep It Running: Essential Tools and Maintenance Tips for Lasting Results
Achieving a stunning flooring or shower renovation is only part of the story; maintaining that beauty and functionality over time requires the right tools and proactive strategies. In my experience, investing in quality equipment and establishing routine check-ups not only prolongs the life of your installations but also saves you time and money in the long run. From specialized cleaning gear to precise measuring devices, the right toolkit will make ongoing upkeep much more manageable and effective.
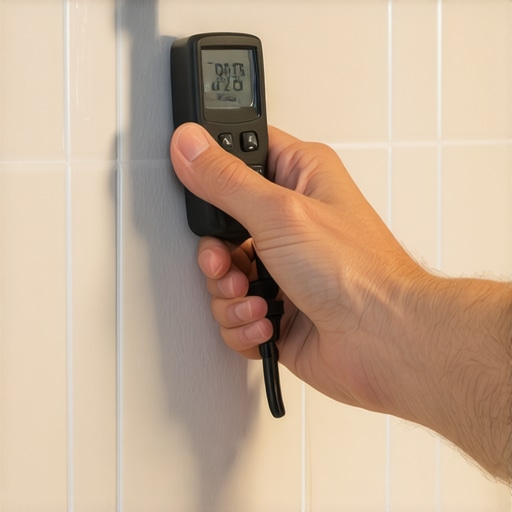
One tool I swear by is a digital moisture meter when working with tiles, especially in showers. It helps monitor moisture levels behind walls and within subfloors, ensuring that there’s no hidden water accumulation that could cause damage later. Regular inspections with a moisture meter, combined with visual checks, can catch leaks or dampness early before they escalate. For example, before re-grouting or sealing, I always verify that the area is thoroughly dry using a reliable moisture sensor, which is crucial to preventing mold and deterioration.
For flooring maintenance, a high-quality vacuum equipped with a beater bar and adjustable settings is invaluable. It allows for gentle yet thorough cleaning, especially for carpeted areas, without damaging fibers or pushing dirt deeper. Additionally, I recommend keeping a soft-bristle brush or a specialized grout cleaning brush handy for periodic deep cleans of tile seams and grout lines, which tend to trap dirt and grime over time.
Looking ahead, I see the trend shifting towards smart maintenance solutions, like IoT-connected sensors that monitor humidity, temperature, and even wear patterns. These innovations can provide real-time insights, alerting homeowners or contractors when attention is needed. Incorporating such technology could revolutionize how we care for our homes, making maintenance intuitive and preventive rather than reactive.
How do I maintain shower waterproofing to prevent leaks over time?
Maintaining your shower’s waterproofing isn’t a one-and-done task; it involves regular inspection and re-application of sealants and membranes. Over time, silicone caulking can crack, and waterproof membranes can wear out, especially in high-traffic areas or if you’ve experienced significant temperature fluctuations. To keep leaks at bay, I recommend inspecting grout lines, seals around fixtures, and the membrane’s edges every six months. When renewing sealant, opt for high-quality, mold-resistant silicone, and ensure surface prep is meticulous—clean, dry, and free of old caulk—for optimal adhesion.
For more detailed strategies on waterproofing upkeep, check out this comprehensive guide. Additionally, using a flexible sealant with a high Shore A hardness can better accommodate movement and prevent cracking over years of use.
Remember, proactive maintenance is your best defense against costly repairs down the road. By making small, consistent checks and investing in the right tools, you ensure your renovation investments remain pristine for years. I highly suggest trying out a digital moisture meter during your next inspection—it’s a game-changer for early detection of issues you might otherwise miss.
Optimizing Your Toolbox for Success
Building an effective toolkit doesn’t happen overnight, but starting with versatile, durable tools like a quality cordless drill, precision measuring tape, and a flexible putty knife will set you on the right track. Pair these with niche items like a contour gauge for scribing baseboards or a specialty grout removal tool to make future maintenance smoother. Alternatively, staying updated with the latest in equipment, such as laser levels or Wi-Fi-enabled sensors, can keep your home projects ahead of the curve.
Embrace these advanced tips and tools, and you’ll find that maintaining your home’s finishes becomes less of a chore and more of a manageable routine. Whether it’s checking moisture levels or replacing aging caulk, early intervention is key to ensuring continued beauty and functionality. Take the advice to heart and start incorporating simple maintenance checks today; your future self will thank you for it.
Throughout my projects, one lesson has consistently stood out: the devil is in the details. While mastering basic cuts and measurements is essential, true craftsmanship reveals itself in the subtle tweaks and personalized techniques that differentiate amateurs from pros. The cardboard-shim hack, for instance, transformed my approach—turning awkward seams into seamless transitions and saving countless hours of rework. Embracing these nuanced lessons has empowered me to turn everyday spaces into showcases of precision and care.
Top Secrets I Wish I Knew When Starting
- Investing in quality tools pays dividends—my reliable moisture meter has prevented mold issues in shower areas and saved me expensive repairs. Don’t underestimate the power of a good contour gauge or a flexible filler; they’re silent heroes in adapting to irregular surfaces.
- Walls and subfloors rarely cooperate perfectly. Learning to scribe and shim, rather than force, has been a game-changer—making installations appear flawless even in challenging conditions. Lesson learned: patience and adaptability beat brute force every time.
- Consistent maintenance is the secret behind lasting beauty. Regular inspections with my moisture meter and timely resealing keep water leaks, dust, and mold at bay. Proactive care is a small investment with tremendous long-term benefits.
- Understanding the importance of proper expansion gaps and flexible sealing strategies prevents future cracking or movement—saving time, material, and frustration. It’s about thinking ahead, not just reacting to visible issues.
- Finally, sharing knowledge creates a community. I encourage fellow DIYers to embrace these techniques, exchange tips, and keep learning—every project is a chance to improve and elevate your craft.
Tools and Resources That Keep Me Inspired
- Digital Moisture Meter: Mine has been essential in detecting hidden dampness behind tiles and under floors—trustworthy and precise for peace of mind.
- Conture Gauge: This tool has simplified scribing bases and molding to wavy or irregular surfaces, ensuring seamless joins every time.
- Professional Guides: I recommend this detailed installation walkthrough for foundational techniques, plus expert articles on achieving resilient waterproofing and finishing.
- Smart Maintenance Devices: Leading into the future, IoT sensors monitoring humidity and temperature are beginning to transform home upkeep—investing in these can proactively extend your installations’ lifespan.
Bring Your Floors and Finishes to Life Now
Every project, big or small, is an opportunity to craft a durable, beautiful space that reflects your personal touch. Embrace advanced techniques, tool smarter, and maintain proactively—your future self will thank you for the effort. Whether you’re perfecting a baseboard corner or sealing a custom shower, remember that mastery is built one detail at a time. Now’s your chance to turn your home into a testament to your dedication and skill.
What’s your biggest challenge when finishing a flooring or shower project? Share your experiences below, and let’s learn from each other’s journeys to excellence!