

I remember standing in my half-gutted master bathroom, covered in drywall dust and staring at a brand-new acrylic shower base that refused to cooperate. Every time I stepped into the center, the right corner would lift off the subfloor with a sickening thud. I had my mortar mixed, my drain aligned, and my patience was thinner than a coat of paint. In my early days, I made the classic rookie mistake of thinking I could just ‘pull it level’ by screwing the flange tighter into the studs. Spoiler alert: that is exactly how you crack a three-hundred-dollar base before the first drop of water hits it. I spent years perfecting the art of the rock-solid install, and today, I am going to show you a simple trick using nothing but scrap cardboard that ensures your base stays perfectly level while your mortar bed sets.
Why a Rocking Shower Base is a Recipe for Disaster
You might think a tiny bit of play in the floor is fine once the tile goes up, but that is a dangerous gamble. If that base flexes every time you take a shower, it will eventually tear the silicone seals or, worse, crack the grout lines on your beautiful walls. I have seen too many homeowners deal with why your shower pan is sinking and the mortar bed fix because they skipped the stabilization phase. The goal is a floor that feels as solid as a sidewalk. When you are working with the mud bed secret for rock solid shower floors, you only have about thirty minutes of work time before things start to get stiff. If you are still fussing with levels while the cement is hardening, you have already lost the battle.
Is a little piece of cardboard actually strong enough to hold up a shower?
It sounds like a ‘hack’ that shouldn’t work, but the cardboard acts as a temporary shim that prevents the base from tilting into the wet mortar while you are checking your work. According to industry standards from the Tile Council of North America (TCNA), subfloor deflection is the primary cause of shower system failure, and this trick helps mitigate that initial movement. Have you ever felt that ‘spongy’ feeling under your feet in a fiberglass shower? That is exactly what we are going to avoid today. By using thin strips of shipping boxes, we create a ‘stop’ that keeps the pan level while the mortar cures into a custom-molded support system. It is much more reliable than how to avoid hollow spots under your new tile using traditional plastic shims that can sometimes create pressure points. Before we mix the mud, we have to talk about the dry fit, because if you don’t get the alignment right now, no amount of cardboard will save you later.
Stop Winging It and Start Dry Fitting
Before you even open a bag of mortar, you must perform a thorough dry fit. I once skipped this on a cramped guest bath remodel, thinking I could eyeball the drain alignment. Once the mortar was down, I realized the drain pipe was sitting exactly three-quarters of an inch too high, and the base wouldn’t sit flush. I ended up covered in wet cement, frantically trying to trim PVC while the clock ticked. Always follow the dry fit rule for no mistake shower drain alignment to ensure your plumbing and your base play nice together. This step is about more than just the drain; it’s about checking for ‘proud’ joists or subfloor humps that could telegraph through the acrylic base later.
The Peanut Butter Consistency Rule
Your mortar bed isn’t just a filler; it is the structural foundation of your shower. You want to mix your deck mud or sand-mix to a ‘dry-pack’ consistency—it should hold its shape when you squeeze a handful, like damp sand at the beach, but not drip any water. If it is too soupy, the weight of the base will just push all the mud to the edges, leaving the center unsupported and prone to cracking. This is the same principle I use for the sand-mix secret for a level shower curb, where structural integrity is non-negotiable.
Stack Your Cardboard Shims Like a Pro
This is where the magic happens. Find the lowest point of your subfloor using a four-foot level. Instead of guessing how much mortar to pile in that corner, grab some scrap cardboard from your delivery boxes. Cut them into small squares and stack them in the low spots until the shower base sits perfectly level during your dry fit. 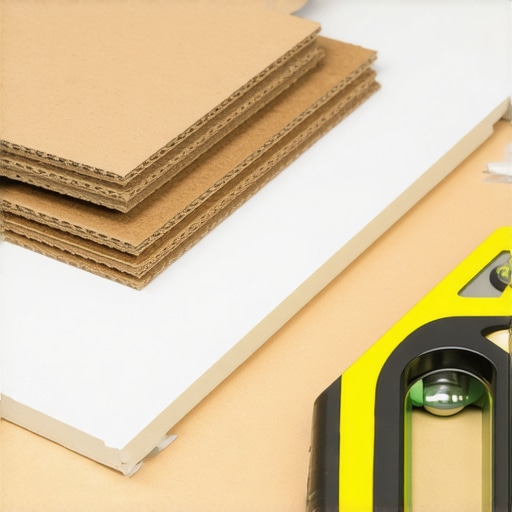 These cardboard stacks act as a physical ‘stop.’ When you finally set the base into the wet mortar, the base will ‘bottom out’ on the cardboard, ensuring it stays level without you having to constantly push and pull while the cement sets. It is a far more stable method than relying on flooring installation mistakes to avoid for a seamless look like using soft wooden shims that can rot or shift over time.
The Final Drop and the Squish Factor
Apply your mortar in mounds about three inches high, spaced roughly six inches apart across the subfloor. Do not spread it flat with a notched trowel. You want those mounds to collapse and spread out as you press the base down. As the mortar spreads, it fills every void and creates a 100% contact patch. It’s a similar logic to step-by-step flooring installation from planning to perfect finish, where substrate preparation dictates the quality of the final result. Once the base hits your cardboard stops, check your level one last time. If you hear a ‘squish’ and the base doesn’t rock, you’ve nailed it. Do not walk on it or install the wall boards for at least twenty-four hours to let that custom-molded support system fully petrify.Once that mortar is dry, most DIYers breathe a sigh of relief, but the nuances of a professional finish are just beginning. One of the most common myths I hear in the industry is that self-leveling underlayment is a ‘set it and forget it’ solution for every wonky floor. In reality, if you don’t address the underlying structural deflection, that expensive leveling compound will just crack and turn into a crunching sound under your feet within months. I’ve seen countless projects where a homeowner assumed the leveler would fix a bouncy joist, only to end up searching for flooring installation mistakes to avoid for a seamless look before the year was out.
Stop Trusting Self-Leveling Compound for Structural Fixes
People often mistake a level surface for a stable one. If your floor has ‘bounce,’ pouring eighty pounds of wet cement on top of it just creates a heavier, more dangerous bounce. Professionals always check the joist span first because no amount of liquid stone can replace solid lumber.
Why do my carpet seams keep peaking even though I used a seam iron?
It’s rarely a problem with the iron or the tape; it’s usually a lack of mechanical tension. A lot of ‘pros’ will tell you that a knee kicker is enough for a standard bedroom, but that is a dangerous shortcut that lead to callbacks. According to the Carpet and Rug Institute (CRI) 104 and 105 standards, a power stretcher is mandatory for all wall-to-wall carpet installations to ensure long-term stability. Without it, you aren’t just risking minor wrinkles; you’re ensuring that your seams will eventually peak as the latex backing relaxes over time. If you’ve noticed your rug looking wavy or the edges pulling away, you might have fallen for the knee kicker mistake that ruins new carpet. You must correctly dial in the power stretcher setting for plush pile carpets to get that drum-tight finish that actually lasts a decade. 
The Hidden Danger of Nailing into Bottom Plates
Another trap involves your trim work and baseboard physics. Most people assume that as long as they hit the bottom plate of the wall with their finish nails, the baseboard is secure. However, bottom plates can be notoriously uneven, warped, or even slightly recessed behind the drywall. This leads to ugly gaps that appear after a year of seasonal humidity changes. You should understand why you should never nail baseboards into the bottom plate only because you need the leverage of the actual vertical wall studs to pull the trim tight against the drywall. In bathrooms, the stakes are even higher. I’ve seen installers ignore the moisture meter test every flooring pro uses, assuming a new subfloor is dry just because it’s new. If that wood has a moisture content over twelve percent, you’re trapping a ticking time bomb under your waterproof vinyl. Finally, let’s talk about the ‘slope of shame.’ I’ve been called to fix why your shower pan is sloping toward the bathroom door more times than I can count. People get so focused on making the pan level during the cardboard-shim phase that they forget the pan itself needs a pre-sloped pitch toward the drain. Have you ever fallen into this trap or realized halfway through that your ‘level’ floor was actually draining into the hallway? Let me know in the comments.I have spent thousands on gear over the last decade, but if you forced me to start over with only three tools, a professional-grade moisture meter would be first on the list. You cannot just eyeball humidity, especially when you are transitioning between different materials. I have seen beautiful projects warp because the installer ignored the moisture meter test every flooring pro uses. For my money, the Wagner Meters Orion 950 is the gold standard because it lets you track environmental conditions over time, not just a single snapshot. Wagner Meters’ technical documentation highlights that relative humidity (RH) testing in concrete is 40% more accurate than older calcium chloride tests for predicting floor failure. If you are laying vinyl or hardwood, this tool is your insurance policy. 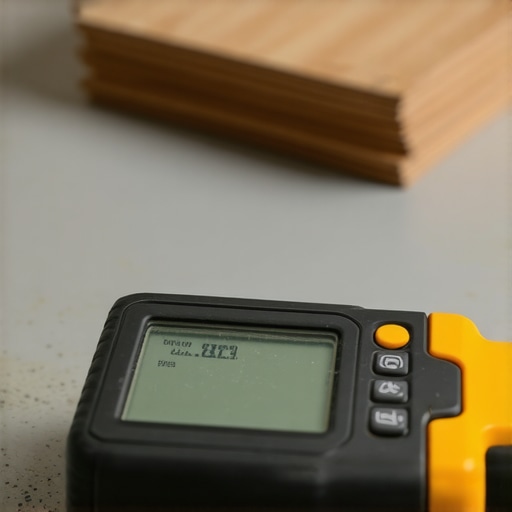
How do I keep my flooring investment from failing early?
Maintenance is not a weekend chore; it is a long-term strategy that starts the moment the last nail is driven. Most homeowners wait for a problem to appear, but the pros know that preventative care is much cheaper than shower repairs when to fix vs replace for longevity. For showers, I tell everyone to ditch the harsh bleach. It eats your sealer for breakfast. Instead, use the toothbrush trick for cleaning stubborn shower grout with a pH-neutral cleaner. It takes ten minutes once a month, but it prevents the deep-seated staining that eventually leads to a full remodel. When it comes to your carpets, the biggest threat is not dirt—it is tension loss. If you did not use a power stretcher during the install, you are already on a countdown to why your carpet is wrinkling two years after install. I always recommend checking your the power stretcher setting for plush pile carpets to ensure that ‘drum-tight’ feel remains consistent as the house settles.
The Tool That Separates Amateurs from Pros
Beyond the big machinery, it is the small finishing touches that define a pro result. I never leave a job site without checking the baseboards for seasonal movement. I always tell my clients to stop baseboard hairline cracks with this flexible filler rather than standard painters caulk, which becomes brittle and snaps during the first dry winter. If you are working in high-traffic zones, choosing the best carpet types for high traffic areas in 2025 will save you more maintenance headaches than any cleaning tool ever could. Looking ahead, I predict we are going to see a massive shift toward augmented reality (AR) tools that can scan subfloor deflection in real-time. This tech will make the ‘cardboard shim hack’ look like the Stone Age, but until that is affordable for every DIYer, the manual methods I have shared are your best bet. I challenge you to go out and buy a moisture meter before your next project; it is the single biggest step you can take to move from ‘weekend warrior’ to ‘expert installer.’
Hard Truths from the Bottom of a Shower Pan
After years of fixing “pro” installs gone wrong, I’ve realized that most failures aren’t about the finishing tile—they’re about what you can’t see. Here are the lightbulb moments that changed how I work:
- The Squish is Science: If your mortar doesn’t collapse under the base, you’re leaving air pockets that will eventually sound like a drum.
- Leveling is a Pre-Game Sport: If you’re leveling the pan while the mud is wet without a physical stop like my cardboard trick, you’re just chasing your tail.
- Moisture is the Silent Killer: Even if a subfloor looks dry, it can trap humidity that buckles your finish later.
Gear That Actually Earns Its Keep
I don’t believe in buying every gadget on the shelf, but these few things are non-negotiable in my trailer. First, the Wagner Orion 950 moisture meter—because the moisture meter test every flooring pro uses is the only way to sleep soundly at night. For carpets, stop relying on cheap knee kickers and look for carpet install secrets achieving flawless results every time using a power stretcher. When it’s time for trim, I always keep a tube of high-performance sealant ready to stop baseboard hairline cracks with this flexible filler, which handles home settling far better than standard caulk. Finally, take a moment to browse different baseboard styles that elevate your interior design before you start your cuts to ensure your trim matches the home’s aesthetic.
Your Floor is Your Home’s Foundation
Starting a flooring project can feel overwhelming, but remember that every master installer started with a single, slightly crooked piece of scrap. By taking the time to stabilize your shower base and prep your subflooring correctly, you are building something that will last for decades. Use these transform your home expert flooring installation tips for 2025 to guide your hands, but trust your gut when it says something isn’t quite level yet. You have all the tools you need to do it right. Have you ever had a shower base that just wouldn’t stop rocking no matter how much mud you used? Let me know in the comments below!