

I’ll never forget the moment I poured my first tile for a shower project and realized the pattern wasn’t quite right—off-center, uneven cuts, and a feeling that I had overlooked something fundamental. It was like trying to solve a complicated puzzle but missing the most crucial piece. That lightbulb moment led me to discover the game-changing ‘Center-Out’ layout trick that transformed my approach—and the results speak for themselves.
The Power of the ‘Center-Out’ Layout in Shower Design
If you’ve ever struggled with creating a symmetrical shower where every tile and feature lines up perfectly, you’re not alone. Achieving that professional, seamless look can be tricky, especially when walls aren’t perfectly plumb or your measurements are just a little off. The secret lies in understanding and applying the ‘Center-Out’ layout. Instead of starting from one corner, which often results in uneven edges or awkward cuts, you begin by establishing your central point—the focal feature or the most visible edge—and then work your way outward.
This method ensures that the main design element is perfectly centered, and all cuts are balanced on both sides. Over time, I found that it saves a ton of stress, reduces waste, and guarantees a more polished appearance. Curious how to implement this in your next shower project? Trust me, once you understand the mechanics, you’ll wonder why you didn’t start here from the beginning.
Are You Skeptical About Its Effectiveness?
If you’ve read about layout tricks and thought, ‘Yeah, but does it really make that much difference?’—believe me, I was there. Early in my career, I made the mistake of rushing the measurement phase, which led to uneven grout lines and misaligned tiles. That mistake taught me that a small shift—like starting from the center—can make a world of difference. And, according to experts, proper layout planning is among the top keys to a flawless installation (learn more about common mistakes to avoid).
Understanding this concept isn’t just about aesthetics. It impacts durability, water resistance, and overall quality. From my personal experience, I can’t emphasize enough how much smoother the process becomes when I plan from the middle out and adjust as I go, rather than forcing everything from a corner or edge.
Now that I’ve shared my journey and the core idea, let’s dive into the practical steps to master the ‘Center-Out’ layout and turn your shower project into a showcase of craftsmanship. Ready to get started? Let’s go!
Establish Your Central Reference Point
Begin by identifying your main focal point, such as the center of your shower wall or the most noticeable feature. Use a chalk line or a laser level to mark this spot precisely. I recall a time when I measured three times before marking the center of a large shower wall, ensuring symmetrical tile placement. This step sets the foundation for a balanced layout.
Calculate and Mark the Starting Line
From your central point, draw a horizontal and vertical line crossing at the mark. These lines divide your area into four quadrants. When I installed a mosaic tile pattern, I meticulously drew these lines to avoid cumulative errors. They serve as guides to keep tiles aligned and centered as you work outward.
Plan Your Tile Layout
Arrange your tiles dry on the floor or use a temporary level to visualize the pattern. Adjust spacing and cuts so that edge tiles are equal in width, preventing awkward small cuts. In a recent project, this allowed me to avoid thin slivers along the edges, which would have looked unprofessional.
Start Tiling From the Center
Apply adhesive at the intersection of your guide lines and lay your first tiles there. Work outward in all directions, following your initial marks. This method ensures your main features are perfectly centered, and the edges are full tiles, reducing the need for complex cuts. I remember a project where following this technique saved me hours after realizing the initial corner layout was off—by starting from the middle, I could easily adjust as I went.
Use a Level and Spacers Regularly
Constantly check for level and uniform grout lines to maintain consistency. Small adjustments early on prevent misalignment later. During one shower remodel, I used a level every few tiles, catching slight deviations early, which resulted in a perfectly flat wall surface.
Adjust as Necessary
If you notice tiles shifting or grout lines uneven, don’t hesitate to re-press tiles or re-apply adhesive. This flexibility is a key benefit of the center-out approach, allowing corrections without dismantling large sections. I once had to re-level an entire quadrant after noticing a slight tilt, but because I was working from the center, I adjusted swiftly without redoing the whole wall.
Finish with Edge and Corner Tiles
Cut edge tiles accurately, so they align neatly with the wall and shower enclosure. Use a wet saw for precise cuts, and stencil or tape to mark cut lines. Properly finished edges lend a professional appearance, and starting from the center makes these final adjustments more straightforward, as the main design is already perfect.
By following these concrete steps, you’ll create a balanced, professional-looking shower that impresses both visually and structurally. Remember, taking your time during the layout phase is essential—rushing can undo all the benefits of this precise method. Whether you’re installing tiles, baseboards, or even adjusting for uneven walls, the core principle remains the same: start from the center and work outward with confidence and accuracy.
For more tips on perfecting your flooring layout, check out step-by-step flooring installation guide. And if you’re considering a full bathroom upgrade, explore modern shower renovation ideas for inspiration.
Many homeowners and even seasoned DIYers fall into traps when tackling flooring, baseboards, carpets, or showers, often because of misconceptions rooted in common advice or oversimplified tutorials. Let’s dig deeper into what most people get wrong and reveal some crucial nuances that can make or break your project.
One pervasive myth is that the cheapest materials always yield the best results. This couldn’t be further from the truth. In my experience, opting for budget options often leads to repeated repairs or replacements sooner than expected, especially with flooring and shower waterproofing. Investing in quality, as highlighted in top trends in installation for 2025, ensures longevity and reduces long-term costs.
Another misconception is that precise measurements are only necessary for big cuts or alignment. In reality, minor measurement inaccuracies can cause significant issues down the line, such as uneven grout lines or gaps with baseboards. The hidden nuance here is mastering the art of pre-measurement and regular checks during installation. Using tools like laser levels or digital calipers, as discussed in expert flooring tips for 2025, can dramatically reduce errors.
Beware the trap of assuming that all adhesives and sealants are interchangeable. For instance, in shower installations, choosing the wrong type of sealant—like using regular silicone instead of a high-quality, mold-resistant product—can lead to leaks and mold growth. This falls under the advanced mistake of not matching materials to their specific environment and use case, which experts emphasize in shower niche shelf tips. Properly applying the right sealant and understanding their properties is essential for durability.
When it comes to baseboards, many underestimate the importance of proper coping cuts and surface preparation. Cutting corners here results in visible gaps and an unprofessional finish. Additionally, many overlook the benefits of micro-adjustments during installation. According to how to choose the right carpet, small tweaks during installation can elevate the entire look. It’s not just about fitting pieces; it’s about fine-tuning every joint.
In flooring, especially when installing large tiles or planks, the mistake of neglecting the substrate’s condition can cause future cracks or uneven surfaces. The subtle point here is ensuring proper underlayment and moisture barriers, which are often skipped by DIYers eager to finish. This point is underscored in durable flooring installation guide. Skipping these steps jeopardizes the entire project’s success.
Have you ever fallen into this trap? Let me know in the comments, and remember: mastering these hidden nuances separates a good installation from a truly professional finish. For more expert insights, check out common mistakes to avoid for seamless flooring.
Investing in quality tools and establishing a solid maintenance routine are key to ensuring your flooring, baseboards, carpets, and shower projects stand the test of time. Over the years, I’ve found that the right equipment not only makes installation easier but also preserves the integrity of your work, saving you money and effort down the line.
Tools I Recommend for Precision and Durability
One of my go-to tools is the professional-grade tensioning bar for baseboards. Unlike standard pry bars, a tensioning bar allows for micro-adjustments, which are crucial when dealing with uneven walls or materials that tend to contract and expand. I personally use the micro-adjustable baseboard tensioner because it minimizes gaps and ensures a seamless finish, especially in older homes with out-of-square walls.
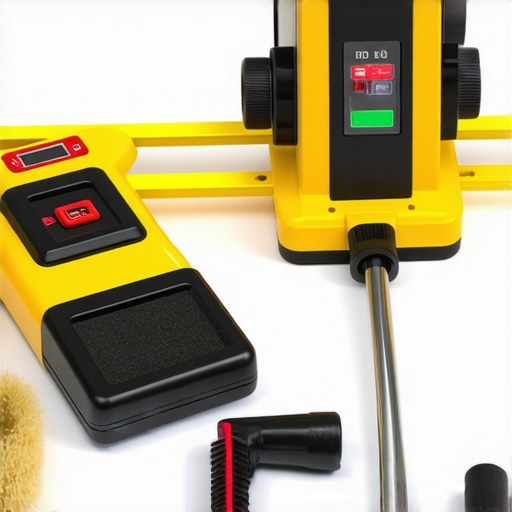
For flooring, I lean heavily on a digital laser level. Unlike bubble levels, lasers provide a full-room view of levelness, which is vital for large-format tiles or plank floors where even minor dips are noticeable. I recommend the self-leveling laser level for its accuracy and ease of use, which is why I rely on it in every project.
Maintaining the cleanliness of your tools is often overlooked but is essential for consistent results. A high-quality, silicone-based spray lubricant extends the life of your tile cutters and saw blades. It prevents blades from overheating and reduces chipping, which are common causes of damaged tiles and uneven cuts. I always keep a small spray bottle on hand for quick cleaning and lubrication.
Creating a Maintenance Routine to Protect Your Work
Once the installation is complete, long-term results depend on regular upkeep. For instance, cleaning shower surfaces with a pH-neutral cleaner helps prevent mold and soap scum buildup, keeping grout joints pristine. To safeguard your floors, avoid abrasive cleaning tools that can scratch surfaces. Instead, opt for microfiber mops or soft brushes that gently lift dirt without damage.
Baseboards and moldings also require periodic inspection for gaps or cracks. Applying fresh caulk or sealant—using a high-quality, mold-resistant product—is a simple way to prevent water intrusion, which can warp or rot your materials over time. Check out this guide for tips on maintaining your baseboards effectively.
Future-Proofing Your Installations
Looking ahead, I believe automation and smart tools will further enhance the longevity of home upgrades. Future iterations of laser levels and moisture sensors are expected to offer even greater accuracy, helping homeowners catch issues early and avoid costly repairs. Training yourself to use these advanced tools now will pay dividends as technology continues to evolve.
How do I maintain my flooring and shower systems over time?
Consistent inspection, routine cleaning with suitable products, and timely repairs—such as reapplying sealant or replacing worn grout—are essential. Adopting these habits ensures your investment remains attractive and functional for years to come. Try integrating a weekly check and deep cleaning schedule into your maintenance plan to catch small issues before they become major problems. As noted in this article, early intervention is key to extending the lifespan of your showers and flooring systems.
Remember, a proactive approach and the right tools—like a laser level for perfect alignment or a tensioning system for baseboards—make all the difference. Keep these practices in mind, and your home improvements will serve you well for decades. Don’t hesitate to experiment with these advanced techniques and tools to elevate your next project!
The Hardest Lesson I Learned About Flooring, Baseboards, Carpet Installations, and Showers
Early in my journey, I underestimated the importance of detailed planning. I once rushed through measuring for a tile pattern, only to find out that small discrepancies compounded into costly rework and a less-than-professional look. That blunder taught me that meticulous measurement and starting from a central reference point are vital. It’s the little adjustments, like verifying grout lines early or rechecking cuts, that make a profound difference in the final outcome.
3 Myths About Shower Layouts and Floor Installations That Held Me Back
One persistent myth was that starting from a corner was easiest. I discovered that working from the center-out ensures symmetry and saves time on complex cuts. Another misconception was believing all sealants are interchangeable; using the right mold-resistant sealant specifically for showers prevents leaks and mold issues. Lastly, I thought lower-cost materials would suffice, but investing in quality components like premium adhesives and tools resulted in more durable, flawless results.
What Experts Won’t Tell You About Baseboard and Carpet Success
Many overlook the nuances of making clean, tight joints—coping cuts instead of mitered ones on baseboards give a seamless look, especially on uneven walls. Using tools like a micro-adjustable tensioning system drastically reduces gaps. When installing carpets, pre-stretching and precise tack strip placement prevent ripples and slippage. These subtle techniques elevate the professional quality of your work and extend its lifespan.
Where to Go from Here
Armed with this insider wisdom, consider focusing on developing your measurement accuracy and investing in quality tools that suit your projects. Explore the latest guides on step-by-step flooring installation and learn advanced techniques that can turn good results into outstanding ones. Remember, every project is a chance to refine your skills and leave behind a masterpiece that you can be proud of.
Your Turn to Try
What was the biggest lesson you’ve learned from a DIY project that didn’t go as planned? Share your experiences below, and let’s grow together in mastering the art of home upgrades. With patience, practice, and the right knowledge, your next shower or flooring project can be your best yet.