

Ever spent hours laying down carpet, only to realize that the seams are glaringly obvious? I remember the first time I did a large room, meticulously matching patterns and aligning edges, only to be disappointed by the visible joins. It was a lightbulb moment for me—seams can make or break the entire look of a flooring project. That’s when I stumbled upon a method that transformed my installations—The Double-Cut Method for creating truly invisible carpet seams. If you’ve ever fought with bulky, ragged edges that refuse to hide, you’re not alone. This technique promises tight, seamless joins that look professional without the need for pricey tools or complicated setups.
The Secret to Seamless Carpet Transitions
My goal today is to share what I’ve learned through years of trial, error, and finally, success. We’ll dive into how this method works, why it’s a game-changer, and how you can apply it to your next project. Whether you’re tackling a small hallway or a large living space, understanding this trick can save you from ugly seam lines and frustration. Ready to upgrade your skills and get flawless results? Let’s get started!
Is the Double-Cut Method Really Worth the Hype?
In the beginning, I was skeptical—I’ve tried so many techniques that promised perfection, only to be disappointed. My early mistake was simply assuming that meticulous measuring was enough. But I learned that cutting corners, quite literally, leads to gaps and uneven seams. It wasn’t until I adopted the Double-Cut Method that I saw a dramatic difference. Experts say precise cuts are essential for a seamless finish, and this method emphasizes that by creating interlocking edges that can’t be pulled apart or visible once installed. It’s such a simple adjustment that makes a huge impact, and I know you’ll find it just as powerful.
Have you faced issues with visible seams or mismatched edges? If so, this might be the technique that finally works for you. For more tips on achieving flawless flooring installations, check out my comprehensive guide to carpet secrets. As I’ll show next, mastering this process can elevate your work from amateur to impressive in no time.
Preparing Your Edges for a Clean Join
Start by carefully measuring the width of your carpet pieces at the seam location. Mark the cut lines precisely using a straightedge and a fabric chalk or marker. When I tackled my first big living room, I learned that exact measurements prevent gaps and uneven seams. Secure the carpet edges with painter’s tape along the cut lines to prevent fraying during cutting. This step resembles cutting fabric for clothing—precision ensures a seamless fit.
Making the Double Cut
Using a sharp utility knife, cut along the marked line, but don’t go all the way through in a single pass. Instead, gently score the surface twice, applying steady pressure. I vividly remember trying to rush through this step and ending up with jagged edges, which made the seam obvious. The secret is to make two shallow cuts, creating a clean, controlled edge. This double cut allows the edges to interlock tightly later, much like puzzle pieces fitting seamlessly together.
Interlocking the Edges
Next, peel back the top layer slightly from each cut edge. Carefully align the interlocking cut portions so the edges slide into each other smoothly. When I first attempted this, the edges kept slipping, causing frustration. Patience is key—adjust the interlocking parts until they fit snugly without gaps. This process enhances the seam’s strength and invisibility, similar to how interlocking puzzle edges create a solid connection.
Sealing the Seam for Durability
Once aligned, apply a carpet seam adhesive or binder along the seam joint for added stability. Press the edges firmly with a seam roller or a heavy brush to ensure full contact. In my experience, skipping this step led to seam separation over time, especially in high-traffic areas. The adhesive acts as the glue holding everything together, akin to mortar in bricklaying, ensuring the seamless look endures through daily wear.
Finishing Touches
Trim any excess fibers or uneven edges with scissors to perfect the seam. Vacuum the area thoroughly to remove any loose fibers or debris. I recall a project where a quick cleanup revealed a virtually invisible seam—making the effort worthwhile. Paying attention to detail here guarantees a professional finish, elevating your installation to a showroom-quality result.
By mastering this double-cut technique, you create carpet seams that are virtually undetectable, even upon close inspection. For more expert advice on flooring projects, explore my comprehensive guide to durable flooring installation. Remember, patience and precision are your best tools for flawless results.
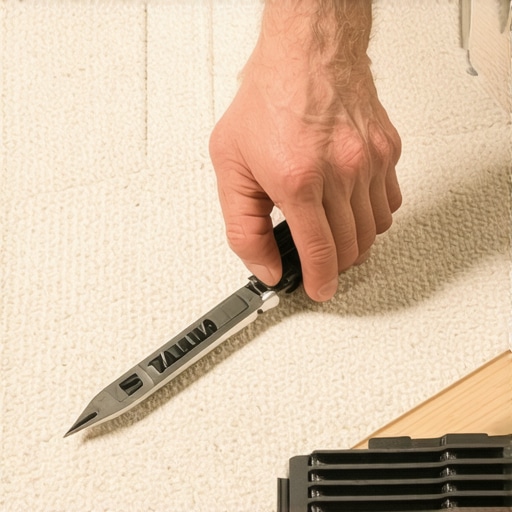
Many homeowners and even seasoned DIYers fall prey to misconceptions when it comes to flooring installation, baseboard fitting, shower construction, and carpet laying. While the basics seem straightforward, the devil is often in the details that are overlooked—details that can lead to costly repairs or subpar finishings down the line. Let’s explore some of the most common misconceptions and advanced pitfalls that can trip you up, even if you’re familiar with the fundamentals.
Why Oversimplifying the Underlayment and Moisture Barriers Is a Common Mistake
One pervasive myth is that choosing a basic underlayment or skipping moisture barriers isn’t a big deal. In reality, these layers are vital for preventing mold, mildew, and even structural damage. Expert sources, such as the latest installation trends, emphasize that improper underlayment choice can lead to buckling or carpet delamination over time. Common oversight occurs when installers neglect to assess subfloor moisture levels properly, which could cause future issues. Using a moisture meter before installing can save you from such pitfalls, especially in basements or concrete slabs.
Advanced Mistake: Underestimating the Complexity of Tiling Around Curves and Uneven Surfaces
Many overlook how much skill and planning are required for imperfect surfaces. Simply tiling over uneven walls or floors without proper shimming or leveling not only results in a crooked appearance but may also cause cracks and leaks later. When installing showers, for example, neglecting to create pre-slope drainage or failing to seal niches correctly can lead to water damage and mold growth. According to industry experts, mastering the art of scribing and shimming is essential for a seamless, durable shower finish. Always remember, surface irregularities should be addressed meticulously before tiling or waterproofing to prevent costly remedial work.
Why Most People Misjudge Baseboard Transitions and How to Get It Right
The common belief is that simply nailing baseboards flush against the wall suffices. But the truth is that walls and floors rarely are perfectly level or straight. The secret lies in how you adapt the baseboard edges to these imperfections. A frequent mistake is to use caulk or paint to hide gaps rather than actually fitting or scribing the baseboards properly. Advanced techniques, like the reverse scribe method or using shims, create a cleaner, more professional look and prevent gaps that collect dust or look unattractive. For innovative ideas on elevating your interiors, check these style tips.
Critical Pitfall in Carpet Installation That Can Ruin Your Whole Room
Carpet installation is often viewed as a straightforward task, but incorrect stretching or poor seam sealing can lead to wrinkles, fraying, and separation over time. One advanced mistake is relying solely on knee kickers without using a power stretcher for larger rooms, resulting in loose or uneven carpets. Additionally, neglecting to secure the tack strips properly or to integrate transitions smoothly can make the carpet look unprofessional and cause tripping hazards. Paying attention to these nuances ensures a long-lasting, flawless finish. For more in-depth strategies, explore my comprehensive carpet tips.
Having awareness of these hidden nuances and misconceptions can elevate your next project from average to professional. Remember, meticulous planning, understanding material behaviors, and employing advanced techniques are the keys to lasting, high-quality results. Have you ever fallen into this trap? Let me know in the comments!
When you’ve invested time and effort into a flooring or finishing project, keeping it in top shape demands the right tools and regular maintenance routine. Personally, I swear by a high-quality seam roller and a cordless heat gun—these are my secret weapons for quickly fixing minor imperfections or reactivating seam adhesive during touch-ups. A durable microfiber mop, paired with a gentle pH-balanced cleaner, helps preserve surfaces without causing damage or leaving streaks, especially on sensitive materials like hardwood or luxury vinyl.
Investing in a reliable moisture meter is essential for long-term results, particularly in areas prone to humidity fluctuations. This allows me to monitor subfloor and wall moisture levels consistently, preventing issues like warping or mold growth that can compromise the entire installation. As trends evolve toward sustainable and low-maintenance materials, I predict that smart tools integrated with app control will become standard, giving real-time data and diagnostics to DIYers and professionals alike.
So, how do I maintain my floors and installations over time? Routine checks with tools like the moisture meter and gentle cleaning practices extend their lifespan significantly. For instance, reapplying sealants or protective finishes every few years keeps surfaces resilient against spills, wear, and cleaning chemicals. When in doubt, consulting experts or detailed guides like this comprehensive flooring maintenance guide offers invaluable insights. I also recommend scheduling professional inspections periodically to catch potential issues early.
Another tip I advocate is maintaining a proper environment—controlling humidity levels and temperature reduces material expansion, contraction, and crack formation. This is especially crucial for wooden baseboards and showertile areas, where moisture fluctuations can cause cosmetic and structural problems. Using a dehumidifier or an HVAC system with humidity control helps preserve the integrity of your completed work.
Don’t forget to keep tools organized and clean after each use; a well-maintained toolkit not only prolongs the lifespan of your equipment but also ensures you’re always ready for maintenance or future upgrades. In my experience, a magnetic tool holder and labeled storage bins make this task manageable.
Looking ahead, integrating smart maintenance devices and predictive diagnostics will vastly improve how we care for our homes’ finishes. For now, investing in quality tools and establishing a routine check-up schedule can make a significant difference in the durability and appearance of your projects. Try incorporating a moisture meter into your next maintenance routine—you’ll thank yourself when your floors stay flawless for years to come.
Throughout my journey in home improvement, one truth has become crystal clear: it’s often the smallest details that elevate a project from average to exceptional. While techniques like the double-cut method for carpet seams or precise tiling around curves demand patience, they pay off by creating a truly professional finish that stands the test of time.
The Hardest Lesson I Learned About Flooring and Finishing Touches
One invaluable lesson was understanding that shortcuts in preparation—be it neglecting to check subfloor moisture levels or rushing the seam sealing process—can lead to problems months down the line. I once skipped sealing a seam properly, only to find it frayed and separating after a few months of use. That experience taught me that thoroughness and patience are non-negotiable for lasting quality.
Why Fixing Small Gaps and Imperfections Is Worth Every Minute
In my early projects, I underestimated the impact of minor gaps or uneven cuts—believing they were too small to matter. But I quickly realized these imperfections can undermine the entire look and even cause future damage, such as creaking floors or water infiltration. Investing extra time in scribing, shimming, and sealing guarantees your work remains flawless for years to come.
How The Right Tools Save Time and Hassle
Having the proper tools, like a high-quality seam roller or a moisture meter, transforms a tedious job into a manageable task. I found that tools not only improve precision but also boost confidence, making complex steps like leveling uneven surfaces or tight corner scribing much easier. Trusting reliable equipment is an investment in your craft and peace of mind.
What I Would Do Differently Next Time
Looking back, I would dedicate more time to surface preparation and environmental controls, especially humidity management. Ensuring subfloors and walls are perfectly dry and level before starting saves countless headaches later. Plus, I’d incorporate regular inspections using my moisture meter to catch potential issues early, preserving the integrity of my installation.
Curated Tools and Resources That Make a Difference
- Moisture Meter: Essential for evaluating subfloor conditions before flooring installation. I personally rely on my moisture meter to prevent future problems, making it a must-have.
- Professional-Grade Seam Roller: Ensures seams are pressed uniformly, creating a smooth, durable finish—trustworthy for high-traffic areas.
- Sharp Utility Knife: Precise cuts are foundational to perfect seams and scribing, making this simple tool indispensable.
- Trusted Guides and Tutorials: Resources like this comprehensive flooring installation guide offer step-by-step insights that shorten learning curves and boost confidence.
Embrace Your Passion and Keep Improving
Your dedication to mastering the craft of flooring, from seamless carpets to flawless tiles, fuels ongoing growth. Each project is an opportunity to refine your skills, learn new techniques, and create spaces that truly feel like home. Don’t shy away from trying advanced methods or investing in quality tools—these small gains lead to big improvements over time.
Are you ready to tackle your next flooring project with newfound confidence? Remember, the key is patience, preparation, and a willingness to learn from each step. Share your experiences or ask questions below—I’m excited to see how you elevate your home finishing skills!