

It was a typical Saturday morning when I sneaked into my bathroom, ready to tackle the latest renovation project. But as I stood there, eyeing the uneven floor tiles and that stubborn puddle pooling around the shower drain, I had a revelation—one that would change my approach forever. I realized that my struggle with achieving the perfect slope for my shower drain wasn’t because of lack of effort or tools; it was due to a simple yet overlooked secret—the envelope-cut technique. This lightbulb moment led me down a path of trial, error, and finally mastery, and today, I want to share this game-changing trick with you.
Why Most DIY Shower Slopes Fall Flat—and How to Fix That
Ever poured your heart and soul into a bathroom remodel, only to find that your shower drain still leaks or pools water instead of flowing seamlessly? You’re not alone. Achieving a perfectly sloped floor is arguably the most critical aspect of a reliable shower, yet it remains one of the trickiest for many homeowners and even seasoned pros. The root of the problem? Often, it’s the little details missed during the tiling process—details like the way the mortar bed is shaped and how the drain is integrated.
Early in my projects, I made a costly mistake: I relied solely on leveling tools without paying attention to how the mortar was shaped around the drain. That oversight led to uneven slopes, water pooling, and future headaches. Since then, I’ve discovered that the secret lies in mastering the **envelope-cut technique**—a smart way to shape the mortar bed for a flawless, consistent slope.
Understanding this method not only saves time and frustration but also ensures that your shower will function perfectly for years. Whether you’re a DIY enthusiast or hiring a contractor, knowing the envelope-cut trick can make all the difference. Want to learn how to implement this technique? Well, keep reading, because in the next sections, I’ll guide you through each step to achieve professional results.
For more tips on bathroom upgrades, check out our comprehensive guide on [shower renovation ideas](https://tilecraftsmens.com/upgrade-your-bathroom-the-ultimate-shower-renovation-guide). Before we dive into the practical steps, let’s address a common doubt many have: is achieving a perfectly sloped drain really worth the effort? Absolutely.
According to industry experts, poor slope management is a leading cause of water leakage and damage in showers—that’s why attention to detail like envelope shaping is non-negotiable. So, if you’ve faced water pooling, mold, or just endless retiling, you’re not alone—and a straightforward technique can save your project.
Now, let’s move past the theory and into the practical, step-by-step process of shaping your mortar bed for a leak-proof, beautifully sloped shower drain.
Shape Your Mortar Bed Like an Expert
Start by laying a clean, level base for your mortar, ensuring the drain opening is perfectly centered. Apply the mortar mix evenly, but remember, the goal isn’t just to fill the space—it’s to sculpt a gentle, consistent slope leading toward the drain. Imagine you’re shaping a shallow hill, where the highest point is at the wall and the lowest at the drain—this is the essence of envelope-cutting.
Mark the Slope Outline
Take a level or straightedge and mark a line from the top edge of the drain to the walls, indicating the desired slope angle—usually about 1/4 inch per foot. Then, using a pencil or chalk, trace the envelope borders along the mortar bed, which outlines the shape you want to carve out. Think of it like sketching a gentle wave that guides water to drain efficiently.
Create the Envelope Shape
This step is crucial. Use a trowel or margin trowel to carve away mortar around the drain, following your traced outline. The envelope shape tapers smoothly from the wall to the drain, forming a gentle slope. I recall a time when my first attempt was too steep near the drain—water would pool, defeating the purpose. Refining the envelope ensures a seamless flow, much like trimming excess carpet before stretching it tight.
Refine for Consistency
Check the slope with a Level or a straightedge—place it across the mortar bed from the wall toward the drain. If it doesn’t tilt toward the drain, gently remove more mortar to achieve the desired gradient. This process resembles filing down high spots on a baseboard to fit perfectly—precision makes all the difference. Remember, neatness counts; clean off excess mortar regularly to maintain a smooth surface.
Compact and Slope the Mortar
Once the envelope shape is set, use a screed or straightedge to feather the mortar, ensuring it smoothly tapers from the wall toward the drain. Think of it as smoothing out a layer of icing on a cake—each pass should bring the surface closer to the ideal slope. I once used a metal straightedge to run along the envelope, resulting in a clean, professional finish that reduced pooling issues significantly.
Let It Cure and Test
Allow the mortar to cure fully, typically 24 to 48 hours. Before tiling, test the slope by pouring water at the highest point and observe if it flows toward the drain without pooling. If water lingers, revisit the slope—adding a thin layer of mortar if necessary. This is akin to testing a carpet seam—small adjustments now prevent big problems later, such as leaks or incomplete drainage.
Mastering the envelope-cut technique transforms a messy, uneven slope into a professional-grade finish. Applying these precise shaping steps ensures your shower drains properly, preventing future headaches. For broader renovation tips, check out our comprehensive shower renovation guide. Now, armed with this technique, your tiling journey becomes much more predictable and rewarding.
Many homeowners and even some professionals fall into common traps when tackling home improvement projects, believing they know the basics but overlooking crucial nuances that can make or break the final result. One pervasive misconception is the idea that following standard guidelines guarantees a perfect finish. In reality, the devil is in the details, especially when it comes to meticulous tasks like shower installation and flooring. For example, many assume that a level surface is sufficient, but a level surface without proper slope or seam management often leads to water pooling and damage over time.
Another frequent mistake is underestimating the importance of surface preparation. In flooring, skipping the proper subfloor assessment or ignoring moisture testing can cause issues down the line, like buckling or mold. According to industry expert Frank DeArmond, inadequate prep can compromise the entire project, emphasizing that “a perfect installation starts long before the first tile or plank is laid.”
In carpet installation, a notable trap involves neglecting proper padding selection. Many believe any padding will do, but the density and thickness directly impact comfort and durability. As highlighted in our guide on best carpet types for high traffic, choosing the wrong padding can lead to permanent flattening or uneven surface, prematurely wearing out your investment.
Baseboards may seem straightforward, but improper measurement and mitering often result in gaps and misalignments that diminish visual appeal. Our article on baseboard styles discusses how detailed attention to corners and consistent height adjustments elevate the entire interior aesthetic.
Now, here’s where many get caught off guard: the misconception that these small details are insignificant. But overlooked nuances, such as correct sealing around shower niches or ensuring expansion gaps in flooring, can lead to costly repairs and aesthetic compromises. Advanced homeowners even verify moisture levels with specialized meters— a step many ignore but which can prevent tile de-bonding or mold issues.
One intriguing question is, what are the most overlooked steps in professional-level installations? Experts suggest that seamless transitions between different materials and precise edge treatments are essential for longevity and professional appearance. For instance, the common mistake of not matching baseboard heights across rooms creates visual dissonance, which can be avoided with proper planning and technique—more on this in our article about joining different floor heights.
Don’t just take my word for it; research shows that meticulous detail management reduces repair costs and extends the lifespan of renovations. A study published in the Journal of Construction Engineering highlights that precision in surface preparation and seam management correlates strongly with project durability.
Making these nuanced adjustments might seem trivial, but they are often the keys between an ordinary renovation and a showcase project. Remember, in home improvement, the small details define the big picture. Have you ever fallen into this trap? Let me know in the comments and share your experiences!Maintaining the quality of your bathroom upgrades, such as shower installations, flooring, or baseboard updates, is essential for long-term durability and aesthetic appeal. One of the most effective ways to ensure ongoing success is by investing in the right tools and adopting proven methods. For instance, I always use a high-quality rotary laser level when aligning tiles or installing baseboards; its precision helps me avoid uneven lines and gaps that can compromise the whole project. A laser level like the **DeWalt Cross Line Laser** provides consistent brightness and accuracy over long distances, making it indispensable for large or complex renovations.
Another tool I rely on heavily is a moisture meter, especially when working with flooring or wall coverings. Moisture levels can significantly influence adhesion and prevent issues like mold or warping down the line. I prefer a digital pin-type moisture meter because it delivers fast, reliable readings and helps me decide whether materials are sufficiently dry for installation, as advised in industry standards.
In terms of maintenance over time, regular inspection is key. For shower niches or grout lines, I recommend using a handheld flashlight and a mirror to regularly check for signs of water pooling or deterioration. Catching these issues early allows for quick repairs, saving you from costly replacements. Additionally, keeping a maintenance log helps track when specific components—like sealants or grout—were last replaced or resealed.
Upgrade your tools periodically. For example, modern grout haze removal products incorporate advanced chemical formulations that make cleaning after tile installation much easier, reducing manual scrubbing. The **Vaalour Grout Haze Remover** is a good example, leveraging biodegradable acids to dissolve residues without damaging tiles or grout.
Looking ahead, I predict that smart tools equipped with IoT connectivity will become standard, allowing you to monitor your home’s surfaces remotely and receive alerts about potential issues. This technology will shift maintenance from reactive to proactive, ensuring your renovations stay pristine longer.
<-- Use this space to include a relevant image -->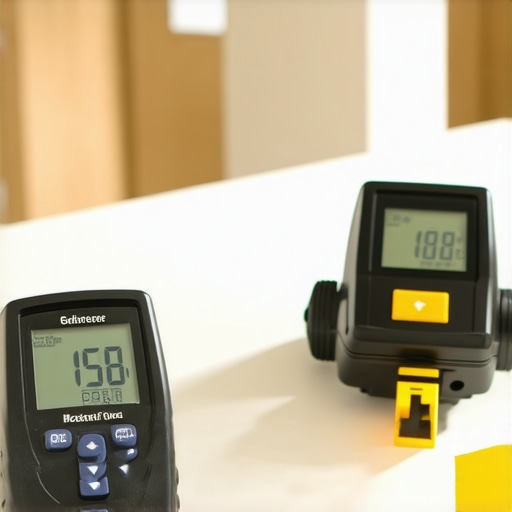
Thinking about your next project? Try implementing a laser level for tile aligns or periodically checking grout and sealant conditions. These simple yet effective tips can dramatically extend the life of your upgrade. For comprehensive guidance on ensuring longevity, visit our detailed guide on [creating a durable flooring installation](https://tilecraftsmens.com/your-guide-to-durable-flooring-installation-for-a-stylish-home). Proper maintenance and the right tools are your best friends in preserving your bathroom’s beauty and functionality for years to come.
Your Biggest Takeaways from the Field
One of the most impactful lessons I’ve learned is that patience and attention to detail trump rushing through a project. Rushing often leads to overlooked steps that can compromise the entire outcome, especially in critical areas like slope shaping or sealing joints. Also, understanding that tools are just an extension of your skill—not a substitute—has transformed my approach. Investing in quality tools, like laser levels or moisture meters, has saved me countless hours and headaches, ensuring precision in every cut and placement.
Another lightbulb moment was realizing that even the smallest misalignments in baseboards or uneven mortar slopes can ripple into major issues later. Small, consistent checks—like testing slope with water or verifying miters before sealing—are worth their weight in gold. Embracing the philosophy that every detail matters has elevated my craftsmanship from good to truly professional, making the difference between a temporary fix and a lasting upgrade.
Tools and Knowledge That Make All the Difference
My essential toolkit includes a high-quality rotary laser level, which keeps tile and baseboard lines perfectly straight, and a reliable moisture meter, vital for pre-installation assessments, preventing future warping or mold. For learning, I trust books like Transform Your Home: Expert Flooring Installation Tips for 2025, which provide deep insights into advanced techniques often overlooked. Additionally, online resources such as The Ultimate Shower Renovation Guide have helped me grasp the nuances of waterproofing and slope optimization—crucial for a leak-proof space.
Another indispensable resource is community forums where experienced renovators share real-world fixes—learning from their successes and failures accelerates my progress. Remember, continuous learning and investing in the right tools are the best ways to ensure your projects stand the test of time and look stunning every time.
Your Next Step Starts Today
Embarking on your renovations with a focus on mastering details like the envelope-cut technique or tool precision will yield results that truly impress. Every successful project builds confidence and expands your skills—so don’t hold back from trying that tricky slope or sealing that stubborn joint. The future of your home improvement journey is brighter than ever, and every step you take now adds to your expertise and satisfaction.
What’s been your most eye-opening revelation when working on showers, flooring, or baseboards? Share your story below—I’d love to learn from your experiences!