

I vividly remember the day I finished installing my new shower, feeling proud of my work. But within a few months, I started noticing stubborn mold spots and grout discoloration creeping into the corners. Frustration set in as I scrubbed tirelessly, only to see the stains return. That was my lightbulb moment—I realized the traditional grout wasn’t designed for the moisture-heavy environment of a shower, and I needed a better solution.
Discover the Game-Changer Your Shower Deserves
What if there was a way to enjoy your luxurious shower without the perpetual battle against stains, mold, and crumbling grout? Well, there is. My journey to a maintenance-free, long-lasting shower led me to a secret—epoxy grout. It’s like giving your bathroom a protective armor that withstands the test of time and moisture. Today, I’ll share how this secret transformed my space and how you can leverage it to keep your shower pristine without endless scrubbing.
Is Epoxy Grout Actually Worth the Hype?
Early on, I was skeptical. They say epoxy grout is more expensive and tricky to work with. I made the mistake of dismissing it as just another trend. But after researching, I found out that epoxy grout is inherently resistant to water, stains, and mold—making it perfect for showers. In fact, according to industry specialists, epoxy grout can last up to 10 times longer than traditional cement-based grout, saving you money and hassle in the long run.
If you’ve ever faced the disappointment of reapplying grout that quickly discolored or cracked, you know how discouraging it can be. That’s why I urge you to consider this alternative. Have you faced the frustration of tile grout that refuses to stay clean or that crumbles after a couple of years? If so, you’re not alone—and there’s a solution that might just change the game.
Next, I’ll walk you through the exact steps I took to incorporate epoxy grout into my shower renovation, ensuring a durable, maintenance-free finish that keeps looking great year after year. Trust me, once you see the difference, there’s no turning back.
Prepare Your Workspace Thoroughly
Before starting the epoxy grout application, I cleared out the entire shower area and used painter’s tape to mask off adjacent tiles. This prevents accidental smudges and keeps your edges crisp. I also mixed a batch of epoxy grout in a clean bucket, following the manufacturer’s instructions carefully. Ensuring the workspace is clean and organized is crucial for a smooth application and a flawless finish.
Mixing the Epoxy Grout Correctly
Mix the components in small batches to prevent waste and ensure freshness. I used a drill mixer attachment to blend the epoxy and hardener thoroughly until the mixture was smooth and uniform. Unlike traditional grout, epoxy requires precise mixing to avoid clumping or incomplete curing, which can compromise durability.
Applying the Epoxy Grout Effectively
Using a rubber float, I loaded the grout and pressed it into the joints at a 45-degree angle. I scraped off excess grout from the tile surface with the float, applying consistent pressure to fill each joint completely. Applying the grout firmly ensures no air pockets or gaps, leading to a stronger, more resistant seal. During this process, I worked in small sections to keep the epoxy from setting prematurely, which can happen quickly.
Smoothing and Cleaning the Joints
After the grout cured for about 15 minutes, I used a damp grout sponge to gently wipe away excess material from the tile surfaces. I rinsed and wrung the sponge frequently to avoid transferring grout residue and kept a clean cloth nearby for final polishing. This step is vital: a clean sponge prevents haze buildup and leaves smooth joints that are less prone to mold growth.
Final Inspection and Curing
Once the grout was visibly set, I removed the painter’s tape and inspected the joints for cleanliness and uniformity. I avoided shower use for at least 24 hours to allow full curing. Proper curing is essential for epoxy grout to achieve maximum strength and stain resistance. Patience here pays off with a maintenance-free finish that lasts over a decade.
While many DIY enthusiasts focus on the basics of flooring and shower installation, there are common myths and nuanced mistakes that can undermine even seasoned homeowners’ efforts. One prevalent misconception is that applying a standard sealant or primer guarantees longevity; however, professionals know that the timing, surface preparation, and product choice are critical for durability. For example, many overlook the importance of properly leveling subfloors before installing tiles, leading to cracks and uneven surfaces over time—a mistake thoroughly discussed in expert guides like [Flooring Installation Mistakes to Avoid](https://tilecraftsmens.com/flooring-installation-mistakes-to-avoid-for-a-seamless-look).
An advanced trap involves underestimating moisture levels, especially when installing over concrete slabs. Excess moisture can cause adhesives to fail and tiles to delaminate, a problem highlighted by industry research emphasizing the need for moisture testing before installation. Skipping this step is a common error that leads to costly repairs later.
When it comes to baseboards, many believe that mitered corners and straightforward nailing suffice for a professional finish. In reality, achieving perfectly aligned, gap-free joints requires precise measurement, scribing for uneven walls, and sometimes using backer rods or shims. The subtlety here is that even slight miscalculations can result in gapping or warping over time, detracting from the overall aesthetic. For insights on elevating your interior with expertly installed baseboards, see [Baseboards Makeover](https://tilecraftsmens.com/baseboards-makeover-elevate-your-interior-with-simple-updates).
The shower installation process harbors its own set of advanced pitfalls. A common myth is that waterproofing membranes are universally sufficient without detailed attention to overlaps and sealant application. Neglecting to apply sealant at critical points, such as corners and joints, can cause leaks that are hard to detect until damage occurs. Proper sealing and the use of appropriate waterproofing techniques are discussed extensively by shower renovation experts, emphasizing the importance of meticulous work.
For anyone aiming at a flawless, long-lasting finish, understanding the nuances of flooring, baseboard, and shower installation can make the difference between a project that lasts and one that needs frequent repairs. The key is to go beyond the surface and pay attention to details that many overlook. Remember, mistakes like rushing the prep work or choosing the wrong materials often lead to failure. For more advanced strategies, you might find my articles on [Creating a Spa-like Shower](https://tilecraftsmens.com/creating-a-spa-like-shower-experience-tips-tricks) or [Top Trends in Flooring Installation for 2025](https://tilecraftsmens.com/transform-your-flooring-top-trends-in-installation-for-2025) helpful.
Have you ever fallen into this trap? Let me know in the comments.
Keep It Working with the Right Tools
Maintaining your installed flooring, baseboards, and showers requires more than just routine cleaning—it hinges on using precision tools that ensure longevity and aesthetics. One of my go-to tools is the digital angle finder. I rely on this device when adjusting baseboards or scribing them to uneven walls; it guarantees that every cut and alignment is precise, reducing gaps and gaps that can lead to moisture infiltration or visual imperfections. For example, when scribing baseboards on an uneven stone floor, a specialized scribing tool complements the angle finder, making this meticulous task manageable even for DIYers.
For caulking and sealing, I always choose a high-quality, mold-resistant silicone syringe. Applying sealant properly around shower niches or where baseboards meet floors prevents water intrusion—a leading cause of long-term damage. Remember, the squeeze-biston method, where you gently apply and smooth out the bead with a damp finger or a silicone finishing tool, yields cleaner, more durable joints. A little Invest in a professional-grade game helps prevent leaks and mold growth that can be very costly down the line.
Software and Planning Make a Difference
In addition to physical tools, I use project management software like Trello to keep track of maintenance schedules, especially for flooring and shower inspections. Routine checks on grout lines, caulk, and sealers are essential for early detection of issues. For long-term results, following a maintenance schedule is crucial: replace or reseal sealers every 2-3 years, and inspect grout for cracks or discoloration. Keeping detailed records ensures you don’t forget vital tasks, particularly in larger homes or multi-room installations.
How do I maintain my flooring and fixtures over time?
Regular upkeep is key—cleaning, sealing, and inspections prevent small issues from becoming costly repairs. I recommend adopting a proactive approach: gentle cleaning with pH-neutral solutions, prompt re-sealing of grout lines, and using specialized tools like grout scrapers and silicone applicators to make repairs easier. Predicting future trends, I believe improvements in smart sealing materials and self-healing grout systems will happen soon, making maintenance even simpler. To stay ahead, always invest in quality tools and products designed for longevity, and don’t skimp on routine checks. For further insights, check out classic installation secrets that still apply during maintenance routines—like ensuring proper adhesion and sealing.
Try adopting a quarterly inspection routine, utilizing the latest tools I mentioned, and you’ll notice your floors and fixtures stay pristine longer, saving you time and money. Remember, taking small but consistent actions now wards off bigger headaches later.
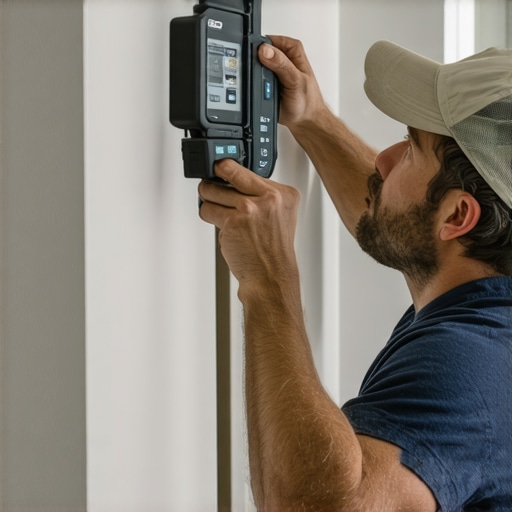
The Toughest Lessons I Wish I Knew About Flooring and Shower Installations
- One of the hardest truths I’ve faced is that shortcuts during prep work can haunt you years down the line. Waiting to level a subfloor or skipping moisture tests might seem minor at the moment, but these oversights often lead to costly repairs and frustration.
- Integrating high-quality materials like epoxy grout has taught me the importance of thinking long-term. It might be more expensive upfront, but the durability and ease of maintenance it offers are well worth the investment, preventing endless scrubbing and staining issues.
- I’ve learned that attention to detail during sealing—especially at corners and joints—can make or break the waterproofing integrity. Overlooking these subtle steps can result in leaks and mold growth, turning a beautiful bathroom into a maintenance nightmare.
- My biggest takeaway? Patience and meticulousness during installation pay off exponentially. Rushing through steps to save time now will only cost more in repairs and replacements later, so take your time and do it right.
- Finally, understanding that every home and project has unique quirks helped me adapt techniques—like custom scribing baseboards or ensuring even grout application—leading to a truly professional finish that endures the test of time.
Tools and Resources That Raised My Game
- Digital Angle Finder: Precise cuts are essential, especially when fitting baseboards on uneven surfaces. This tool helped me achieve seamless joints and avoid gaps, making my finish look professional.
- High-Quality Silicone Sealant: Choosing a mold-resistant, durable sealant around the shower and baseboards prevented water intrusion, saving future headaches and keeping mold at bay.
- Project Management Software like Trello: Staying organized with maintenance schedules and inspection notes ensured I didn’t forget crucial tasks like resealing grout or checking for cracks, extending the life of my installations.
- Trusted Readings from Industry Experts: Resources like [Flooring Installation Mistakes to Avoid](https://tilecraftsmens.com/flooring-installation-mistakes-to-avoid-for-a-seamless-look) provided insights that helped me sidestep common pitfalls and achieve a smooth, lasting result.