

I’ll never forget the sound of that first $50 stick of solid oak baseboard snapping like a dry twig. It happened in a client’s Victorian-style foyer where every single wall seemed to be allergic to a straight line. I was young, arrogant, and convinced that enough 16-gauge nails would force any piece of wood to obey. I was wrong. By the time I finished, the trim looked like a series of jagged tangents, and the gaps between the wall and the wood were wide enough to hide a roll of pennies. It was a humbling failure that sent me back to the drawing board—literally. If you’ve been struggling with flooring installation mistakes to avoid, you know that the finishing touches like baseboards can make or break the whole room. Today, I’m showing you the ‘Flex-Glue Move.’ This is the specific technique I developed after years of trial and error to ensure your trim hugs those curves as tightly as a new carpet install.
[IMAGE_PLACEHOLDER]
Stop Fighting Your Walls and Use the Glue Instead
The biggest issue with curved walls isn’t the wood; it’s the tension. When you bend a board, it naturally wants to return to its straight state. This creates a constant outward pressure that eventually pulls nails right out of the drywall. I used to think I could just caulk the difference, but as we’ve discussed before, cracking caulk is a sign of movement you shouldn’t have allowed in the first place. The ‘Flex-Glue Move’ involves using a high-tack, flexible polymer adhesive in tandem with the kerf cut trick. This combination doesn’t just hold the board; it deadens the internal tension of the material. Have you ever tried to nail a board into a curve only to have it pop out ten minutes later? It’s infuriating. It feels like trying to fold dry spaghetti without it breaking. But here’s the good news: once you master the glue-assist, those curves become the easiest part of the job.
Does an Adhesive Really Provide a Better Hold Than Nails?
It’s a fair question to be skeptical. We’ve been told for decades that nails are the gold standard. However, according to the Adhesive and Sealant Council, modern construction adhesives distribute stress across the entire surface area of the joint rather than concentrating it at a few small points like a nail head. This is crucial for curves. When I first started, I ignored glue because I thought it was ‘cheating’ or ‘lazy.’ That mistake cost me hours of rework and wasted material. Now, I won’t touch a curved wall without a tube of high-performance flex-glue. If you’re worried about the mess, don’t be. When you combine this with shimming secrets, you get a professional finish that looks like it was custom-molded to the room. Have you ever had a piece of trim snap on you right at the end of a long day? Let me know in the comments—I need to know I’m not the only one who’s been there!
Prep Your Trim with Precision Kerf Cuts
Before you even think about reaching for the glue, you have to prepare the wood to bend without snapping. This is where the kerf cut trick for bending baseboards around curves becomes your best friend. Essentially, you are removing material from the back of the board to give it ‘ribs’ that can compress or expand. I remember a project in a tight circular powder room where the radius was so small it felt like I was trying to wrap the trim around a basketball. I didn’t cut deep enough on my first attempt, and crack—there went $40. The secret is to use a miter saw to cut about two-thirds of the way through the thickness of the board every half-inch. If the curve is particularly aggressive, you might need to space them even closer. To prevent the face of the wood from tearing during this process, always use the painters tape trick for splinter-free baseboard cuts by wrapping the front of the board before you start slicing. 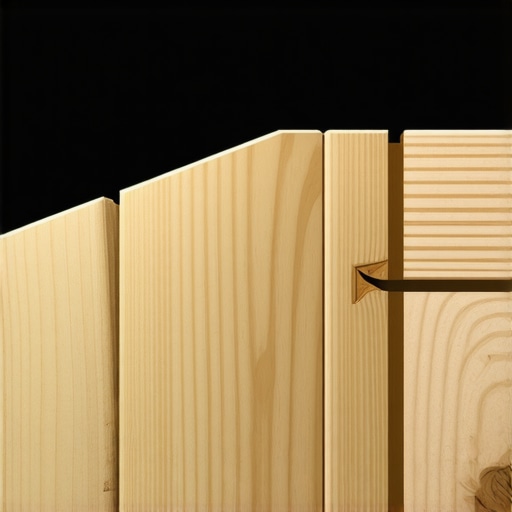
Why High-Tack Adhesive is Your Best Friend
Once the board is flexible, the adhesive does the heavy lifting. Think of the glue as a permanent clamp that works 24/7. While the glue assist trick for wide plank hardwood floors is about preventing squeaks, in baseboard work, it is about fighting the wood’s memory. Use a zig-zag pattern of a high-performance polymer adhesive on the back of the trim. I once worked on a renovation where the homeowner had tried to use cheap liquid nails on a curved wall; by the time I arrived, the trim had literally peeled itself off the wall like a giant scab. You need something with a ‘high-grab’ rating. When you press that board against the wall, the vacuum seal created by the adhesive is often stronger than the nails themselves. This is especially vital when you are dealing with moisture-rich areas like showers and bathrooms where humidity can make wood expand and contract more than usual.
How to Anchor When the Studs Disappear
The biggest frustration with curved walls is that the studs never seem to be where you need them. You’ll have a beautiful bend going, but no solid wood to nail into at the apex of the curve. In these ‘dead zones,’ I rely on the hollow wall anchor that actually holds baseboards. By pre-drilling a tiny hole and using a specialized anchor, you can pull the board tight against the drywall while the glue sets. If you still find yourself with minor light leaks at the top of the trim, don’t panic. Knowing how to fix baseboard gaps on curved walls with a bit of flexible filler will save your sanity. I once spent three hours trying to scribe a board to a wonky plaster wall before realizing that a combination of a shim and a little bit of ‘flex-fill’ would have given me a perfect result in ten minutes. Remember to respect the expansion gap rule as well; even though you’re gluing the trim to the wall, the floor underneath still needs room to breathe.The common wisdom in the trades often tells you that if a baseboard is pulling away from a curved wall, you just need a bigger nail gun or more fasteners. I’m here to tell you that’s the fastest way to split a sixty-dollar piece of cherry or oak. In my years of fixing flooring installation mistakes, I’ve seen more trim ruined by ‘nail-happy’ installers than by the curves themselves. One massive myth is that you should only nail into the bottom plate of the wall. The truth is that why you should never nail baseboards into the bottom plate only comes down to leverage; it simply doesn’t provide enough resistance to counteract the lateral force of a bent board. You must hit the studs, even if it means using a high-end sensor to track them through thick drywall.
Why More Nails Usually Means More Problems
When you over-nail a piece of trim, you create multiple stress points. If the wood expands—and it inevitably will—those nails act as fixed anchors that prevent the wood from moving naturally. According to the USDA Forest Products Laboratory, wood is a hygroscopic material that constantly seeks equilibrium with the surrounding humidity. If you haven’t performed the moisture meter test every flooring pro uses, you’re basically guessing at the wood’s stability. When that wood swells and it’s pinned down by forty nails, it doesn’t just stay put; it cups, splits, or forces the nails to ‘blow out’ the finished face. It’s the same logic why carpet install pros emphasize mechanical tensioning over just stapling—if you don’t respect the material’s physics, it will fight back.
Can a Single Bead of Glue Outperform Twenty Finish Nails?
The short answer is yes—if it’s the right high-performance polymer. While many DIYers worry about the mess, pros know that an adhesive creates a continuous bond that distributes the load across the entire surface. Think of it like this: would you rather hold a heavy object with twenty needles or the full palm of your hand? The adhesive provides that ‘palm’ support. If you’re still seeing light between the trim and a wavy wall, stop reaching for the hammer and learn how to fix baseboard gaps without replacing the trim. Sometimes, the fix is a better scribe or a specialized flexible filler that moves with the house. 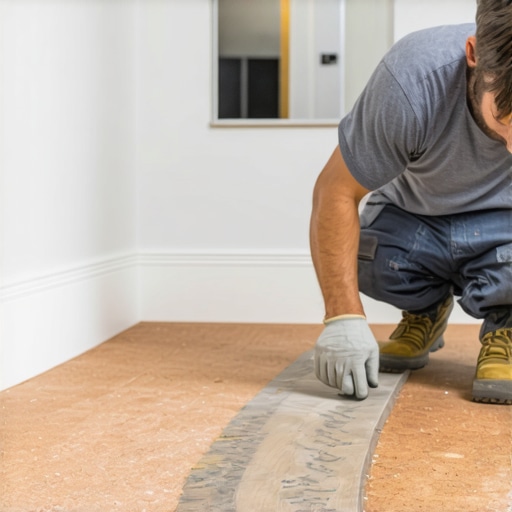 Another trap I see often is ignoring the ‘memory’ of the wood grain. Even when using the kerf cut secret for wrapping baseboards around columns, the fibers want to return to their straight state. If you don’t allow the adhesive to fully cure before removing your temporary braces, you’re asking for a midnight ‘pop’ that sounds like a gunshot. Have you ever fallen into this trap and woken up to a piece of trim hanging off the wall? Let me know in the comments!Once the trim is up and the glue is set, the real work of longevity begins. I used to think the job ended when the last nail was hidden, but I quickly realized that a professional finish requires a long-term maintenance mindset. If you want to avoid common flooring installation mistakes, you need to own an oscillating multi-tool. It is the only tool that allows for those surgical flush cuts against existing casings. I specifically use a brushless Fein Multimaster because the vibration dampening saves my hands during eight-hour shifts. When you are trying to master the undercut saw secret for professional doorway transitions, this tool is the difference between a gap-free floor and a mess. I also swear by a 360-degree green beam laser level. Red lasers are fine for dark closets, but if you are working in a sun-drenched living room, the green beam is the only way to ensure your baseboard line stays perfectly level across thirty feet of wavy floor.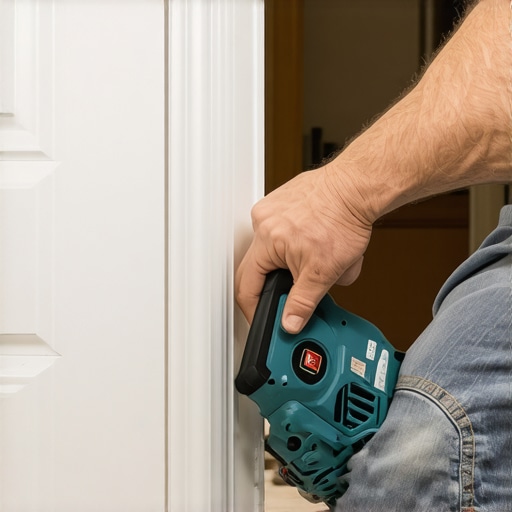
The Oscillating Multi-Tool Is Your Secret Weapon
Beyond just the initial install, keeping these finishes looking sharp means knowing how to handle the inevitable house settling. The National Wood Flooring Association (NWFA) Technical Publication No. C200 states that indoor relative humidity should stay between 30% and 50% to prevent excessive wood movement. If you ignore this, even the best ‘Flex-Glue Move’ won’t save your miters from opening up. I always recommend clients keep a hygrometer in the room. It is a $15 investment that protects a $15,000 floor. For those with luxury vinyl, remember the pre-sand move for perfectly flush vinyl plank seams; it prevents the edges from catching on socks or vacuums, which is how most ‘unbreakable’ floors actually start to fail.
How do I maintain my flooring and baseboards over time?
Maintenance is not just about sweeping; it is about chemistry. For tiled areas, you must learn how to deep clean sanded grout without scuffing tile. I have seen homeowners ruin beautiful showers and bathrooms by using acidic cleaners that eat away the sealer. Stick to pH-neutral cleaners and a soft nylon brush. If you notice a crack in the corner of your shower, do not wait. Check my guide on shower repairs: when to fix vs. replace before a small leak becomes a structural nightmare.
Where the Future of Home Finishes is Headed
As we move deeper into the decade, I am seeing a massive shift toward sustainable, ‘living’ materials that actually look better as they age. We are moving away from the plastic-sheen of the early 2010s. Looking at top trends in installation for 2025, we are seeing more integrated baseboards—where the trim is actually flush with the drywall using a ‘Z-shadow’ bead. It is a technical nightmare to install but looks incredible. I challenge you: on your next project, do not just reach for the standard 3.5-inch MDF. Pick up a high-quality moisture meter and perform the moisture meter test every flooring pro uses before you even open a single box of material. It will change how you view wood forever.
The Hardest Lesson I Learned About Forcing Wood to Bend
If I could go back to that Victorian foyer where I snapped that first expensive oak board, I’d tell myself one thing: respect the grain. After two decades of installs, I’ve realized that humidity is the invisible hand that moves your trim. If you aren’t testing for moisture before you start, you’re just guessing. I also learned that patience is a tool just like a hammer; if you rush the cure time of your adhesive, you’ll be fixing flooring installation mistakes to avoid for weeks afterward. Finally, never underestimate the power of a relief cut; sometimes taking away material is the only way to make the remaining wood stay where you want it without a fight.
My Go-To Gear for a Precision Finish
I don’t leave for a job site without my Fein Multimaster; it is the only tool that allows for the surgical precision needed for gap-free transitions. I also swear by the Wagner Orion moisture meter to ensure the wood is stable before the first cut. For the glue itself, a high-tack polymer adhesive is my absolute gold standard. These tools aren’t just gadgets; they are the difference between a job that looks good for a month and one that stays perfect for a lifetime. If you are serious about your results, invest in a 360-degree green beam laser level—it turns a guessing game into a guaranteed straight line even across wavy floors.
Building a Legacy One Room at a Time
Mastering the ‘Flex-Glue Move’ is about more than just aesthetics—it’s about pride in your craft. Whether you are performing a simple baseboards makeover or embarking on a complete step-by-step flooring installation, taking the time to handle curves properly sets your work apart from the standard contractor grade. Don’t be afraid to slow down and get the bend right. The physics of wood can be frustrating, but once you learn to work with the material instead of against it, you can create a space that feels truly custom. Have you ever tried to bend a piece of trim only to have it explode in your hands? Tell me about your most frustrating curve in the comments below!