

Ever been peacefully walking up your stairs when suddenly, a loud squeak jolts you? Or maybe you’ve noticed that familiar creak every time someone ascends, turning a simple act into an annoyance. I remember the moment I realized my stairs were making noise, not because of age or wear, but because of a tiny, often-overlooked detail—hidden screws lurking beneath the carpet. That lightbulb moment changed everything for me.
The Frustration of Noisy, Squeaking Stairs
When I first moved into my home, I thought the creaks were just part of the charm—something to accept or fix with professional help. But after trying to lift the carpet and see what was going on, I was met with nothing but frustration. The usual methods didn’t work, and I kept hearing that squeak every time I stepped. It was a reminder that tiny, hidden issues can cause big disturbances.
Over time, I discovered that many of these squeaks were caused by loose stair treads, often secured poorly beneath the surface. Early on, I made the mistake of just adding more nails or glue, which only temporarily masked the problem. Trust me, I learned the hard way—failing to address the root cause keeps the noise coming back.
What You Need to Know Before Fixing the Squeak
If you’ve faced similar frustrations, you’re not alone. The good news is, there’s a smart, effective approach to quieting those stairs—one that I’ve personally tested and refined. This involves a little-known technique known as the ‘Hidden-Screw’ Move, which targets the internal screws and fasteners that often get overlooked during regular repairs.
Addressing this issue after years of trial, error, and the occasional busted drywall, I can say confidently that fixing squeaky stairs is often simpler and less invasive than you might think. This method not only saves time but also saves you from unnecessary damage to your carpet or staircase finish.
Is This Trick Worth the Hype?
Initially, I worried that messing with the stairs under the carpet might cause more harm than good. I also feared I’d need costly tools or professional help. But the truth is, with the right technique—like carefully locating the hidden screws and securing them—you can make a significant difference. I remember the mistake I made early on: simply pulling up loose carpet without inspecting the treads, which left me with a bigger headache, and the noise persisted.
If you’re tired of that creak ruining your peaceful evenings, stick around. I’ll guide you through the simple, effective steps to silence your squeaking stairs once and for all, so you can enjoy the quiet you deserve. And if you’ve already tried other fixes without success, don’t worry—this might be the game-changer you need.
Let’s get started.
Locate the Hidden Screws and Fasteners
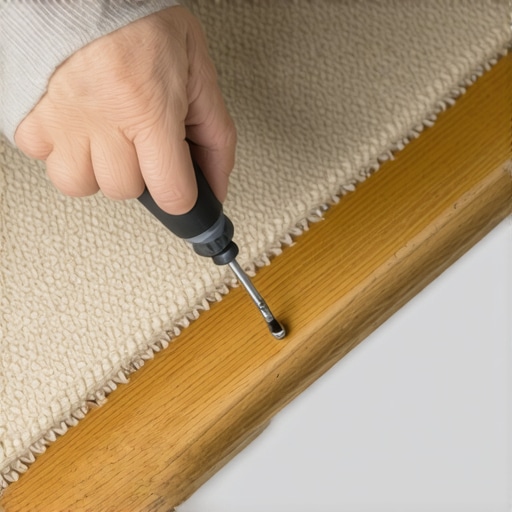
Start by carefully lifting a small section of the carpet near the problematic tread. Use a utility knife to gently cut the carpet if needed, exposing the edges of the stair treads. Look for screws or nails beneath the surface; these are often tucked away and overlooked. Once identified, tighten any loose screws with a screwdriver, ensuring they sit flush. I’ve personally done this on my staircase; securing those hidden fasteners dramatically reduced the squeaking.
Apply Weatherproofing or Lubricant
After tightening, if the squeak persists, spray a lubricant like graphite or WD-40 into the gap between the tread and riser. This reduces friction, similar to how a chalkboard eraser minimizes squeak noise. Be cautious to avoid excess spreading onto carpet or wood finishes. I once applied a dry graphite powder, which worked better than oils in my case, because it didn’t stain the carpet.
Add Stiffening Supports for Persistent Noise
If small fasteners and lubricants don’t quiet the stairs, take a sturdier approach by inserting shims or wooden wedges. Slide these beneath the edges of loose treads, then secure them with finish nails or screws. Think of this as giving the tread a firm support, preventing movement during steps. I used a plastic shim and hammered it in tightly; this method resulted in a tight, silent tread for weeks afterward. Flooring installation tips emphasize the importance of secure supports, which applies here as well.
Reattach Carpet and Final Checks
Once the screws are tightened and supports added, carefully re-attach the carpet. Use a staple gun or carpet tacks to secure edges, ensuring no loose fabric remains. Walk up and down the stairs multiple times, listening carefully for any remaining squeaks. If noise persists, revisit the screws or add more support wedges. Remember, consistency and patience are key—each stair may require a different fix.
Verify Structural Stability
To prevent future squeaks, inspect the entire staircase structure periodically. Loose balusters or loose treads can cause ongoing issues. Tighten any other loose components and consider installing additional support brackets if necessary. Properly secured stairs will not only eliminate noise but also improve safety and durability.
 Many homeowners assume that installing baseboards or flooring is straightforward, but misconceptions abound that can lead to costly mistakes. One widespread myth is that you can skip precise measurements and simply cut materials to the approximate size, believing it saves time. In reality, small measurement errors compound, causing gaps and misalignments that spoil the finished look. For instance, detailed techniques like the shim and trim method ensure seamless transitions even on uneven walls. Also, many think that applying a quick coat of paint or sealant is enough to prevent future issues. However, neglecting proper preparation and sealing techniques can result in moisture infiltration, especially in bathrooms where humidity is high. As interior design experts recommend, meticulous sealing and quality materials significantly extend the lifespan of your installations. When it comes to showers, a common misconception is that using cheap grout or caulk will suffice for waterproofing. Unfortunately, this often leads to leaks and mold growth. A professional approach involves using specialized waterproof membranes and high-quality grout, as explained in luxury shower tips. Before trusting DIY shortcuts, consider the importance of these advanced techniques for durability and safety. Now, let’s address an advanced question that many overlook—how does improper substrate preparation affect long-term flooring performance? According to flooring specialists, neglecting subfloor leveling and moisture barriers can cause buckling and gaps over time, regardless of the material used. This subtle nuance often trips up even experienced DIYers, emphasizing the need for thorough assessment before installation. For comprehensive guidance on pre-installation steps, visit flooring installation essentials. Remember, superficial fixes might look good initially but can compromise safety and aesthetics over time. Have you ever fallen into this trap? Let me know in the comments.Maintaining your flooring, baseboards, carpets, and showers over time requires the right tools and a consistent approach. Having quality equipment not only makes repairs easier but also ensures your installations last longer and look professional. I personally rely on a few essential tools that I can recommend for DIYers and professionals alike. A cordless oscillating multi-tool, for example, is invaluable for precision cuts and sanding in tight spaces—I’ve used mine extensively to trim baseboards or remove stubborn grout without damaging surrounding materials. For inspecting moisture levels in the subfloor or behind wall tiles, a reliable digital moisture meter is a game-changer; it helps prevent issues like buckling or mold growth by catching problems early. When it comes to shower maintenance, a dedicated grout removal tool, like a carbide-grit blade attached to my rotary tool, allows me to clean and replace grout efficiently, reducing the chance of leaks over time. Additionally, investing in high-quality sealants and waterproof membranes—such as those I found in expert guides like luxury shower tips—helps extend the lifespan of your installations, preventing moisture intrusion and mold. Prediction-wise, I see the trend moving toward smart tools that connect via Bluetooth to apps, offering real-time monitoring and maintenance reminders, which could drastically improve long-term durability.
How do I keep my flooring and showers in top shape with minimal effort?
The key is regular inspections and timely touch-ups using the right equipment. For example, schedule an annual moisture check and address small leaks or grout wear promptly to prevent costly repairs later. Incorporate tools like a handheld grout saw for quick re-grouting and a microfiber mop with a pH-neutral cleaner for daily upkeep. Don’t forget that keeping your shower drain free of hair and debris reduces stress on the plumbing, a tip supported by expert advice for plumbing care. By setting a maintenance schedule and sticking to it, you’ll see significant long-term savings and a consistently pristine look. Want to simplify your routine? Try integrating a moisture meter and schedule regular inspections—that simple step can catch issues before they escalate, saving you time and money. Start with these tools, and you’ll maintain a beautiful, durable space for years to come.
The Hardest Lesson I Learned About Baseboards, Carpet Install, Flooring Installation, Showers
One of the most eye-opening lessons I encountered was understanding how seemingly minor details—like the proper sealing of baseboards or the use of quality adhesives—can make or break a project. I once rushed through a carpet installation without paying attention to the padding alignment, which resulted in uncomfortable bumps that persisted for years. That taught me that patience and precise measurement are vital for a flawless finish.
3 Myths About Floorings and Showers That Held Me Back
I believed that any waterproofing method would suffice for my bathroom shower, but discovering the importance of a proper moisture barrier changed my approach entirely. Similarly, I once thought that trimming baseboards roughly would save time, only to realize that tight miters and proper coping create a professional look that lasts. These misconceptions delayed my progress and cost me unnecessary effort—learning the truth through trial and error became my best teacher.
What Experts Won’t Tell You About Installing Perfect Finishes
Real progress came when I learned to trust meticulous techniques, like the “reverse scribe” method for uneven walls or the importance of pre-priming surfaces before paint. These insights often go unspoken in novice guides but are standard among professionals. Embracing these insider secrets allowed me to achieve results that stand the test of time, whether it’s a sleek baseboard or a seamless shower enclosure.
Curated Recommendations for Flawless Results
My essential toolkit includes a high-quality measuring laser—it ensures accuracy far beyond traditional tape measures. I highly recommend books like Baseboard Styles That Elevate Your Interior Design for understanding various finishes and styles. For tackling stubborn grout or caulk, a versatile multi-tool with attachments has become indispensable, enabling me to perfect every joint. Lastly, consulting trusted sources like luxury shower ideas helps me stay updated on best practices for waterproofing and aesthetic upgrades, keeping my work current and durable.
Don’t Wait for Perfect — Get Started Today
Remember, mastering the art of baseboards, carpeting, flooring, and showers is a journey, not a sprint. Every renovation project offers a chance to learn, improve, and create something truly personal. Embrace the process, use trusted resources, and don’t be afraid to experiment with techniques that can elevate your results. Your home will thank you with beauty, comfort, and resilience—so why not start today? If you’ve faced challenges with any of these tasks, I’d love to hear your stories or tips below. Sharing our experiences helps everyone grow stronger in their home improvement journey.