

It was one of those gut-wrenching moments that every DIYer dreads—standing back after a long day of painting baseboards, only to realize the lines are uneven, drips are everywhere, and the edges look downright amateurish. I remember thinking, “All this effort, and it looks like I did it in a rush.” That epiphany led me down a rabbit hole into the world of primers, brushes, and those elusive tricks to get perfect results.
The Trick to Flawless Baseboard Finish That Nobody Tells You
Over the years, I’ve learned that a secret weapon in achieving ultra-smooth, professional-looking baseboards isn’t just high-quality paint or meticulous brushwork. It’s a specific type of primer—known as high-build primer—that creates a flawless canvas. When I first heard about it, I was skeptical. But after my initial success, I was hooked. Today, I’m going to share what I discovered: why high-build primer is my go-to step for hassle-free, stunning results every time.
Is the Hype About High-Build Primer Just Marketing Buzz?
I’ve seen plenty of tutorials touting certain primers as miracle workers, but the truth is, I made a classic mistake early on: I skipped proper surface preparation, assuming that any primer would do. That mistake made my paint job uneven and prone to cracking. When I finally started using high-build primer, I realized it’s not about fancy labels—it’s about how it fills in tiny imperfections, creating a perfectly smooth surface. According to industry experts, using the right primer improves paint adhesion and finish quality significantly (source).
So, if you’ve ever been frustrated by visible brush strokes or uneven edges, this primer might just become your best friend. But before diving into the application process, let’s consider why this step makes such a difference—and whether it’s worth the effort for your project. Ready to transform your baseboards from rough to refined? Let’s get into the details that will change your painting game for good.
Prime Like a Pro
Start by thoroughly cleaning your baseboards to remove dust, grease, or loose paint. Use a damp cloth or a gentle cleaner to ensure a smooth surface. Once dry, lightly sand the surfaces with fine-grit sandpaper to improve primer adhesion and eliminate imperfections. Think of this step as preparing a canvas before painting—it sets the stage for a perfect finish.
Choose the Right Primer
Select a high-build primer designed for wood or drywall that can fill in minor surface imperfections. My personal favorite is a product that creates a sponge-like base, leveling out surface flaws. Remember, a quality primer saves you time and effort later, preventing uneven paint coats or visible flaws. You can explore more about baseboard trends in this guide.
Apply the Primer Precisely
Pour the primer into a clean, angled brush or a mini roller tray. Use a high-quality brush for detailed edges and corners, and a roller for flat surfaces. Start at one corner and work methodically along the length of the board, applying an even thin coat. Think of this process as spreading a smooth layer of butter on toast—avoid thick blobs that may drip or dry unevenly.
Tip: Use a Slip-in Edge Guard
To prevent messes on your wall and floor, attach painter’s tape just above the baseboard’s edge before priming. This ensures crisp, clean lines and reduces cleanup. Remember, patience here pays off—the primer needs adequate drying time, usually about 2 hours, before applying paint.
Address Surface Imperfections
While the primer is still tacky, look for any remaining bumps or gaps. Use a small putty knife to gently press filler into deeper imperfections or sand down raised spots once dry. This step is crucial because it creates a perfectly smooth surface, reminiscent of how a professional installer prepares every surface before finishing.
Rinse and Repeat if Needed
Inspect your primed surface. If you notice uneven coverage or missed spots, apply a second thin coat. Remember, multiple light coats are better than one thick layer, which can cause drips or uneven drying. This technique improves durability and ensures a flawless finish that lasts.
Sealing the Deal
Once the primer has fully dried—refer to the manufacturer’s recommended cure time—you’re ready to paint. Using a high-quality brush or roller, apply your chosen paint following the same careful, even strokes. Your baseboards will now have a professional, smooth appearance that makes the entire room pop.
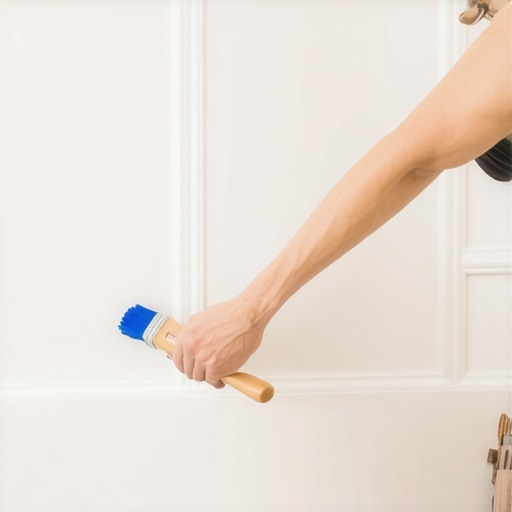 Many DIY enthusiasts and even some professional installers often fall prey to misconceptions that compromise the quality of their projects. For example, a prevalent myth is that choosing the thickest or most expensive flooring guarantees a perfect finish. However, the real secret lies in correct substrate preparation and an understanding of material limitations. Skipping proper surface leveling can lead to uneven floors or tiles cracking—something I learned the hard way by rushing the subfloor correction process, which is often overlooked despite its critical importance (see expert tips here).Once you’ve completed your renovation project, the real work begins—keeping everything in top shape over the long haul. Regular maintenance is essential to preserve its appearance and functionality, especially when it comes to flooring, shower enclosures, and baseboards. I recommend investing in specific tools and establishing routines that will save you time and money in the future.
For flooring, I personally rely on a high-quality steam mop with adjustable settings. It effectively removes dirt without the harsh chemicals that can damage delicate finishes. A microfiber mop head is gentle yet effective, and I always avoid excessive moisture—as too much water can warp wooden floors or loosen adhesives. For tiles, a grout brush fitted with stiff bristles ensures that grime doesn’t build up in corners and joints, maintaining the aesthetic and preventing mold.
When it comes to shower maintenance, a silicone squeegee is a must-have. Personally, I use a squeegee with a padded handle that makes it comfortable to reach into all corners, preventing soap scum and water spots from setting in. Additionally, applying a daily spritz of a water-repellent treatment helps in repelling mineral deposits, especially in hard water areas. For more stubborn stains or mold, I recommend a dedicated tile and grout cleaner that is safe for your specific materials.
Baseboards often accumulate dust and scuffs. For their upkeep, I use a soft-bristled, extendable duster combined with a gentle all-purpose cleaner. This combo allows me to reach high or tight spots without the need for ladders or step stools. When dealing with minor scratches or cracks, a flexible filler can be a quick fix to maintain a polished look.
Looking ahead, I believe the trend in maintenance will incorporate smart technology. Automated cleaning devices, such as robotic mops and UV sterilizers, are becoming more affordable and effective—making regular upkeep easier than ever before. Just as advanced installation techniques are evolving, the tools we use to maintain our projects are advancing rapidly.
How do I keep my installations looking fresh year after year?
One key is to develop a routine inspection schedule. Monthly checks for grout cracks, water leaks, or scuffed baseboards can catch issues early before they turn into costly repairs. Using specialized tools, like a moisture meter for the subfloor or a laser level for tile straightness, can help you identify problems before they worsen. For instance, ensuring your shower sealant remains intact prevents water damage and mold growth, which is essential for longevity (see expert tips here).
Try adopting an inspection habit and invest in quality maintenance tools; it will pay dividends in preserving your home’s beauty and value. Whether you’re tackling hardwood floors, shimmering tiles, or crisp baseboards, consistent attention is the secret to long-term satisfaction.
The Hardest Lesson I Learned About Flawless Finishes
One of my biggest realizations was that no matter how much experience you have, surface preparation always trumps fancy paint or brushes. Skipping thorough cleaning and sanding might seem insignificant, but it can sabotage your entire project, leading to uneven edges and a less-than-professional look. That lightbulb moment reminded me that a meticulously prepared surface is the foundation of success.
Tools and Resources That Changed My Approach
Investing in quality tools has been a game-changer. I swear by an angled high-quality brush for precise edges and a mini roller for flat surfaces—these make application smoother and more controlled. For primers, I trust brands that create high-build formulations, like the one I mentioned earlier for filling surface imperfections. Additionally, books like this guide have expanded my understanding of current trends and techniques.
Embracing the Journey with Confidence
The process of achieving beautiful, professional-looking baseboards isn’t just about technique; it’s about believing in your ability to learn and improve. Each project teaches patience, attention to detail, and the value of preparation. With every successful finish, I experience a boost of confidence that motivates me to try more challenging tasks. Remember, mastery comes with persistence—so keep experimenting, and your skills will grow exponentially.
Have you faced unexpected challenges when working on baseboards or similar projects? Share your stories below—I’d love to hear how you overcame them and what lessons you’ve learned along the way.