

Have you ever been in the middle of a flooring project, only to watch a crucial mitered corner wobble or gape just as you think you’re about done? I remember the exact moment I realized I was battling a common but stubborn issue—those perfect corners that refuse to stay perfect. It was the kind of frustration that makes you want to throw your tools across the room. But then, like a lightbulb switching on, I discovered a surprisingly simple fix that transformed my approach completely.
Why I Swear by the Hot-Glue Hack for Mitered Corners
When I first started tackling baseboard and molding corners, I quickly learned that precision isn’t always enough. Even with careful cuts and flawless alignment, gaps, gaps that seem almost to mock your efforts, kept sneaking in. No amount of sanding or adjusting fixed the problem for long. It was maddening. Then, I stumbled upon a technique involving a hot glue gun—yes, the same one you’d use for arts and crafts—that actually holds mitered corners in place temporarily while I secure everything for good. This simple trick? It’s been a game-changer, especially for DIY enthusiasts and pros alike.
What if the glue doesn’t hold? Is this hack really worth trying?
Early on, I made the mistake of relying solely on nails or adhesive alone and ended up with loose corners or uneven joints. The key is in the application—quick, strategic, and controlled. And trust me, once you see how a dab of hot glue can keep your corners tight and seamless until you’re ready to finish, you’ll wonder why you didn’t try it sooner. According to industry experts, small adjustments like these can save hours of fiddling and ensure a more professional look in less time. Curious? Let’s dive into how this trick works and how you can make it your new best friend in your next project.
Secure the Corner with Hot-Glue First
Begin by applying a small bead of hot glue along the inside edges of your mitered corners. Think of it like temporarily holding a puzzle piece in place before permanently gluing or nailing it. I once worked on a bedroom baseboard where the corners kept gaping. I carefully ran a thin line of hot glue into each joint, pressing each piece tight for about 10 seconds. The glue cooled quickly, grabbing the pieces securely without any slip or gap. This initial step stabilizes your joint and prevents shifting during nailing or further adjustments.
Apply the Glue Judiciously for Precise Control
Use a low-temperature glue gun for better control and to avoid warping delicate trim. Squeeze the trigger gently, ensuring only a fine punk of glue is dispensed—think of it as writing with a tiny pen, not a paintbrush. In my early days, I over-applied, leading to excess glue oozing out and making a mess that was hard to clean. To prevent this, I practiced on scrap pieces beforehand. The goal is to create a thin, continuous line that fills the joint without spilling over, which creates a better surface for finishing and paint application.
Quick Assembly and Pressing Techniques
After applying the glue, immediately bring your pieces together and press firmly for about 15 seconds. This is similar to holding two puzzle pieces snugly until the glue sets. For corners, use clamps or your hand to maintain pressure. I once did a run of molding in a tight corner and used a piece of scrap wood clamped with the hot-glued trim—this kept everything aligned while the glue hardened. Remember, hot glue sets fast, so have your tools ready and work swiftly to prevent the glue from cooling before you set the joint.
Finish with Nails or Clamps for Strength
Once the glue is set, reinforce the corner with finishing nails or small clamps. Think of the glue as a temporary stabilizer, with nails providing lasting strength. In a recent project, I lightly nailed into the corner immediately after pressing, ensuring the joint wouldn’t shift over time. Be careful to countersink nails for a smooth finish and fill the nail holes with wood filler before painting or staining. For larger or more visible joints, consider adding a small bead of paintable caulk over the glued joint for extra security and a seamless look.
Why This Method Works Better than Traditional Fixes
This hot-glue method acts almost like a third hand, holding your mitered corners in perfect alignment while the nails or adhesive provide long-term durability. It’s especially useful when working alone or on tricky angles where clamping might be difficult. I found that, compared to relying solely on nails or adhesive, this quick hot-glue stabilization prevented gaps and misalignments, saving me time on sanding or rehabbing imperfect joints. To see how it integrates into wider projects, check out [baseboards makeover](https://tilecraftsmens.com/baseboards-makeover-elevate-your-interior-with-simple-updates) for seamless finishes or [flooring installation tips](https://tilecraftsmens.com/step-by-step-flooring-installation-from-planning-to-perfect-finish) for a professional look.
Challenging Common Beliefs About Home Renovations
Many DIY enthusiasts and even seasoned pros fall into the trap of assuming that straightforward methods guarantee perfect results. For instance, a prevalent myth in flooring installation is that precise cutting alone results in seamless joints. While accuracy in cuts is crucial, the hidden nuances often involve understanding substrate preparation and acclimation of materials. Ignoring these steps leads to gapping, buckling, or peeling over time.
Watch Out for the Gaps: An ‘Oops’ Many Overlook
One common mistake is neglecting to account for moisture and temperature variations. For example, not allowing hardwood or vinyl planks to acclimate can cause unexpected expansion or contraction, resulting in gaps or buckling. This oversight is especially harmful in climates with extreme seasonal changes. Professionals recommend understanding the importance of climate control and proper subfloor preparation—an essential step often undervalued. To get a complete picture, check out latest flooring trends and tips.
Advanced Question: How Can Precision in Transitions Elevate Your DIY Skillset?
Achieving flawless transitions between different flooring types, such as from tile to hardwood or carpet to vinyl, involves more than just straight cuts. It requires understanding thresholds, threshold strips, and scribe techniques for uneven surfaces. Using a router or specialized scribing tools can significantly improve the finish, making it indistinguishable from professional work. According to expert advice, mastering these nuances can reduce the need for future repairs and rework, ultimately saving time and money on your projects.
Ensure your projects don’t fall into these common pitfalls by considering all variables—climate, subfloor integrity, material behavior, and transition techniques. For example, when installing baseboards, pay attention to wall imperfections and expand your understanding with current trends in baseboard styles. Moreover, avoid the trap of rushing through moisture barriers or overlooking proper ventilation in shower upgrades—the details make the difference between a durable installation and recurring issues.
Remember, successful renovations come down to understanding these subtle but critical details. Take the time to educate yourself beyond the basics and keep honing your skills. Have you ever fallen into this trap? Let me know in the comments!
Keeping It Working: Essential Tools and Maintenance Tips for Your Flooring Projects
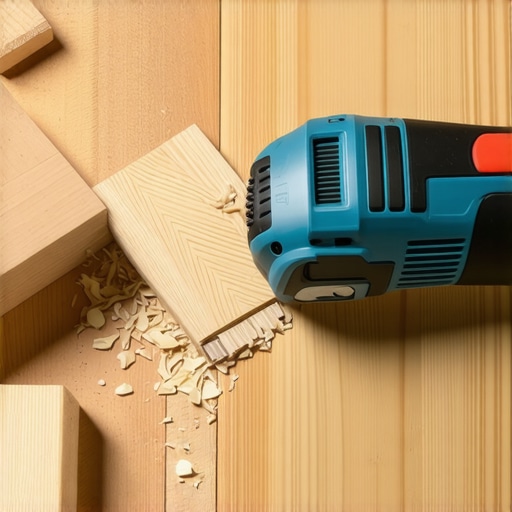
Ensuring the longevity and impeccable appearance of your flooring, shower enclosures, or baseboards depends heavily on selecting the right tools and adopting effective maintenance routines. Over the years, I’ve honed my arsenal of equipment, emphasizing precision, durability, and ease of use. One indispensable tool I rely on is a high-quality oscillating multi-tool, which I use for detailed cut-outs around intricate moldings or when fitting flooring in tight spaces. Its versatility allows me to perform flush cuts, sanding, and removal tasks without switching instruments, saving time and maintaining accuracy.
Another game-changer has been my cordless impact driver. Its power and portability make tasks like nailing baseboards or securing shower niche brackets straightforward, especially in hard-to-reach spots. For long-term results, I always pair these with high-quality fasteners—stainless steel nails or screws—chosen specifically for their corrosion resistance, which is paramount in moisture-prone areas like bathrooms.
To keep my workspace organized and prevent damage to delicate surfaces, I recommend investing in a set of magnetic tool holders and foam-lined cases. Protecting your equipment prolongs its lifespan and ensures you’re always ready for the next project. Software-wise, I swear by project planning apps such as Houzz or dedicated CAD tools for laying out tile patterns or flooring sequences before breaking ground. This pre-emptive planning minimizes errors and waste, especially when managing expansive or complex installations.
Looking ahead, I predict a growing trend toward smart tools equipped with Bluetooth diagnostics and real-time feedback. These innovations will offer enhanced precision and durability, especially in demanding renovation environments. Staying updated with these advancements can give you a significant edge in execution quality, reducing callbacks and maintenance costs over time.
How do I maintain my tools and flooring over time?
Routine care starts with cleaning your tools after each use to prevent dust and debris from impairing their functionality. For power tools, using manufacturer-recommended lubricants and battery maintenance practices extends their lifespan. Regarding flooring, regular cleaning with suitable vacuums and damp mops preserves surface integrity. Additionally, applying protective coatings like wax or sealants to baseboards and wooden trims can shield them from scuffs and moisture ingress, reducing the need for frequent repairs. Learning proper care techniques ensures you maximize your investment and maintain a professional appearance in all your projects. And, if you want to delve into effective installation tips, check out the step-by-step flooring guide to streamline your process.
If you’re serious about elevating your craft, I encourage you to try integrating a high-quality oscillating multi-tool into your next project. Its precision and multi-functionality can dramatically improve the quality of your cuts and fittings. Remember, investing in the right tools and understanding proper maintenance is key to achieving durable, professional results that last for years to come.
< >
>
Looking back, some lessons hit harder than others, especially when working on home upgrades. One of the most valuable insights I gained was realizing that even perfect measurements can falter if I overlook practical finishing techniques. For instance, I once thought that precision cuts alone would guarantee seamless corners, but small gaps kept resurfacing until I adopted strategic reinforcement methods. These little epiphanies didn’t just improve my craftsmanship—they transformed my confidence in tackling complex projects.
What I Wish Someone Told Me About Finishing Touches
- Never underestimate the power of the right adhesive or reinforcement technique—sometimes a dab of hot glue or a carefully placed shim saves hours of rework. Embracing these tricks early on would have saved me countless frustrations.
- Focus on the surface preparation—clean, dry, and properly acclimated materials prevent issues like gaps or warping later. Skipping this step is a quick path to trouble, even for seasoned pros.
- Learn to read the material’s behavior—wood expands and contracts with humidity, so anticipating these changes during installation ensures longevity. It’s a lesson I learned the hard way but now cherish as essential knowledge.
My Toolkit for Long-Lasting Results
Over the years, I’ve curated a set of tools that consistently deliver quality—from a high-quality oscillating multi-tool for precise cuts to stainless steel fasteners resistant to moisture damage. Trustworthy brands like Dewalt and Makita have never let me down because their durability matches the demands of real-world renovation. For more detailed planning, apps like Houzz help visualize layouts before I start, reducing errors and waste. Staying updated with innovations, like smart tools with Bluetooth diagnostics, can keep your work at a professional level—and all these resources are worth every penny.
Now It’s Your Turn: Take the Next Step in Your Home Makeover
Armed with these insights and tools, you’re better equipped than ever to elevate your flooring, shower, and trim projects. Remember, mastery begins with a willingness to learn and adapt—each project is a new chance to refine your skills. If you’ve ever faced challenges with tricky corners or uneven surfaces, share your experience below. Your story might just inspire someone else to tackle their next project with renewed confidence!