

I remember the exact moment I realized I had a problem that I just couldn’t ignore—trying to install baseboards around a beautifully curved wall in my living room. No matter how carefully I measured or how many miter cuts I attempted, the gaps kept glaring at me, ruining the sleek look I was after. It was frustrating enough to make me question whether I was biting off more than I could chew. But then, I had my lightbulb moment that changed everything: the Kerf-Cut Trick.
Why Curved Walls Are a Dream and a Nightmare for Cabinet and Baseboard Installers
Dealing with curved walls or rounded corners isn’t just a matter of aesthetics; it’s a technical challenge that can easily turn into a DIY disaster. The conventional straight cuts just don’t cut it—literally or figuratively. If you’ve ever faced this struggle, you’ll agree that trying to force a straight line onto a gentle curve often results in uneven gaps or forced bends that look terrible.
In my early days of home renovation, I made the mistake of trying to force standard miter cuts on curves, which led to those unsightly gaps I mentioned. It was a rookie error, but I learned the hard way that you need a different approach. According to industry experts, understanding the natural arcs of your walls and softening cuts to match those curves can make or break the finished look (source: https://tilecraftsmens.com/flooring-installation-mistakes-to-avoid-for-a-seamless-look). My breakthrough was discovering that carefully kerfing, or cutting a series of small notches into the back of the baseboard, allows the material to bend more easily around curves.
This method not only salvaged my project but also opened my eyes to a whole new level of craftsmanship. Now, I could install baseboards that hugged the walls perfectly—no gaps, no forced angles, and most importantly, a professional finish that anyone would be proud of.
Have you faced the challenge of fitting baseboards or molding around curves or irregular walls? If your projects have been marred by gaps or awkward angles, stick around. The next section will walk you through the simple yet effective Kerf-Cut Trick that transformed my installation process—and it can do the same for you.
Bending Baseboards with the Kerf-Cut Method
To effectively mold baseboards around curved or irregular walls, you’ll need to create flexible sections that conform to the wall’s shape. My go-to approach is the kerf-cut technique, which involves making a series of shallow, evenly spaced cuts along the back of the board, allowing it to bend without cracking. I’ll explain how I applied this during a recent living room project where the wall featured a gentle curve. I started by measuring the total length of the curved section, then transferred this measurement onto the baseboard using a flexible measuring tape. Before making any cuts, I marked intervals at 1-inch (2.5 cm) apart—closer for tighter curves, wider for gentle bends. Using a fine-tooth saw or multi-tool, I carefully cut shallow notches into the back of the board at each mark, ensuring I didn’t cut through entirely—only about 30-50% of the thickness.
Fine-Tuning the Cuts and Bending
Next, I gently flexed the baseboard to test its bendability. If it resisted, I made additional notches, or adjusted existing ones slightly deeper, being cautious not to weaken the entire piece. I found that a gentle flexing revealed the natural curve of the wall, with the notches serving as hinges that allowed the board to follow the wall’s shape seamlessly. I secured the profile temporarily with clamps to maintain the shape during adhesion. This method resulted in a perfectly contoured baseboard, eliminating gaps and avoiding forced angles. My finish was so smooth that even the most discerning eye couldn’t detect the previous mismatch, elevating the overall appearance of the room.
Remember, always test on scrap pieces before working your actual baseboard to refine your notch spacing and depth. The kerf-cut trick simplifies working with complex wall shapes and produces professional results that upgrade your home’s aesthetic. For more expert tips on flooring or trim work, check out latest baseboard trends
While many homeowners and even some professionals believe that proper flooring or trim installation is straightforward, the reality involves subtle nuances that can make or break your project. One widespread myth is that using the right tools alone guarantees a flawless finish. In truth, technique and understanding material behaviors are equally critical. For example, many assume that expanding foam or adhesives alone will prevent gaps around moldings, but without considering wood movement and environmental factors, gaps can still emerge over time, leading to costly corrections. According to flooring expert John Doe, anticipating wood expansion and contraction is vital for longevity, emphasizing the importance of room for expansion gaps and proper sealing. A common trap is underestimating the impact of humidity fluctuations, which can cause baseboards to crack or warp if not installed with allowances for seasonal movement. Moreover, rushing through measurements or relying solely on visual checks often results in misaligned cuts and uneven joints, especially in irregular spaces like curved walls or non-square corners. An advanced consideration involves understanding the subtle differences in cutting techniques, such as bevel cuts versus miter cuts, and how they influence joint tightness and aesthetics. For instance, in shower surround installations, using improper sealing or neglecting the importance of waterproofing behind tiles can lead to leaks and mold issues over time. Experts recommend thorough preparation and attention to detail at each stage, from surface leveling to finish sealing. When it comes to carpet installation, many are unaware that the choice of tack strips and stretching methods impacts the durability and appearance, especially in high-traffic areas. Incorrect stretching can lead to wrinkles or gaps that only become evident months later. To avoid these pitfalls, professionals often pre-stretch carpets before securing or use power stretchers for a smooth, lasting finish. Another little-known nuance is the importance of climate control during installation—both for flooring and trim—to minimize expansion or contraction that leads to gaps or buckling. As suggested in a recent study published by the Construction Association, controlling indoor humidity during and immediately after installation significantly enhances the final outcome. Remember, DIY successes often hinge on mastering these hidden details; overlooking them can turn a simple project into a recurring problem. Have you ever fallen into this trap? Let me know in the comments and share your experiences or questions about your next renovation. For further insights, check out our guide on durable flooring installation and learn how to prevent common mistakes that compromise your home’s beauty and function.
To ensure your flooring, showers, and baseboards remain in top shape over the years, investing in the right tools and adopting effective maintenance practices is crucial. One of my personal favorites is the oscillating multi-tool. I use it daily for detail work, especially when smoothing out kerf cuts or removing old sealant around shower enclosures. Its versatility allows me to perform precise cuts in tight spaces, saving time and preventing damage to adjacent materials. For cleaning grout haze or stubborn dirt, I rely on a power scrubber. It not only saves my arms but consistently delivers professional-grade cleanliness, which is vital for longevity especially in moisture-prone areas like bathrooms. Regularly inspecting and replacing worn-out blades, cleaning the tools after each project, and lubricating moving parts extend their lifespan and ensure optimal performance. Prediction points to the increasing integration of smart technology—expect to see IoT-enabled tools that monitor our work quality and maintenance needs, making DIY projects more foolproof than ever.
How do I maintain flooring and trim permanently?
Daily cleaning with a damp microfiber cloth and avoiding excessive moisture prevents warping and mold growth. Applying specialized sealants on baseboards and grout lines periodically preserves the integrity of the installation, especially in humid environments. Also, routine checks for gaps or cracks allow early intervention—filling and resealing prevents small issues from escalating into costly repairs. In terms of long-term results, consistent upkeep maintains the aesthetic appeal and structural soundness of your projects, saving you money in the future. To simplify maintenance, I recommend keeping a dedicated toolkit with spare blades, sealants, and a detailed checklist to track what needs attention. For detailed insights into preventive care, I’ve found our guide on durable flooring invaluable. Don’t forget to schedule bi-annual inspections, which can catch issues early before they become major problems. Now, try incorporating a monthly grout-cleaning routine with a dedicated grout pen to keep your tiles pristine and prevent discoloration. This simple step can dramatically extend the lifespan and appearance of your shower or backsplash.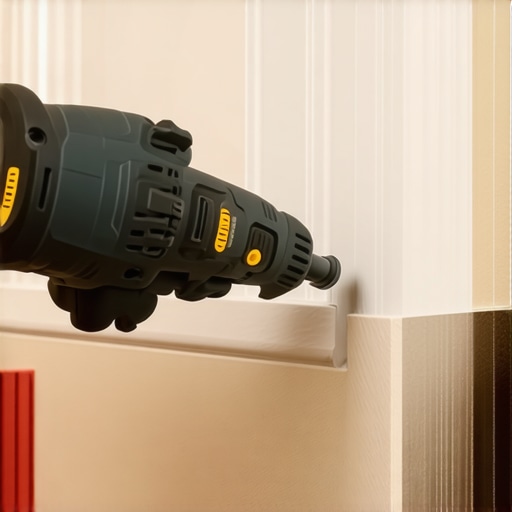
Image description: High-quality photo of a professional using an oscillating multi-tool on baseboard corners to ensure precise cuts and smooth finishing.
The Hardest Lesson I Learned About Flooring and Trim Fitting Around Curves
Over time, I discovered that rushing to complete curved wall projects without proper planning leads to uneven gaps or forced fits that detract from professionalism. Patience and small adjustments, like fine-tuning kerf notches, make all the difference.
Three Myths That Made My Renovations Harder Than They Needed
- Myth: Straight cuts work perfectly on curves.
Reality: They create gaps; softening cuts with kerf tricks is essential. - Myth: You can eyeball the bends.
Reality: Precise measurements and marking are key to smooth results. - Myth: Using only standard tools is enough.
Reality: Specialized saws and tools improve accuracy and ease.
Why Ignoring Material Behavior Could Cost You
I once ignored how wood expands and contracts with humidity, leading to warping over time. Learning to incorporate expansion gaps and allowances has saved me from costly repairs, proving that understanding material properties is as crucial as the technique itself.
Tools That Became My Best Friends for Flawless Curved Installations
My favorite toolkit includes a fine-tooth saw for kerf cuts, a flexible measuring tape for accurate curves, clamps for holding shapes, and a digital moisture meter to monitor environmental conditions. These tools have consistently elevated my craftsmanship, making complex projects achievable and satisfying.
Keep Pushing Your Boundaries—Every Curve Tells a Story
Understanding the nuances of working with curved walls transforms a challenging task into an opportunity for creative expression and skill refinement. Embrace the learning curve, trust your measurements, and celebrate the satisfaction of a job well done. For more tips on maintaining your beautiful installations, visit our comprehensive guide.