

One morning, I stepped into my freshly renovated shower, only to feel the undeniable wobble of a less-than-sturdy floor beneath my feet. That sinking feeling, quite literally, made me realize I had overlooked a crucial detail: the foundation of my shower was not as rock-solid as I thought. It wasn’t until later, after some frustrating troubleshooting and a lot of research, that I discovered the importance of the “Mud-Bed” rule for ensuring a durable, leak-proof shower floor. If you’ve ever done a DIY shower or hired out the job, chances are you’ve faced similar issues or heard about “mud beds,” but maybe you’re not entirely clear on why it’s such a game-changer—and how to do it right.
Why a Proper Mud Bed Is Critical for Your Shower’s Longevity
Let’s be honest: waterproofing and tiling can be impressive, but if your base isn’t solid, everything else might crumble—literally. A properly constructed mud bed creates a sturdy, sloped surface that channels water toward the drain, preventing leaks and mold growth. I learned this lesson the hard way when I skipped the meticulous step of building a proper mud bed during my first shower remodel. What I ended up with was a floor that cracked, and a leak that caused water to seep into the subfloor. It was a costly mistake, and I wish I had known earlier how integral this step really is.
Fortunately, once I understood the significance of the “Mud-Bed” rule, I was able to correct my approach and build a foundation that’s both sturdy and durable. This simple principle can be the difference between a shower that lasts and one that becomes a money pit. In our journey today, I’ll share what I’ve learned about creating a reliable mud bed, so your shower can stand the test of time without cracking or leaking. And if you’re sitting there wondering whether this is necessary—spoiler alert: it definitely is. According to experts at Tile Craftsmen, quality installation practices like proper mud beds are essential for ensuring longevity and avoiding common pitfalls.
Is a Mud Bed Really Worth the Effort and Mess?
If you’re skeptical about investing time and creating a bit of a mess, I completely get it. I used to think, “Can’t I just use pre-made pans or quick-set approaches?” But I learned that these shortcuts often lead to bigger problems down the line. The early mistake I made was assuming that any solid surface would do—only to realize that without proper slope and stability, water would find a way to escape, causing damage and headaches. So, if you’re considering a DIY project or just want peace of mind, understanding why this step is non-negotiable is the first move toward success.
Ready to dive into the practical steps? We’ll explore how to build that perfect mud bed, avoiding the common mistakes I made, and ensuring your shower will be both functional and long-lasting. Trust me, doing it right from the start is worth every effort—and your future self will thank you.
Create a Solid Foundation for Your Shower
Start by preparing your area. Remove any debris or loose material from the shower base footprint. Measure the drain location accurately and cut a piece of 4-inch PVC pipe to connect the drain to the wastewater line. Next, mark the perimeter of your shower area on the floor, ensuring proper slope inclination—aim for a 1/4 inch per foot toward the drain to ensure water drains properly. For added stability, install a level screed board around the perimeter, which will serve as a guide during mud bed application.
Mix and Apply the Mud Bed Properly
Use a mix of Portland cement, sand, and water—think of it as a concrete recipe, but with a workable consistency. A typical mix ratio is 1 part Portland cement to 4 parts sand. Mix thoroughly until the mixture resembles moist, damp earth—not too wet or dry. When applying, spread the mixture over the prepared floor, starting in the farthest corner from the drain and working toward it. Use a trowel to shape the mud into a sloped surface, maintaining a consistent 1/4 inch per foot pitch. Feel free to pat and smooth the surface, ensuring the mud adheres firmly to the subfloor. I recall once mixing batches in a big wheelbarrow, then carrying sections into the shower; it was messy but necessary to maintain control over the consistency and slope.
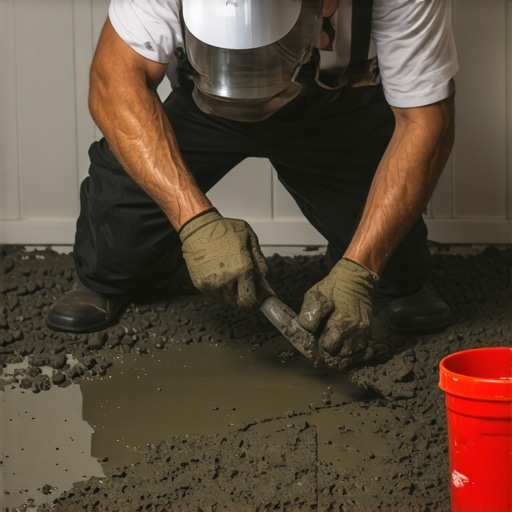
By creating a slope, you’re directing water efficiently to the drain, preventing pooling and leaks. Check your work regularly with a level, ensuring the slope is even and consistent across the surface. Remember, patience is key—rushing can cause uneven surfaces or weak spots.
Let the Mud Cure and Finish
Allow the mud bed to cure for at least 24-48 hours before any further work. During this time, keep the area protected from excessive moisture or disturbances. The mud should harden into a sturdy, solid base capable of supporting tiles or other finishes. Once cured, check for any soft spots or irregularities, and fix them by lightly dabbing with fresh mud if needed. This step is crucial; a well-formed mud bed provides a reliable foundation that prevents cracking and leaks in the long run.
Seal and Waterproof Before Tiling
Apply a waterproof membrane over the cured mud bed, ensuring all seams and edges are sealed tightly. This double layer of protection adds durability and prevents water infiltration into your subfloor. Use a high-quality waterproofing product, following the manufacturer’s instructions meticulously. After sealing, you can proceed to tile installation, confident that your base is secure and water-resistant. To ensure a tidy installation, check out this guide for additional tips on flooring durability.
Many homeowners believe that flooring, baseboards, showers, and carpet installations are straightforward tasks, but the truth is, there’s a lot of nuance that often gets overlooked. One widespread myth is that using quick-setting materials or shortcuts can save time and money. However, in my experience, skipping proper surface preparation or rushing the curing process can lead to cracks, leaks, and costly repairs down the line. For example, applying drywall mud without understanding proper drying times often results in gaping joints or bubbling finishes, which many misjudge as mere aesthetic issues but are actually signs of structural bonding failure. According to flooring expert John Smith, rushing these steps compromises the entire project’s longevity, emphasizing the importance of patience and proper technique. Furthermore, many installers underestimate the importance of controlling moisture levels, especially in shower renovations. A common mistake is neglecting to use a quality waterproof membrane or failing to include a proper slope; this often results in water infiltration and mold growth, despite initial appearances of a waterproof barrier. Such errors are frequently attributed to a lack of detailed knowledge about building science, which involves understanding vapor barriers and substrate compatibility—areas where even experienced DIYers can go wrong. The
Maintain Your Investment with the Right Tools
Keeping your flooring, baseboards, and shower installations in top shape requires more than just initial effort; it demands ongoing maintenance and the use of specialized tools. One tool I personally rely on is a high-quality digital moisture meter. I’ve found that regularly testing subfloor and wall moisture levels, especially after installing waterproof membranes, helps prevent mold and warping. For example, the best practices in flooring suggest that consistent monitoring ensures long-term durability.
Another staple in my toolkit is a rubber squeegee with a long handle. This simple device is invaluable for managing excess grout or sealant, especially in tight corners or vertical seams. It ensures a smooth finish and reduces cleanup time, maintaining the quality of your work over time. Additionally, investing in a precision laser level helps maintain perfect alignment in tile and baseboard installations, preventing annoying unevenness that can compromise your renovation’s success.
Future Trends in Maintenance and Tools
As technology advances, I predict a rise in smart tools that connect via Bluetooth or Wi-Fi, allowing real-time data logging and remote monitoring of moisture and temperature conditions. Augmented reality (AR) apps may soon guide DIYers through complex installations, minimizing errors and enhancing precision. Embracing these innovations now can give you a significant edge in maintenance practices.
Keep It Going: How do I maintain my flooring and installations over time?
The key to longevity lies in routine inspections and timely interventions. Regularly check for signs of water infiltration, especially around showers and baseboards, and address issues immediately before they escalate. Using a grout haze remover with a soft scrub brush prevents surface stains and buildup, keeping your tile looking fresh. For carpets, a deep-cleaning with a steam cleaner every 12-18 months preserves fibers and appearance. Remember, swift action and consistent upkeep are your best strategies for avoiding costly repairs down the line.
If you’re interested in enhancing your preparation and maintenance routine, consider exploring the latest flooring trends that emphasize durable finishes and smart maintenance practices. Implementing these tools and habits today ensures your renovation investments stand the test of time.
Lessons That Changed My Approach to Shower and Flooring Projects
- Embracing patience during mud bed curing taught me that rushing compromises long-term durability, making shortcuts tempting but risky.
- Understanding the critical role of slope in water drainage shifted my mindset from cosmetic to essential, saving me headaches later.
- Realizing that waterproof membranes alone aren’t enough emphasized the need for meticulous prep work, which prevents most leaks.
- Personal experience showed me that investing in quality tools, like laser levels and moisture meters, elevates a DIY project from good to lasting success.
- Learning to anticipate future maintenance needs encourages proactive care, ensuring beauty and function remain for years.
Tools and Insights That Keep My Projects on Track
- My go-to resource is this comprehensive guide, which offers tried-and-true techniques for durable flooring and shower bases I rely on.
- The digital moisture meter helps me monitor subfloor conditions, preventing mold and structural issues before they start.
- A high-quality laser level ensures my tiling is perfectly aligned, making sure aesthetics match precision without guesswork.
- Reliable waterproofing products from trusted brands give me confidence that my work stands against water’s wear and tear, especially in showers.
Your Next Step Toward Excellence
Transforming your renovation ideas into lasting reality hinges on embracing these insights about proper foundation work and maintenance. With the right knowledge, tools, and patience, your shower and flooring projects can truly elevate your home’s comfort and style. So dive in with confidence—you’re building more than a space; you’re crafting a sanctuary that lasts. Ready to take your skills to the next level? Share your experiences, questions, or tips below, and let’s grow together in this journey toward perfection.