

I vividly remember the weekend I was about to lay new laminate flooring in my living room. Everything was set—the planks, the sealant, the tools—but I overlooked one crucial step: checking the concrete’s moisture level. That mistake nearly cost me a small fortune when, a few months later, I noticed warped boards and unsightly cupping. It was a lightbulb moment. I realized I’d skipped an essential test that’s underrated yet vital in preventing moisture problems down the line.
Why Ignoring Moisture Checks Can Ruin Your Flooring Project
The truth is, moisture in concrete is one of the sneakiest enemies of durable, beautiful flooring. If you’ve ever battled cupped, cracked, or warped floors, it’s often a sign that moisture wasn’t properly evaluated and managed before installation. This oversight can lead to costly repairs, reduced lifespan of your floors, and just plain frustration.
From personal experience, I learned that comprehensive moisture testing is not just a recommendation; it’s a necessity. The *plastic-sheet test*, in particular, has become my go-to method—simple, effective, and surprisingly reliable. This small, inexpensive step can save you big bucks and headaches.
Now, I’ll show you how to use this test properly, so you can confidently tackle your next flooring project. But first, let’s address a common concern.
Is the plastic-sheet test really worth the hype?
Many folks dismiss this step as trivial or overly simple, but early on, I misunderstood its importance. I once thought, “It looks dry enough,” and proceeded without verification. That was a mistake. The plastic-sheet test, when done correctly, gives a clear indication of whether moisture levels are within safe limits. If you neglect it, you risk installing floors over damp concrete, which can cause long-term damage.
According to industry standards, moisture levels above 3-4% can compromise flooring integrity. The plastic-sheet test helps you catch issues early, before they become major problems.
So, if you’re planning a flooring installation—or if you’ve already experienced problems with moisture—you’re in the right place. We’ll walk through the steps to perform the plastic-sheet test properly, what signs to watch for, and how to interpret the results. Ready to make moisture management your project’s first success? Let’s dive in.
Prepare Your Testing Area
Begin by clearing the area around where you’ll perform the moisture test. Ensure the concrete slab is free of debris and dry surface dust. This provides an accurate reading of moisture beneath, not surface contamination. If you’re working in a basement or area prone to humidity, use a moisture meter compatible with concrete to get precise results. Remember, accuracy here sets the foundation for a successful install, preventing costly mistakes later.
Perform the Plastic-Sheet Test
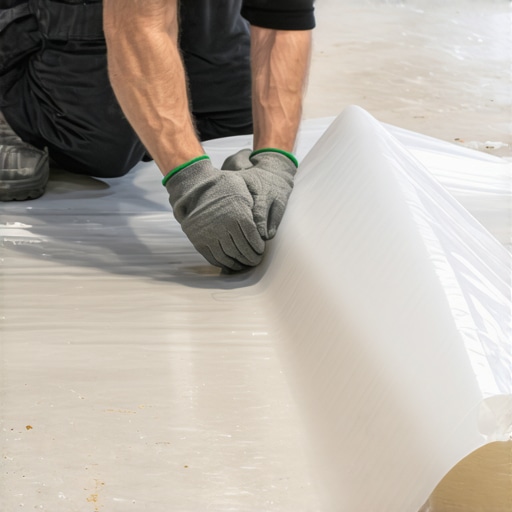
This simple test involves taping a 2-foot square piece of heavy-duty plastic sheeting directly to the concrete surface with waterproof tape. Be sure to tape down all edges securely to prevent air circulation underneath. This tight seal traps moisture vapor that may emanate from the slab, making it easier to detect.
Timing Is Key
Leave the plastic in place for 24 to 48 hours. During this time, watch for signs of moisture accumulation. Personally, I once forgot to check within the recommended window and prematurely removed the plastic after 24 hours. The result? A false sense of dryness. When I finally checked after 48 hours, I noticed small droplets and condensation on the underside of the plastic—a clear sign of excessive moisture. If you see this, further moisture mitigation is necessary before proceeding.
Interpretation and Next Steps
If after 48 hours, the plastic remains dry, and no droplets or condensation are visible, you can proceed with confidence. Check moisture levels with a concrete moisture meter for added precision, aiming for readings below 3-4%. If readings are higher, consider installing a vapor barrier or waiting longer until moisture levels decline. My experience with this test saved me from installing over damp concrete, which would have led to warped boards and failure. For detailed mitigation techniques, explore moisture mitigation strategies to ensure your flooring remains pristine.
Keep Records for Future Reference
Document your test results, including date, moisture levels, and observations. This record proves useful if issues arise months later, confirming that initial conditions were adequate at installation time. My own records helped me identify that my moisture issues stemmed from seasonal humidity changes rather than installation flaws.
 Even seasoned homeowners can fall prey to misconceptions about interior installations. A widespread myth is that baseboards are purely decorative, leading many to overlook their importance in hiding gaps and protecting walls, which can result in uneven finishes and drafts. Similarly, many assume that carpet installation is just about stretching and tacking—forgetting the critical role of proper padding and seam techniques that affect durability and comfort.
When it comes to flooring, a common mistake is choosing materials based solely on aesthetics, ignoring factors like subfloor compatibility and moisture management. For example, skipping moisture barriers beneath hardwood can cause warping and buckling over time. As for showers, many believe sealing grout lines once is enough, but inadequate maintenance and sealing can lead to mold, leaks, and structural damage. An advanced point worth noting is that improper waterproofing around niches and curbs often results in hidden leaks that slowly weaken walls and floors.
Why do so many professionals still struggle with perfect tile transitions?
This question often puzzles even experienced installers. Achieving seamless transitions between different flooring types or levels requires meticulous measurement, precise edging, and sometimes custom reducers or thresholds. A typical mistake is assuming that a standard transition strip fits all situations; in reality, each project demands tailored solutions. According to industry expert insights, failing to account for expansion gaps or substrate irregularities can cause warping or gaps over time. You can see how small oversights in planning and execution create long-term issues, emphasizing the need for advanced knowledge and attention to detail. To truly master these nuances, consulting specialized guides or professional resources is essential. For instance, reviewing top flooring installation trends can provide valuable insights.
**The Hidden Nuance:**
One often overlooked aspect is the role of climate and seasonal changes on installation longevity. Many installers neglect to consider humidity fluctuations during sealing or setting processes, which can lead to future gaps or buckling. For example, expansion joints in hardwood floors or flexible sealants around showers should be designed with seasonal movement in mind. Neglecting this subtle point can transform a perfect install into a maintenance headache over time. Experts suggest basing decisions on climate-specific guidelines and performing seasonal adjustment checks, a step that is frequently skipped but crucial for durability. As noted in a study by the Building Science Corporation, accounting for environmental dynamics in design and construction significantly extends the life of interior finishes and structures.
Have you ever fallen into this trap? Let me know in the comments.Maintaining your flooring, baseboards, and showers over time requires more than just a keen eye; it demands the right tools and a consistent routine. One indispensable instrument I rely on is a **digital moisture meter** specifically designed for concrete and subfloors. Unlike traditional handheld hygrometers, my preferred model offers digital readouts with quick response times, enabling me to assess moisture levels accurately before initiating any installation or renovation project. This ensures long-term durability and prevents costly repairs down the line.
Another tool that has transformed my maintenance routine is a **flexible caulking removal tool**. Old, cracked caulk around showers and baseboards not only looks unsightly but also harbors mold and moisture that can lead to structural damage. Using a flexible, razor-edged scraper allows me to safely remove old caulk without damaging surrounding surfaces, making way for fresh sealing compounds. For continuous upkeep, I swear by **silicone sealing removers** that are specifically formulated to break down old sealants, simplifying the removal process while maintaining surface integrity.
Investing in Quality Spare Parts and Sealants
Choosing premium, mold-resistant silicone sealants enhances the longevity of your installations, especially around showers and flooring transitions. I always opt for products with **antimicrobial properties**, which fight mold growth over time and reduce maintenance frequency. Keeping a well-stocked kit of these sealants, along with reusable tools such as caulk finishing guns and smoothing tools, allows me to perform touch-ups swiftly, preserving the crisp lines and clean appearance of my interiors.
What about tools for ongoing cleaning? For routine upkeep, I highly recommend a **microfiber mop** with a swivel head. Its gentle texture lifts dirt and prevents scratches on finished surfaces like hardwood and vinyl, while the swivel mechanism makes it easy to reach tight corners and under baseboards. Pairing it with pH-neutral cleaners designed for your flooring type keeps surfaces gleaming without risking damage or residue buildup. Regular cleaning with the right tools in hand prolongs the lifespan and visual appeal of your investments.
Looking ahead, I see a shift towards **smart moisture sensors** that connect to home automation systems, providing real-time alerts if moisture levels spike unexpectedly. Incorporating such technology can save hours of manual checks and catch issues early, preventing damage before it becomes visible. For now, though, a good-quality digital moisture meter remains the backbone of effective maintenance.
How do I keep my flooring and showers working perfectly over time?
Consistent inspections, combined with the right tools—like moisture meters, flexible scrapers, and quality sealants—are your best defense. Regularly replacing worn-out caulk and ensuring proper sealing around fixtures prevents leaks, which are among the most common causes of long-term damage. In my experience, committing to a quarterly maintenance routine using these specialized tools keeps everything in top shape and ready for years of beautiful, functional use. If you’re looking to elevate your maintenance game, try implementing a moisture monitoring system with alerts documented in your regular checklists—it’s an advanced step that offers peace of mind. Want personalized advice on selecting the best tools for your project? Visit our contact page to connect with experts who can guide you through your next upgrade.
The Hardest Lesson I Learned About Moisture Checks and Finishing Touches
One profound realization I had was that the smallest overlooked detail can have the biggest long-term impact. Whether it was forgetting to check moisture levels or rushing the sealing process around a shower niche, these missteps cost me time, money, and frustration. It’s become clear that patience and thoroughness in moisture management and finishing work are not just good practices—they’re essential. The true wisdom lies in understanding that quality craftsmanship is often defined by what you do during the final, seemingly minor steps—that’s where lasting results are built.
Tools and Guides That Elevate My Craft
Over the years, I’ve come to rely on a select few resources that consistently elevate my flooring and installation projects. The first is a high-accuracy digital moisture meter, which provides instant insights into subfloor conditions—trust me, it’s worth every penny for preventing future issues. Additionally, I recommend investing in a high-quality silicone sealant with antimicrobial properties to ensure longevity around showers. For tutorials, the detailed guides available on shower renovation tips have been invaluable in refining my sealing techniques and waterproofing skills. Lastly, joining industry webinars and forums keeps me updated on best practices and emerging technologies, making my work more reliable and efficient.
Your Opportunity to Make a Difference
Every project offers a new chance to hone your skills and ensure long-lasting results. By embracing meticulous moisture checks, leveraging the right tools, and paying attention to the finishing details, you can significantly extend the lifespan of your flooring and shower installations. Remember, the difference between a good job and a truly professional finish often boils down to the care taken during those final steps. So, why not challenge yourself today? Implement one new moisture management technique and observe the difference it makes. Have you ever faced a moisture-related challenge that taught you a valuable lesson? Share your story below—I’d love to hear how you overcame it and what you learned along the way.