

I vividly remember the moment I stepped into my newly renovated bathroom and saw the uneven, cracked grout lines stretching across my large-format tiles. It was a lightbulb moment—my Big Tile project had turned into a frustrating puzzle. The wide grout lines I dreamed of had become a thorn in my side, making the entire space look less polished than I envisioned. That experience sparked my quest to find a simple, reliable way to achieve flawless extra-wide grout lines that wouldn’t crack or crumble over time.
The Problem with Wide Tile Grout Lines That Never Seemed To Go Away
Many homeowners and DIY enthusiasts like myself have faced the challenge of wanting those bold, wide grout lines for aesthetic reasons but battling persistent cracking or uneven application. It’s disheartening to see your effort turn into a visual distraction instead of a showcase feature. The key, I learned, lies in understanding the importance of proper pre-filling techniques that set the foundation for durable, beautiful grout lines. Today, I’ll share the #1 secret I discovered that transformed my tiling projects—something I wish I knew from the start.
Have you ever had wide grout lines crack just months after installation?
Early in my project, I made the mistake of skipping a crucial step—pre-filling the gaps with a special compound designed for wide joints. I thought simply applying the grout would do the trick, but I soon discovered that ignoring this simple preparation led to uneven lines and cracks. Trust me, I’ve been there, and I want to save you the headache. As I researched further and experimented, I found out that the secret is in the pre-fill method, which reinforces the grout’s durability and keeps your lines looking pristine for years.
Let’s dive into exactly what this pre-fill trick is and how you can implement it in your next tiling project. By the end, you’ll have the confidence to create stunning, extra-wide grout lines that stand the test of time—and yes, even in high-traffic areas or humid environments like showers. Ready to turn your tile layout from a potential mess into a work of art? Then let’s get started.
Prepare the Gaps Before Applying Grout
During my last tiling project, I started by meticulously cleaning the joint spaces, removing any debris or dust. Then, I used a high-quality, flexible joint filler—similar to setting a sturdy foundation for a house—that better supports the grout and prevents cracking. I applied this filler using a rubber spatula, pressing it deep into the gaps. This step reinforces the joint, making the subsequent grout layer more resilient and less prone to movement or cracks.
Choosing the Right Pre-Fill Compound
In one particular bathroom I renovated, I opted for a polymer-enhanced filler designed explicitly for wide joints. It’s like choosing the right underlayment beneath a carpet—crucial for durability. If you skip this selection, thin, brittle fillers can crack over time. You can find suitable products at local tile supply stores, or consult with professionals about the best options for your specific tile and environment.
Applying the Pre-Fill Material Properly
Once I had my filler, I carefully pressed it into each joint, ensuring there were no air gaps. I used a damp sponge to smooth the surface and remove excess material, making sure the filler was flush with the tile surface. Think of this as setting a perfect base—like leveling a subfloor before installing hardwood. This extra step helps the grout adhere better and reduces the chances of cracks developing later.
Allow Time for Curing and Stabilization
Patience is key. I left the pre-filled joints to cure for at least 24 hours in a controlled environment—no foot traffic, no water exposure. Rushing this process is like trying to cut drywall before the mud has dried—you risk damage and unevenness. Proper curing times allow the filler to bond fully, providing a solid core that supports wider grout lines without excessive movement.
Applying the Final Grout Layer
After curing, I applied my chosen grout—preferably epoxy or a high-flex cement-based grout for extra durability. Using a rubber float at a 45-degree angle, I pressed the grout into the joints, making sure to fill the pre-filled gaps completely. This method ensures the grout bonds well to the reinforced base, preventing cracks or crumbling over time. Wiping off excess grout with a damp sponge before it sets helps achieve a clean, professional finish.
Seal and Maintain the Grout for Longevity
Finally, I sealed the grout lines with a high-quality grout sealer—think of it like applying a protective coat to your car. This step guards against moisture penetration and stains, especially in humid areas like showers. Reapply the sealer every year or as recommended, and your wide grout lines will stay looking fresh, crack-free, and impressive for years.
By investing a little extra time in the pre-fill step, you create a stronger foundation that withstands everyday wear and tear. It’s like adding steel rebar inside a concrete slab—your grout lines become highly resistant to cracking, even with slight tile movement or temperature fluctuations. This technique was a game-changer in my projects, and I highly recommend it for anyone aiming for professional-looking, durable wide grout lines.
Looking for more tips on perfect tile installations? Check out our guide on expert flooring installation tips for 2025 or explore trendy baseboard styles that elevate your interior.
Many homeowners believe that flooring, carpet, or shower installations are straightforward tasks that only require following basic instructions. However, this oversimplification hides critical nuances that can make the difference between a durable, professional-looking result and a costly failure. One common misconception is that using the same adhesive or grout for every situation guarantees success. In reality, expert installers recognize that different materials—such as porcelain tiles versus natural stone—demand specific sealing and bonding techniques for longevity. For example, some think that applying more grout ensures a better seal, but over-application can trap moisture and lead to mold growth, especially in showers.
Additionally, many assume that baseboards can be simply nailed into drywall without considering additional considerations like wall imperfections or material expansion. In fact, advanced professionals often modify their approach by using shims or flexible adhesives to accommodate wall irregularities and seasonal movement, preventing gaps and cracks.
What is the most overlooked mistake in high-traffic flooring and shower areas that causes long-term damage?
This mistake is neglecting proper vapor barriers and slope considerations during installation. For instance, in shower renovations, improper slope allows water to pool, accelerating deterioration. Similarly, not installing a vapor barrier beneath flooring in damp areas leads to mold, warping, and even subfloor rot—all issues that can be avoided with correct detailing. According to industry experts, such oversights are often responsible for costly repairs down the line. To learn more about avoiding common pitfalls, check out our comprehensive guide on shower renovation techniques.
Another overlooked nuance involves the timing of sealing grout or applying paint to baseboards. Many skip sealing immediately after installation, which can result in staining and water damage over time. Proper sealing acts more like skin protection—without it, your investment weakens prematurely.
Understanding these subtle details and avoiding the typical pitfalls ensures your installation stands the test of time. Remember, what looks simple on the surface often involves intricate preparation and material-specific expertise. Have you ever fallen into this trap? Let me know in the comments. For more professional tips on tile and flooring, explore our latest installation trends.
Keeping It Working: Essential Tools and Techniques for Longevity
Once you’ve completed your flooring, tile, or trim installation, the key to maintaining their pristine condition lies in using the right tools and adopting strategic upkeep routines. Personally, I rely on a few specialized items that have made my work more efficient and my results more durable. A cordless orbital sander, for instance, helps me refine baseboards without damaging delicate surfaces, ensuring a seamless fit over time. Additionally, a high-quality grout sealer applicator ensures even coverage, which is critical for resisting stains and moisture intrusion—especially in showers.
How do I maintain my tile and flooring over time?
Regular cleaning is paramount. I recommend using pH-neutral cleaners that won’t degrade grout or finish. For floors, a microfiber mop combined with a gentle cleaning solution minimizes scratches, preserving the surface’s appearance. For grout lines, applying a penetrating sealer every year creates a barrier against water and stains, extending the life of your installation. When signs of wear appear or if grout begins to crack, I reapply grout or use repair kits designed for specific tile types—this prevents small issues from snowballing into costly repairs.
Investing in quality maintenance tools pays dividends. For instance, a handheld grout cleaning brush with replaceable heads allows for detailed upkeep around edges and in corners—areas that often accumulate dirt. Also, a steam cleaner can be highly effective on sealed tile surfaces, providing sanitation without harsh chemicals. Looking ahead, I believe that integrating smart technology, like RFID tags on maintenance products, could become a trend, reminding homeowners when to re-seal or clean specific areas—making upkeep more manageable and less guesswork.
Why choosing the right tools makes all the difference
Using the correct equipment isn’t just about convenience—it directly impacts the longevity of your work. For example, a high-quality rubber float not only ensures smooth grout application but also helps prevent cracks caused by uneven pressure. Similarly, opting for a professional-grade sealant applicator guarantees even coverage across large surfaces, reducing the risk of water infiltration and mold growth. Proper sealing and finishing are essential steps often overlooked, but they provide long-term protection and beauty.
Prepare for the future with smart maintenance strategies
As the industry evolves, I’m excited about the prospects of automated systems that monitor moisture levels and alert homeowners when resealing or cleaning is due. Advances in materials science also suggest that self-healing grout, which can repair minor cracks autonomously, might soon become mainstream. Implementing these innovations early can save you time and money, and keep your installations looking fresh for decades.
Now, I challenge you to try incorporating one of these advanced maintenance tips—perhaps investing in a penetrating grout sealer or a steam cleaner—and see how it transforms your upkeep routine. Staying proactive with the right tools ensures your flooring and tiles continue to impress, saving you from unexpected repairs down the line. For additional insights on finishing touches, explore our latest baseboard styling trends.
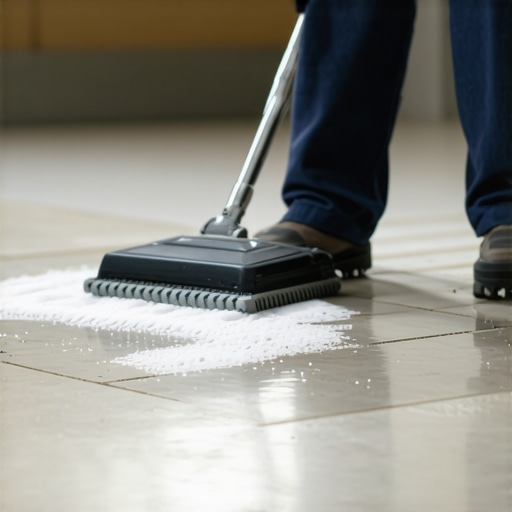
What Hidden Truths Did My Old Self Miss About Creating Flawless Wide Grout Lines?
One of the hardest lessons I learned was that rushing the pre-fill stage can undo months of careful planning. I used to believe that applying the grout directly was enough, but I found that neglecting reinforcement led to cracks and uneven lines within just a few months. My biggest breakthrough was realizing that anchoring each joint with a high-quality, flexible filler acts like a backbone, supporting the grout and preventing future damage.
Another lightbulb moment was discovering the importance of patience—letting the pre-fill cure fully is essential. Skipping this step or rushing the process almost always resulted in costly repairs. Now, I see the pre-fill as the foundation of a durable, eye-catching design, especially for those bold, extra-wide grout lines that truly make a statement.
Finally, I underestimated the value of selecting the right materials. Not all fillers and grouts are created equal—knowing which products align with your environment and tile type can save headaches and enhance longevity. Remember, your grout lines are more than just aesthetic features; they’re structural elements that deserve our respect and careful preparation.
Tools and Tips That Changed My Approach
Over time, I’ve come to trust a handful of tools that elevate my tiling results, like a premium grout sealer applicator and a high-quality rubber float. They ensure even application, which is critical in maintaining wide grout lines without cracks or gaps. I also rely on an oscillating sander for perfect baseboard finishing, preserving a clean look that complements the grout’s bold lines.
The books that shaped my technical confidence include industry guides on tile installation and moisture management. These resources uncover the science behind proper sealing and joint reinforcement, enabling me to anticipate issues before they arise. If you’re serious about long-lasting results, investing in expert-approved tools and reading reputable industry literature is a game-changer.
Claim Your Confidence: Act Now and Reimagine Your Space
Remember, transforming your tiling project into a masterpiece isn’t just about technique—it’s about mindset. With the right knowledge and tools, you can craft stunning, crack-free wide grout lines that elevate your home’s aesthetic and durability. So, why wait to bring your vision to life? Take that first step today and set the stage for years of proud, beautiful results.
Have you ever struggled with perfecting wide grout lines? Share your experiences below—I’d love to hear what worked or what challenged you!
,