

I remember standing in my bathroom one morning, staring at a puddle of water slowly creeping around my feet. It was that dreaded moment—that slow drain leading to awful odors and a silent battle with water pooling where it shouldn’t. Honestly, I felt defeated. I had invested so much time and money into my remodel, only to face this stubborn issue. That’s when the lightbulb flickered, and I discovered a simple yet powerful technique that changed everything: the pre-slope for shower drains.
Why I Finally Got It Right About Shower Drainage
For years, I struggled with recurring odors and sluggish drainage, often thinking it was just part of the package with shower installations. It wasn’t until I delved into the plumbing secrets shared by seasoned pros that I realized I’d been missing a key step—creating a proper pre-slope underneath the shower pan. This overlooked detail is the cornerstone for faster drainage and odor prevention, and once I fixed my approach, I noticed an immediate difference. My shower was not only more efficient but also smelled fresher, and maintenance became a breeze. If you’re tired of fighting water pooling or odors, understanding this secret could save you from endless frustration.
Is the Pre-Slope Trick Really That Simple?
Admittedly, I was skeptical at first. I’d made the mistake early on of rushing through the subfloor prep, thinking that leveling and sealing were enough. I didn’t realize that a slight incline—about 1/4 inch per foot—beneath your drain can make a world of difference. According to plumbing experts, neglecting this step can lead to poor drainage and mold growth, which can compromise your bathroom’s hygiene and lifespan. So, my early oversight was a costly mistake I don’t want you to repeat.
Now, I’ll walk you through the fundamentals of getting your pre-slope just right, so you can avoid these issues altogether. Ready to transform your shower experience? Let’s dive into the details that will turn your bathroom into a model of efficiency and cleanliness.
If you’ve ever faced stubborn drainage problems, or if your shower just isn’t flowing like it used to, your solution might be simpler than you think. Just remember, the secret hidden beneath the surface is what makes a remarkable difference. Take a look at some tips on how to choose the right materials and techniques that align with your home’s style and needs.
For more about elevating your interior design with small but impactful updates, check out this article on baseboards makeover.
Level the Base First
When I tackled my bathroom project, my first mistake was ignoring the importance of a perfectly level subfloor. I used a 4-foot spirit level and a laser level to identify high and low spots. Ensuring the entire surface was flat has a direct impact on creating a consistent slope. I started by marking the high points and adding shims underneath the subfloor panels, just like you would when installing baseboards for a seamless transition. This step is crucial because uneven surfaces lead to water pooling or uneven drainage. Take your time here, and don’t rush — a level base is your foundation for everything that comes next.Many homeowners and even some DIY enthusiasts believe they have the basics down when installing baseboards, showers, flooring, or carpets. However, what most overlook are the subtle details that can make or break the finished look and durability of these projects.
Are You Falling for These Misconceptions?
One widespread myth is that simply matching the style of baseboards to the room is enough to elevate your interior. In reality, the precise *cut and scribing*—especially around uneven walls—are critical for a seamless appearance. Neglecting this detail often leads to gaps or uneven joints, which can be costly to fix later. According to experts, taking the time to scribe baseboards precisely adds a polished touch that standard cuts can’t achieve, as detailed in this guide.
Similarly, there’s a common misconception that applying a thick layer of mortar is enough for a durable shower pan. But without considering the *pre-slope* and *clamping* of the liner, leaks can develop over time. I’ve seen many overlook this step and regret it later—leaving them with costly repairs. An advanced mistake many seasoned installers warn against is skipping the *proper subfloor prep*, which can lead to uneven flooring and cracks. For instance, vinyl plank floors need a flat, well-prepared subfloor; otherwise, bouncing or separation may occur, as discussed in this resource.
Carpet installation might seem straightforward, but newbies often ignore the importance of *tensioning and stretching*. Failing to properly stretch carpet can result in wrinkling or buckling over time. Advanced installers emphasize the importance of a consistent *power stretch*, especially in high-traffic areas, which ensures longevity and a flawless finish. Check out this article for expert tips.
What About Corner Details and Transitions?
A nuanced aspect often missed is the transition between different materials or at corners. For example, many install baseboards without accounting for the ‘scribing’ that adapts to wavy walls. This oversight results in gaps or uneven seams, detracting from the aesthetic. Similarly, in showers, the curbless design or niche construction requires precise slope and waterproofing details that go beyond basic waterproof membranes. According to professional tips, small details like the proper *back-buttering* of tiles or the *sloped niche* can prevent recurring issues like water pooling or mold growth. For advanced installers, paying attention to these fine points elevates their work from average to exceptional.
In summation, mastering these nuances differentiates a professional finish from amateur work. Don’t let common misconceptions lead you astray—investing time in precise cuts, proper prep, and correct tensioning will pay dividends in durability and aesthetic appeal. For comprehensive steps on these topics, explore expert flooring tips and other detailed guides. Have you ever fallen into this trap? Let me know in the comments and share your experiences!”,
Investing in the Right Tools for Longevity
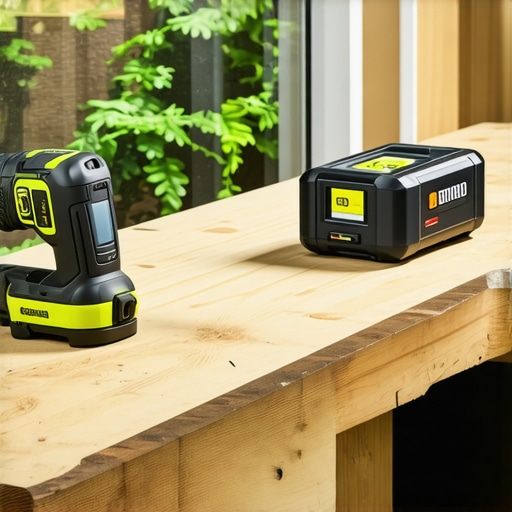
Maintaining your bathroom renovations, flooring, or carpentry projects requires not just skill but also the right equipment. Personally, I swear by using a high-quality cordless oscillating multi-tool for precise cut-ins and minor repairs. Its versatility allows me to address edge trimming, grout removal, or sanding without switching tools constantly, saving time and reducing errors. For measuring, I rely on a digital laser level, which provides accurate readings over long distances—crucial for ensuring a perfectly level subfloor or aligning baseboards. These tools are especially worth the investment as they maintain their accuracy over years of use and handle diverse tasks efficiently.
Which Equipment Helps Maintain Long-Term Results?
Beyond initial installation, regular maintenance is vital. I recommend keeping a few specific items handy: a quality grout sealer applicator to prevent water infiltration in showers, a handheld steam cleaner for deep cleaning carpets and tiles, and a microfiber duster for dusting baseboards and vents. These tools help in preserving the integrity of your work, preventing issues like mold, grime buildup, or surface damage. Staying proactive with these simple yet effective tools extends the lifespan of your installations and keeps them looking fresh for years.
Preparing for Future Wins: Don’t Forget About Scaling
Thinking ahead can save you money and time as your home evolves. If you’ve successfully installed a shower with a perfect pre-slope, you might consider scaling up by integrating water-saving fixtures or upgrading to a smart shower system. Modern options like digital thermostatic controls allow precise temperature adjustments and usage monitoring. Similarly, with flooring, choosing modular, click-lock vinyl planks that can be easily replaced or expanded makes renovations more manageable. Planning the right tools now, such as a flooring removal bar or starter kits for advanced tile cuts, prepares you for seamless scaling whenever you decide to upgrade other areas.
How do I maintain my installations over time?
One of the best ways to keep your home projects in top shape is regular inspection. Check for cracked grout, loose baseboards, or uneven flooring, and address small issues before they turn into costly repairs. For example, reapplying sealant in showers every few years helps prevent water damage, while tightening loose screws in baseboards maintains a clean look. Also, investing in a moisture meter can help you monitor for hidden dampness behind walls or under flooring, especially in high-humidity areas. These proactive measures, combined with your familiar tools, will ensure long-lasting results and reduce the need for big fixes down the line.
If you’re interested in deepening your project maintenance skills, I recommend trying out the advanced grout sealing tip I mentioned. It’s a simple step that dramatically prolongs the life of your tile work. Remember, consistency is key—regular upkeep paired with the right tools keeps your renovations looking pristine for years to come. For detailed guidance on choosing the best maintenance routines for your specific project, explore professional flooring tips and stay ahead of the curve.
The Hard-Earned Lessons That Changed My Approach
- One of the toughest truths I faced was realizing that rushing through subfloor prep inevitably led to issues down the line—uneven edges, water pooling, and even mold. This made me appreciate the importance of meticulous level checks and proper pre-slope creation, which I once overlooked in my eagerness to finish quickly.
- I used to believe that matching baseboard styles alone would elevate my space, but I learned that precise scribing and measuring—especially around uneven walls—are what truly make a professional look. This lesson transformed my finishing touches from average to exceptional.
- Ignoring the tiny details like corner transitions or correctly sealing grout in showers cost me dearly. Every small oversight compound into bigger problems, reminding me that attention to nuance is vital for durability and aesthetic quality.
- Investing in quality tools, such as a laser level and a vibration pad for tile work, dramatically improved my results. I now understand that having the right equipment can turn a good project into a great one, saving time and frustration.
- Planning for future updates, like integrating smart fixtures or easier-to-replace flooring panels, showed me that thinking ahead makes ongoing maintenance and upgrades smoother, keeping my home fresh and functional longer.
Tools and Resources That Make a Difference
- Laser levels: Trustworthy for ensuring absolute precision in leveling subfloors or aligning baseboards; I rely on a digital model for its accuracy and ease of use.
- High-quality grout sealer: Essential for protecting shower walls from stains and water infiltration—I’ve seen it extend the lifespan of tile installations significantly.
- Sheet scribing tool: A hidden gem for customizing baseboards around uneven walls, making transitions seamless, and giving a polished look.
- Educational guides and tutorials: Resources like detailed installation videos and expert blogs help me avoid common pitfalls and understand advanced techniques—check out these professional tips for deeper insights.
Embrace the Journey of Home Improvement
Transforming your space with perfect baseboards, reliable shower slopes, and durable flooring isn’t just about the end result—it’s about the lessons learned along the way. Every misstep is a stepping stone toward mastery, and with attention to detail, the project becomes a rewarding journey. Remember, the smallest details often make the biggest difference in both looks and longevity. Are you ready to tackle your next home project with newfound confidence? Share your thoughts below—I’d love to hear your experiences or questions about elevating your interiors.