

I’ll never forget the day I installed new baseboards in my living room and noticed a noticeable gap where my sloped floor dipped sharply at one corner. That lightbulb moment hit me hard—how could I achieve a seamless look when the floor wasn’t level? It was frustrating, but also a learning opportunity. If you’ve ever wrestled with uneven baseboards on a steeply slanted floor, you’re not alone. The good news is, there’s a technique that transforms this challenge into an opportunity for professional-looking results, and I’m here to share it with you.
Why Sloped Floors Make Baseboard Installation a Headache
Most people assume that straight walls and level floors make baseboard installation straightforward. But a steeply slanted floor throws a wrench into that simplicity. When your floor slopes considerably, standard approaches leave gaps, cracks, or forced cuts that look messy and unprofessional. In my early projects, I tried to adapt by forcing cuts or shimming the baseboards, which only led to uneven edges and wasted hours. It wasn’t until I learned the Reverse-Scribe Move that everything changed. This technique allows you to fit your baseboards perfectly, regardless of floor slope, delivering a clean, finished look that rivals professional results.
Ready to solve your uneven baseboard woes? Keep reading—what I share next will make your next project smoother and end with a flawless finish.
Is the Reverse-Scribe Move Really Worth the Hassle?
Early on, I was skeptical. I thought, “How hard can it be to just cut a few pieces and call it a day?” I made the classic mistake of rushing into the install without understanding the nuances of working on a sloped surface. As it turns out, this move is a game-changer, especially once you realize how much time it saves and how much better the final look is. According to experts, prioritizing proper techniques like the Reverse-Scribe can prevent costly mistakes during installation and improve the durability of your baseboards. Don’t just take my word for it—view it as an investment in your home’s aesthetic and structural integrity.
So, have you faced this exact problem? Or are you planning a renovation that involves uneven floors? If so, stay tuned—I’ll walk you through the step-by-step process and share tips that helped me turn a messy corner into a showcase feature. Let’s get started on transforming your space into a polished masterpiece with little more than patience and the right technique.
Preparing for the Technique
Before you start, measure the degree of your floor slope using a level or a digital laser. For steep slopes, mark the high and low points along your wall to visualize how the baseboard will need to bend or adjust. I once worked on a 10-degree slope in my basement, and without proper preparation, I would’ve ended up with huge gaps. Mark the points where the baseboard will meet the wall and note how much adjustment each piece needs.
Creating the Scribe Pattern
Next, cut a piece of scrap material that matches the thickness of your baseboard. Use this as a template to trace the floor’s contours onto the back of your actual baseboard. Lay the scrap against the floor and trace along its edge with a pencil, creating a custom pattern that exactly matches your slope. I recommend doing this on a small section first to ensure your pattern is accurate, which saved me time and material in the long run.
Cutting the Baseboard
Cut along your traced line with an oscillating tool or a fine-tooth saw, depending on your comfort level. For tight curves, an oscillating multi-tool with a fine blade offers precision and control, much like a jeweler shaping a piece of jewelry. When I did this in my project, I found the oscillating tool made clean cuts with minimal splintering, resulting in a perfect fit. Always wear safety gear, and cut slowly to follow your line precisely.
Fitting and Adjusting the Piece
Place the cut piece against the wall and floor. Check for tightness and look for gaps or overlaps. If necessary, make minor adjustments with a file or sandpaper along the cut edge to improve the fit. During my earlier attempts, I had to trim a little off a corner to eliminate a gap that was a millimeter too wide—patience here pays off for a seamless look.
Securing the Baseboard
Once satisfied with the fit, attach the baseboard using nails or adhesive, ensuring it follows the wall perfectly. Use Shim clips or shims behind the baseboard to compensate for any remaining irregularities. I used a nail gun for speed, but you could also use finishing nails and a hammer, being careful not to split the wood. Finish by filling nail holes and caulking the top seam where the wall and the baseboard meet.
Implementation of the Reverse-Scribe
This method is similar to a reverse scribing technique, which involves marking the floor onto the baseboard and then cutting to mirror the floor’s contours. This is particularly useful when the slope is uneven or inconsistent. I once applied this to a staircase wall on a curved surface, and the result was a baseboard that hugged the wall perfectly without gaps or misfits.
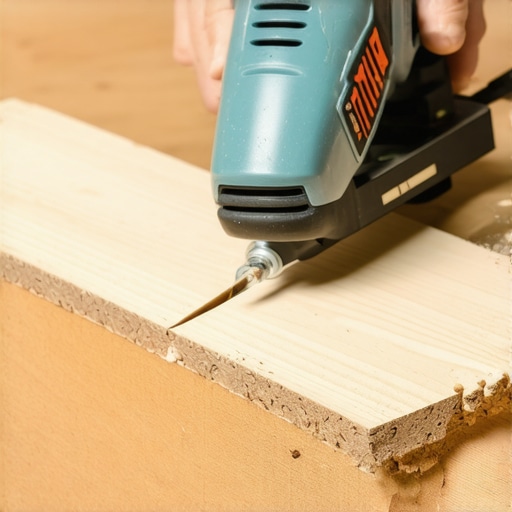
Prompt:Detailed image showing a person using an oscillating tool to cut a precision curve on a scrap piece of wood, illustrating the reverse-scribe technique for sloped floors, with focused detail and proper safety equipment visible.
Alt text:Man cutting a curved piece of wood with an oscillating tool for custom baseboard fitting on a sloped floor.
Many homeowners assume that basic knowledge guarantees perfect results when installing baseboards, carpets, or showers. However, even experienced DIYers often fall for subtle mistakes that undermine their effort and budget. One widespread misconception is that achieving a seamless finish relies solely on precise cuts and measurements. In reality, understanding the nuances, such as the importance of shimming, proper sealing, and substrate preparation, can make or break your project. For instance, many believe that using inexpensive nails or adhesives will suffice, but without the right method or materials, gaps and cracks will inevitably appear. As I’ve learned from expert tutorials and tried-and-true techniques, paying attention to these details can elevate your craftsmanship from average to professional-grade.
An often-overlooked aspect is the role of environmental conditions. You might be tempted to install flooring or trim during fluctuating humidity or temperatures, but this can lead to buckling, warping, or gaps down the line. According to industry expert John Bridge, controlling indoor climate during and after installation is crucial for longevity and appearance. Don’t rely solely on your tools—consider the climate and substrate stability to avoid future costly repairs.
Ever wondered why your freshly laid tiles crack or your paint peels prematurely? These issues frequently stem from overlooked preparation steps or incompatible materials. For example, applying grout or sealants without cleaning the surface thoroughly can trap moisture and cause deterioration over time. Similarly, using non-flexible caulking in areas prone to movement often results in unsightly cracks.
What do experienced professionals know that most DIYers miss? One common advanced mistake is neglecting the importance of accurate scribing and shimming around irregular surfaces or uneven walls. Instead of forcing a fit or making multiple cuts, employing techniques like the reverse-scribe move or custom shimming ensures a snug, durable finish. These methods require patience and a keen eye, but they drastically improve overall quality.
To truly master home upgrades, it’s vital to recognize that small details matter. For example, when installing a shower enclosure, selecting the right waterproofing membrane and sealing joints correctly prevents leaks and structural damage. That’s why I recommend consulting detailed guides like [shower enclosure tips](https://tilecraftsmens.com/shower-enclosures-101-expert-tips-for-modern-bathroom-makeovers) to understand these critical points.
Are you aware of how substrate preparation may be sabotaging your project? Sometimes, a surface that appears smooth actually harbors moisture or loose particles, leading to adhesion failures. Testing and preparing substrates properly, including sanding or treating with primer, buys you long-term durability.
Finally, don’t underestimate the power of proper layering and sequencing during installation. Rushing through steps or skipping essential layers can cause issues ranging from tile cracks to baseboard separation. For comprehensive guidance, check out [step-by-step installation tips](https://tilecraftsmens.com/step-by-step-flooring-installation-from-planning-to-perfect-finish), which underscore the importance of a systematic approach.
Have you ever fallen into this trap? Let me know in the comments!
Keeping It Working: Tools and Maintenance Strategies for Lasting Results
Achieving professional-grade results in flooring, baseboard installation, or shower upgrades is only half the battle; maintaining those investments over time is equally vital. Having the right tools at your disposal not only simplifies routine upkeep but also helps you catch small issues before they become costly repairs. I rely heavily on specific equipment and methods that ensure longevity and quality in my projects, and I recommend you do the same.
Invest in a Quality Moisture Meter
One of the most overlooked tools for maintaining flooring integrity is a reliable moisture meter. Moisture levels in subfloors or wall substrates can lead to buckling, mold, or cracking if not monitored. I personally use a pinless moisture meter because it provides quick, non-invasive readings—perfect for ongoing checks over years. Regular monitoring with this tool helps me catch rising moisture issues early, especially in basement or bathroom installations where water intrusion is common.
Maintain Your Work Area with Proper Cleaning Supplies
Keeping your installed surfaces clean and free of debris prevents long-term damage. I swear by using a soft microfiber mop and non-abrasive cleaners designed for specific flooring types. For hardwood and laminate, gentle solutions preserve finish, while for tile, using a grout-safe cleaner avoids discoloration. Consistent cleaning reduces dirt buildup that can wear down finish or cause scratches, especially around baseboards or corners.
Use a Laser Level for Precise Alignment
A laser level becomes indispensable when ensuring long-term straightness in baseboards and flooring transitions. As I’ve learned from experts, such as those on Transform Your Home, maintaining accurate alignment prevents pestering gaps and uneven surfaces over time. Place a laser line along the wall to check periodically—any deviations signal that adjustments are needed before issues escalate.
Apply Protective Sealants and Regular Inspection
Sealing grout, edges, and vulnerable joints with high-quality silicone or sealants protects against water seepage, which is crucial for showers and flooring seams. I recommend inspecting these seals every few months and reapplying as needed—especially after cleaning or heavy use. Additionally, periodically examining baseboards and tiles for cracks or gaps enables early repairs, preserving appearance and structural integrity.
Plan for Future Trends and Upgrades
Anticipating future advancements, such as self-healing sealants or smart moisture sensors, could revolutionize long-term maintenance. Staying informed allows homeowners and pros alike to incorporate innovations early, saving time and money in the long run. For example, integrating moisture sensors linked to smart home systems can provide real-time alerts, helping prevent water damage proactively.
How do I maintain my flooring and installations over time?
Regular inspections, proper cleaning, and timely repairs are your best defenses. Invest in tools like moisture meters and laser levels, which I personally use to ensure everything stays aligned and dry. Consistent maintenance not only extends the life of your investments but also ensures they look pristine for years to come. Ready to try an advanced tip? Incorporate periodic moisture checks with a digital meter—it’s simple, effective, and can save you from major issues later. For more ideas on long-term home improvements, visit this guide.
After years of tackling uneven surfaces, I’ve unearthed some *hidden lessons* that transformed my approach to baseboard installation on steeply sloped floors. These insights saved me time, avoided costly mistakes, and elevated my craft to a professional level. If you’re ready to go beyond the basics and truly understand what it takes to achieve seamless results, read on.
Lessons That Changed My Approach to Uneven Floors
- Measure the slope precisely before cutting: Using a digital laser helped me understand the exact degree of my floor’s incline, guiding me to create more accurate templates rather than guesswork, saving hours on adjustments later.
- Trust custom scribing over forced cuts: Rather than trying to force baseboards to fit or make multiple small cuts, I learned to trace the actual contour using a scrap piece, which resulted in a perfect fit—every single time.
- Patience is a virtue, especially with delicate cuts: Slow, controlled cuts with an oscillating tool produce cleaner edges and less material waste. Rushing only increases errors and frustration.
- Embrace the reverse-scribe move for complex slopes: This technique was a game-changer, allowing me to shape baseboards that hug the floor’s unique contours, giving a custom, professional look.
- Consider the environment’s role in long-term success: Controlling humidity and temperature during installation prevents gaps, warping, or splitting over time—a lesson I wish I had known earlier.
Tools and Resources That Make a Difference
- Digital laser level: Ensures perfect alignment and detection of slopes, making your measurements more reliable than traditional bubble levels.
- Oscillating multi-tool with fine blades: Provides precision cuts around complex curves, significantly reducing material wastage and rework.
- Custom templates and scrap wood: Creating a template from scrap pieces saves time on adjustments and ensures consistent fitting across surfaces.
- Guides on scribing and sealing: Deepening your understanding of these techniques can elevate your finishing to a professional standard.
Your Moment to Elevate Your Projects
There’s a satisfying confidence in knowing that your baseboards not only fit flawlessly but also enhance the beauty of your space. Don’t shy away from challenges; embrace the process with patience, precision, and the right tools. Remember, mastery in installing over uneven floors opens new creative possibilities and adds value to your home. I challenge you to tackle your next project with these insights—trust me, the results will speak for themselves.
What part of working on sloped floors have you found most intimidating? Share your experiences and questions below—let’s learn from each other!