

I still remember the cold draft hitting my ankles as I sat on my living room floor, staring at the ‘perfect’ baseboards I had just cut. I’d spent hours measuring, yet there it was: a gap between the wood and the wall big enough to hide a set of car keys. I thought I was a failure, or maybe my house was just melting. It turns out, my walls were just behaving like normal walls—they were crooked, bowed, and completely uneven. I tried to hide it with a mountain of filler, but as many of us eventually learn, caulk eventually cracks when you use it to bridge a canyon. That was my ‘lightbulb moment’—I didn’t need more caulk; I needed to learn how to scribe.
Stop Fighting Your Wavy Walls and Start Scribing
My biggest mistake early on was assuming that a straight piece of trim should naturally fit against a wall. It won’t. Whether you are finishing up a massive flooring installation or just doing a quick room refresh, the secret to those professional, tight-as-a-drum joints isn’t a more expensive saw. It is a scribing tool. This little gadget allows you to transfer the exact ‘wiggles’ of your wall onto your wood. I used to think I could just use the shimming secret to force things into place, but that often leads to tension that pops nails loose later. Scribing is the only way to make a rigid piece of timber dance to the tune of a wonky wall. According to building industry experts at Fine Homebuilding, even modern homes frequently see wall stud deviations of up to 1/4 inch, meaning a truly flat wall is a statistical anomaly.
Is a Dedicated Scribing Tool Actually Worth the Hype?
You might be thinking, ‘Can’t I just use a pencil and my finger?’ Trust me, I tried. My finger would slip, the pencil would tilt, and I’d end up with a line that looked like a mountain range. A real scribing tool—or even a modified compass—locks your distance in place. It’s the difference between a ‘good enough’ DIY job and a finish that makes your neighbors ask which pro you hired. I’ve even used this technique for more complex projects, like figuring out how to scribe tall baseboards to a fieldstone fireplace, where the gaps are even more unforgiving. Today, I’m going to walk you through exactly how to use this tool so you can stop wasting money on wasted trim. Have you ever finished a room only to realize the gaps were all you could look at? Let’s fix that right now. Before you make your next cut, remember the painters tape trick to ensure your scribed line stays clean and visible.
Master the Scribe and Forget Your Gap Anxiety
To start this process, you need to place your piece of trim against the wall exactly where it will live. If your floor is also wonky—which is common after a complex step-by-step flooring installation—you might need to level the board first using small shims. I remember doing a bathroom renovation with expensive oak trim and a wall that looked like a potato chip. I rushed the dry-fit, didn’t level the board, and the resulting line made the trim look crooked even though it fit the wall. Now, I always take an extra five minutes to ensure the board is perfectly plumb or level before I even pick up my pencil.
Find Your Widest Gap First
Look for the specific spot where the wall bows furthest away from the wood. This is your benchmark. Set your scribing tool or compass to this exact distance. Think of the scribe as a bridge; it must be wide enough to span the biggest canyon but consistent enough to track the tiniest pebble in the drywall. If you are working with flexible materials, the shimming secret can help hold the board steady while you lock in your measurement. If your compass isn’t locked tight, the distance will creep, and you’ll end up with a gap on the other end of the board.
Trace Your Wall with Surgical Precision
With the compass point against the wall and the pencil on the wood, drag the tool slowly from one end to the other. Don’t rush. Imagine you are a cartographer mapping a rocky shoreline. If you hit a bump or a glob of old paint, let the tool ride over it naturally. #IMAGE_PLACE_PLACEHOLDER_B#
Why the Back Bevel is Your Best Friend
Here is where most DIY projects go south. If you cut the wood perfectly vertical at a 90-degree angle, the back of the wood will often hit a hidden protrusion in the drywall before the front edge ever touches the wall. To solve this, use the back-bevel secret. Angle your jigsaw or table saw blade about 5 to 10 degrees so you are removing more material from the back of the board than the front. This creates a sharp knife-edge on the visible face that can tuck tightly against the wall. It’s like tailoring a suit; you want the outer layer to be crisp while the inner structure does the heavy lifting.
Finetune the Fit with a Sanding Block
Even a perfect jigsaw cut might leave behind a few burrs or tiny splinters. I always keep a coarse sanding block handy to shave off a hair of wood here or there. Using the sanding block hack allows you to sneak up on a perfect fit without the risk of over-cutting with a power tool. When I finally mastered this technique during a high-stakes shower renovation, the trim looked like it had literally grown out of the wall. It is an incredibly satisfying feeling that is much better than relying on flexible filler to hide a massive void. Always remember to test the fit one last time before you drive in your first nail.
Why Your Tightest Joints Might Fail Within a Year
Most homeowners believe that once a piece of trim is scribed and nailed, the job is finished for a lifetime. However, the biggest myth in carpentry is that ‘tight’ equals ‘permanent.’ In reality, houses are breathing organisms. If you don’t account for the structural movement during your step-by-step flooring installation, those beautiful scribed lines will eventually open up. I used to obsess over a hair-thin joint, only to return to a project a year later and find the wood had shrunk or the house had settled, creating a ghost of a gap. This is where flexible filler becomes more than just a crutch; it becomes a technical requirement for longevity.
Do You Really Need a 48-Hour Moisture Test for Every Room?
One of the most frequent ‘oops’ moments I see involves rushing the timeline. Professionals often skip the moisture check, assuming a dry-looking subfloor is safe. According to the National Wood Flooring Association (NWFA), the moisture content between your subfloor and your new planks should generally be within 4% of each other for strip flooring. Ignoring the moisture meter test every flooring pro uses is the fastest way to turn a high-end project into a cupping nightmare. If you’ve noticed your planks peaking or bowing, you likely missed this hidden nuance. 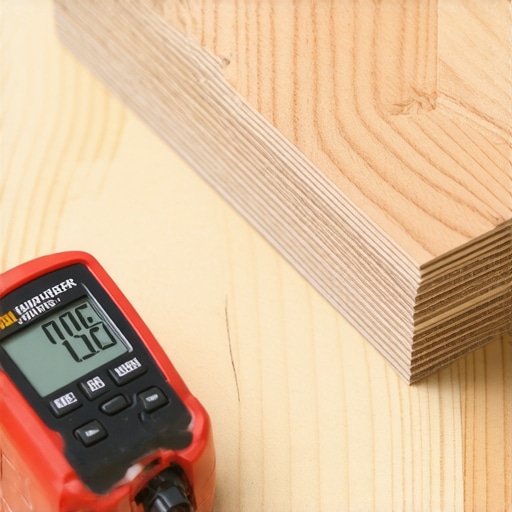
The Bottom Plate Trap That Ruins Your Finish
A common mistake during baseboard installation is what I call the ‘Bottom Plate Trap.’ Most DIYers find the easiest place to nail is the very bottom of the wall because that’s where the 2×4 plate sits. However, nailing baseboards into the bottom plate only is a recipe for disaster. When the floor naturally deflects under weight or the studs dry out, the top of the baseboard will pull away from the wall, creating a massive horizontal crack. Always aim for the studs higher up, using the hollow wall anchor that actually holds baseboards if you can’t find a solid wood backing.
Stop Relying on Your Knee Kicker for Carpet
In the world of carpet, the ‘tight is tight’ philosophy is dangerously incomplete. Many installers think they can finish a room with just a knee kicker. This is a contrarian view in some budget circles, but a power stretcher is not optional. Relying on the knee kicker mistake that ruins new carpet leads to those annoying ripples two years down the line. To achieve truly professional results, you need the leverage of a wall-to-wall tool. Whether you are dealing with a carpet install or a complex shower renovation, the hidden nuance is always in the tools you think you can skip. Even your shower maintenance has secrets; if you’ve ever wondered why your shower grout is turning pink or orange, it’s usually a biological nuance of airborne bacteria rather than a failure of the grout itself. Have you ever fallen into this trap of skipping a ‘pro’ tool and regretting it later? Let me know in the comments.
Put Down the Metal Hammer and Grab a Dead Blow
I used to think force was the answer to a stubborn flooring plank that wouldn’t click into place. I’d grab my standard framing hammer, a block of wood, and start swinging. All I ended up with were mushroomed edges and a sore shoulder. Then I discovered the dead blow hammer secret for flat floor seaming, and everything changed. A dead blow hammer is filled with steel shot that eliminates post-strike bounce, transferring all that energy directly into the plank. It’s the only way to get a seamless joint without damaging the fragile locking mechanisms. Whether you are knee-deep in a step-by-step flooring installation or trying to close a gap in your vinyl, the right tool determines if your floor looks like a professional job or a frantic weekend mistake. For my fellow DIYers, I also recommend keeping a high-quality moisture meter in your kit. Seriously, don’t even think about opening your flooring boxes until you’ve performed the moisture meter test every flooring pro uses. If the subfloor is holding onto dampness, your beautiful new boards will be cupping by next season, no matter how perfectly you scribed them.
How do I keep my flooring and trim looking new for a decade?
Maintaining the ‘day one’ look requires more than just a vacuum. You have to watch the humidity levels in your home. Wood and MDF are like sponges; they expand in the summer and shrink in the winter. This is why you often see baseboard hairline cracks appearing near the ceiling or floor. My personal maintenance routine involves a biannual check of the caulking. Instead of using standard painters’ caulk, I’ve switched to high-stretch elastomeric sealants. The Tile Council of North America (TCNA) Handbook actually specifies that movement joints (the gaps we often hide with trim) are essential for preventing tile tenting and grout failure. If you are maintaining a wet area, knowing when to fix vs replace for longevity is key. For example, if you see mold behind the caulk in your shower, it’s time to strip it down and re-seal, rather than just layering more on top. 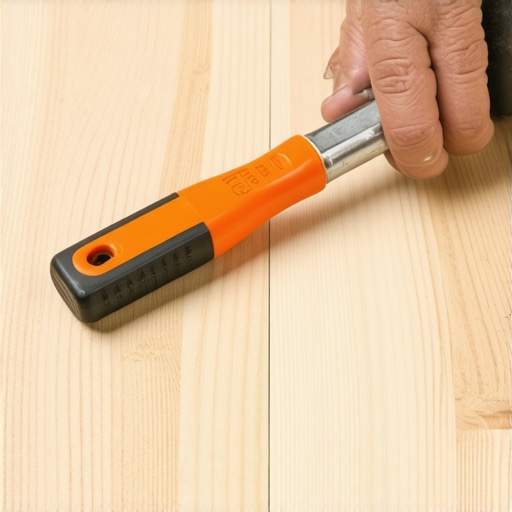
The 2025 shift toward digital precision
Looking ahead, the days of just ‘eyeballing it’ with a compass are numbered. We are seeing a massive surge in baseboard trends in 2025 that favor ultra-minimalist, shadow-gap profiles that leave zero room for error. I expect to see more DIYers adopting laser-mapping tools that can 3D-scan a room and provide a digital template for every cut. Even carpet install techniques are evolving, with new heat-fusion seam tapes that are virtually invisible even under high-powered lighting. If you want to stay ahead of the curve, stop relying on manual measurements alone. My biggest piece of advice for your next project? Before you nail a single board, try the back-bevel trick on a scrap piece of wood. Seeing that sharp, scribed edge disappear into a wavy wall for the first time is a ‘core memory’ for any renovator. Go grab a compass and a scrap piece of MDF right now—practice scribing the most uneven wall in your garage. Once you master the movement, you’ll never fear a crooked house again.
3 Mistakes That Nearly Ruined My First Baseboard Project
Looking back at my earliest attempts, I realized that chasing perfection is often a trap. The most important ‘lightbulb moment’ for me was accepting that a tight joint isn’t permanent unless you account for movement. I used to think a gap was a failure, but now I know that caulk eventually cracks if the house doesn’t have room to breathe. Another hard-earned lesson? Never skip the humidity check. I once laid a beautiful floor only to see it buckle because I ignored the moisture meter test every flooring pro uses. Lastly, remember that your walls are moving even when you aren’t looking. Using flexible filler for those inevitable hairline fractures is a technical necessity, not a shortcut.
The Tools I Never Step onto a Job Site Without
If you want your work to last as long as the mortgage, you need to invest in the right support system. I personally swear by a heavy-duty dead blow hammer for every step-by-step flooring installation. Using the dead blow hammer secret for flat floor seaming ensures you aren’t shattering the tongues and grooves of your expensive planks. For the finishing touches, a simple sanding block is my secret weapon; the sanding block hack allows for micro-adjustments that a saw just can’t match. And for those moving into soft surfaces, never settle for a knee kicker alone. Checking out carpet install secrets will show you why a power stretcher is the only way to avoid ripples down the road.
Why Your Next Cut Will Be Your Best One Yet
Taking on these projects can feel overwhelming, but once you master the scribe, you’ve unlocked a professional skill that most homeowners will never possess. As we look at baseboard trends in 2025, the focus is shifting toward clean, intentional lines that celebrate craftsmanship. Don’t be afraid of the crooked walls or the uneven subfloors; they are just puzzles waiting for you to solve them. Your journey into high-end flooring installation starts with that very first pencil mark. Have you ever struggled with a wall so wavy it felt impossible to trim? Let me know your story in the comments below!