

Have you ever stepped out of a shower, only to find tiny tile pieces clinging to your hair or pooling on the bathroom floor? That sinking feeling when you see your carefully tiled ceiling start to peel or tiles loosen—it’s enough to make anyone question their DIY skills. I remember the first time I faced this nightmare: a seemingly simple shower renovation that turned into a leaky, falling disaster because I overlooked a crucial detail.
Why Shower Ceiling Tiling Can Be a Nightmare
Here’s the truth—tiling a shower ceiling isn’t just about aesthetics; it’s about durability and understanding the unique environment inside your bathroom. The constant exposure to humidity, temperature swings, and water spray makes it a tricky spot. Many homeowners, myself included early on, underestimate the importance of proper adhesion and ventilation. Without the right preparation, your tiles are doomed to fall, leaving you frustrated and out of pocket. But don’t worry—I’ve cracked the code after plenty of trial and error. Today, I’ll share my tried-and-true methods to keep your shower ceiling beautiful and, most importantly, intact. Want to avoid the same mistakes I made? Keep reading!
Is It Really Worth the Effort? Maybe Not, Unless You Know the Secrets
One mistake I made early was rushing the prep work—skipping the primer or choosing the wrong adhesive. It seemed minor at the time, but it led to a whole lot of falling tiles. Experts agree that surface preparation and correct materials are key; in fact, the [National Tile Contractors Association](https://tilecraftsmens.com/shower-enclosure-101) emphasizes that proper substrate and moisture barriers can prevent costly failures. So, if you’re tired of fixing loose tiles or dealing with water damage, you’re in the right place. Let’s dive into the real secrets that will make your shower ceiling tile-held and long-lasting.
,
Preparing Your Surface for Lasting Tiles
Before laying a single tile, ensure the ceiling surface is spotless and level. Remove any loose paint, dust, or old adhesive. Use a damp cloth to wipe the area thoroughly, then allow it to air dry. Install an approved moisture barrier, such as a cement board or water-resistant drywall, to protect against humidity.
Applying Primer and Moisture Barrier
Apply a high-quality primer recommended for bathroom environments to improve adhesion. Follow with a waterproof membrane or vapor barrier, especially around joints and edges. This is crucial to prevent water infiltration that causes tiles to loosen over time. I once neglected this step on a small patch, which resulted in mold growth and tile failures months later—an expensive lesson learned.
Choosing the Right Adhesive and Grout
Select an epoxy or latex-modified thinset mortar designed for wet areas. These provide superior bond strength and flexibility. Avoid generic adhesives; they crack under constant humidity. When I first used standard tile adhesive for a shower ceiling, the tiles eventually detached due to poor flexibility. After switching to a high-performance mortar, I saw immediate improvements. Use compatible, water-proof grout to seal joints, reducing the risk of water seeping behind tiles.
Mixing and Applying Adhesive Correctly
Mix your mortar following manufacturer instructions, achieving a peanut butter-like consistency. Use a notched trowel—typically 3/16-inch for ceilings—to spread adhesive evenly over the surface. Work in small sections to prevent the mortar from drying before setting. For example, I divided the ceiling into quadrants, completing one at a time, which helped maintain control and a uniform application.
Strategic Tile Placement for a Perfect Finish
Begin tiling at the center of the ceiling and work outward, applying tiles in a pattern that minimizes cutting and uneven edges. Use spacers to maintain consistent gaps. Remember, tiles on a ceiling can sag if not pressed firmly into the adhesive. I once used a level to ensure each tile was flush, preventing a lopsided look and reducing future cracking.
Handling Corners and Edges
Use specialty corner tiles or cut standard tiles carefully with a wet saw for sharp, clean edges. Apply small dabs of adhesive on the back to prevent slippage. For tight corners, I employed a scribing technique with a piece of cardboard to match wall angles precisely, ensuring a snug fit that looks professional.
Final Sealing and Ventilation Strategies
Once tiles are set and grouted, apply a waterproof sealant over the grout joints for extra protection. Make sure your bathroom has proper ventilation—install an exhaust fan and keep it running during and after showers. Without adequate airflow, moisture persists, undermining your work. I installed a high-capacity vent, which drastically reduced condensation and prolonged the lifespan of my tiling.
By following these detailed steps, you turn a challenging project into a durable, visually appealing feature. Proper surface prep, materials, and techniques are your best allies against peeling and loose tiles, ensuring your shower ceiling remains pristine for years.
Most homeowners assume that installing baseboards, carpeting, or new flooring is straightforward—a task that just requires basic measurements and some nails. However, real experts know that beneath these seemingly simple updates lie nuanced details that can make or break the finished look and longevity of your renovation. Contrary to popular belief, rushing the prep work or ignoring subtle architectural quirks often results in gaps, uneven lines, or worse, costly repairs down the line.
Common Myths That Could Cost You
One widespread myth is that all adhesives work equally well for flooring or tiles. In reality, choosing the wrong type—like using traditional thinset for a shower floor instead of a waterproof mortar—can lead to cracking or water infiltration. Experts like those at the durability guides emphasize selecting materials tailored to your environment.
Another misconception is that baseboards should be nailed directly to drywall without considering whether the wall is plumb or if the floor has settling issues. This oversight can cause gaps or separation over time, especially on uneven or settling subfloors. Learn more about the best baseboard installation techniques to avoid this common trap.
Advanced Mistake to Watch Out For: Ignoring Structural Movements
One of the most sneaky errors homeowners make when replacing flooring or installing new tile surrounds is neglecting to account for natural or structural movement. For example, expansive and contractive forces due to temperature shifts or subfloor settling can cause tiles to crack or detach if expansion gaps aren’t properly incorporated. According to a study in the American Concrete Institute’s research, allowing room for movement in your layout design significantly improves longevity.
Never underestimate the power of these small but critical details. When installing flooring or carpets, or sealing your shower enclosure, thinking about the nuances can save you hundreds in future repairs.
Have you ever fallen into this trap? Let me know in the comments!
Keep Your Installations in Top Shape with the Right Tools
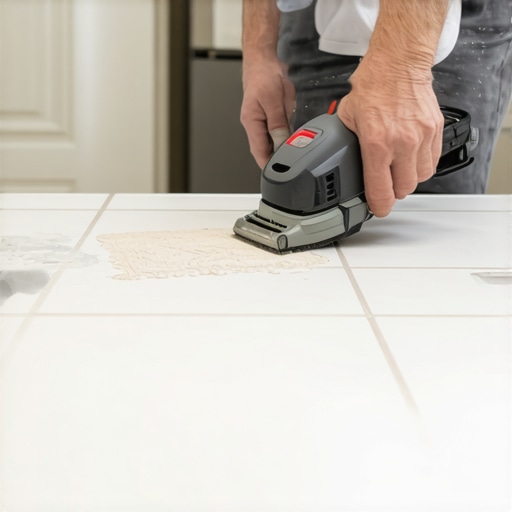
Investing in quality tools is essential for maintaining your flooring, tiles, and showers over time. I personally swear by a high-grade oscillating multi-tool for detailed repairs and sanding, especially when dealing with intricate molding or grout lines. Its versatility allows me to remove old sealants, clean grout, or smooth out surface imperfections without damaging surrounding materials. For checking moisture levels before and after repairs, a digital moisture meter becomes indispensable; it ensures your subfloor or framing remains dry, preventing future issues like mold or warping. I recommend the [General Tools MMD4E Moisture Meter](https://tilecraftsmens.com/contact-us-2), which combines accuracy with ease of use, saving you time and guesswork.
Utilize Software and Planning Tools
Beyond physical tools, leveraging design software like SketchUp or Roomstyler helps pre-visualize updates, especially when planning a massive flooring overhaul or a bathroom remodel. These programs allow you to experiment with layout options, color schemes, and materials before lifting a finger—saving you costly mistakes. I’ve used them extensively to plan complex transitions between different flooring types, ensuring seamless aesthetics and functionality.
Establish a Sustainable Maintenance Routine
Maintaining your flooring, tiles, and showers requires consistent attention. Regularly inspect grout lines for cracks or discoloration; reapply sealant every couple of years using a high-quality silicone-based product. For hardwood and laminate floors, routine cleaning with a microfibers mop and the right floor cleaner preserves the finish. I personally prefer methods that avoid excessive water, like using a spray and wipe approach, which extends the life of your flooring and prevents warping.
How Do I Maintain Showers and Bathrooms Over Time?
Prevention is key. Keep ventilation systems functioning—installing or upgrading your exhaust fan can cut humidity levels, protecting your tile and grout from deterioration. Regularly cleaning shower niches and sealing grout lines prevents mold and water infiltration. I recommend applying a silicone-based grout sealer every year, as it forms a barrier against moisture and stains. For recent innovations, there’s [a growing trend toward antimicrobial coatings](https://tilecraftsmens.com/shower-enclosures-101-expert-tips-for-modern-bathroom-makeovers) that actively inhibit mold growth, further simplifying maintenance efforts.
Incorporating these tools and routine practices will ensure your renovations stand the test of time. Specifically, I encourage trying the use of an oscillating multi-tool for detailed repairs—it’s a game-changer for maintaining structural integrity without tearing out entire sections. As technology advances, expect future tools to offer even smarter diagnostics and predictive maintenance capabilities, reducing downtime and extending the lifespan of your home improvements.
Looking back, the most valuable insights I’ve gained stem from hard-earned mistakes and unexpected discoveries. One of the biggest lessons is that seemingly small details—like choosing the right sealant or factoring in seasonal humidity changes—can dramatically extend the lifespan of your installations. I once ignored an expansion gap in my vinyl flooring, leading to buckling during summer; now I always prioritize room for movement. Another revelation is that patience with surface preparation—sanding, cleaning, and priming—is your secret weapon against future hassles. Rushing these steps almost always results in uneven lines or gaps, which are painful to correct later. Lastly, I learned that investing in quality tools, like a high-precision scribing tool or moisture meter, is an upfront cost that pays for itself through smoother work and longer-lasting results. These lessons aren’t just tips—they’re the foundation for projects that stand the test of time and look professional every time.