I vividly remember the first time I tackled outside corners for baseboards. I was rushing to finish a room, eager to see it transformation, only to realize that my corners looked mismatched and crooked. No matter how carefully I measured or cut, those stubborn gaps and uneven miter joints persisted, making me frustrated and questioning my skills. It was a lightbulb moment when I discovered the ‘Spring-Clamp’ trick – a simple yet game-changing technique that changed my approach entirely.
The Power of the Spring-Clamp Trick for Outside Corners
Before learning this trick, I often dealt with gaps, crooked cuts, and compromised finishes at outside corners, which forced me to spend extra time filling and sanding. It wasn’t just about aesthetics; it was about efficiency and confidence in my work. When I integrated the spring-clamp method, I found I could pull tight and keep everything perfectly aligned during installation. This saved me time, prevented me from re-cutting pieces, and gave my projects a professional look I could be proud of.
Is This Technique Worth the Hype?
Initially, I was skeptical. The idea of using a spring to hold complex corners tight sounded too simple to be effective. And honestly, I made my fair share of early mistakes – like over-tightening and damaging delicate trim. But once I practiced the technique correctly, I saw the results speak for themselves. Now, I recommend it to everyone, but especially to DIYers and pros aiming for flawless outside corners. Curious to see how it works? Keep reading, and I’ll walk you through the step-by-step process that can transform your next baseboard project. If you’re interested in more flooring tips, check out this guide on upcoming trends for 2025.
In the meantime, think about your past projects—have you ever faced the frustration of imperfect corners? If so, you’re not alone. Let’s get into the details and show you how this trick can make a noticeable difference in your finishing work, making your home look as crisp and professional as those seen in remodeling magazines.
,
Hook the Trim and Apply Gentle Tension
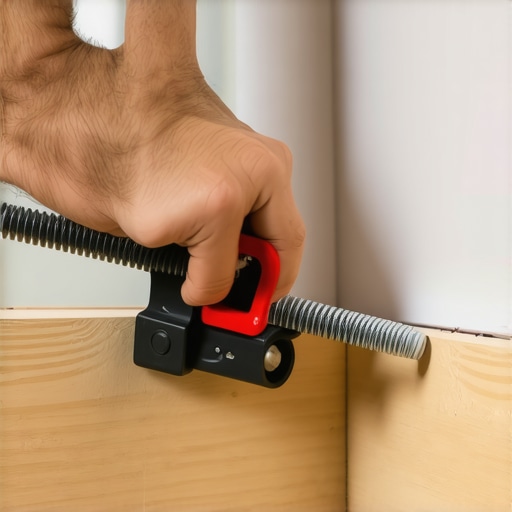
Start by positioning your baseboard pieces at the outside corner, ensuring they fit snugly. Place a spring clamp, like the ones used for woodworking projects, onto the mitered joint, applying gentle pressure to hold the pieces tightly together. I remember a time when I used a basic clothespin—a makeshift spring—for a quick fix; it worked surprisingly well, preventing gaps during adhesion. The key is to use a clamp with enough tension to pull the joint tight without damaging the trim.
Align and Secure During Adhesion
Precise Positioning
Align the pieces meticulously, making sure the corners meet perfectly. The spring clamp maintains consistent pressure, preventing any shifting. Think of it as a temporary hand holding the pieces in place, much like how a painter tethers a canvas to stay taut during stretching. This step ensures your joints fit seamlessly when the adhesive cures.
Applying the Right Amount of Tension
Adjust the clamp to exert enough force to close any small gaps—too tight, and you risk damaging the wood; too loose, and you won’t achieve a tight seam. Use your fingers to gauge tension, verifying the joint remains flush and gap-free. Remember, if the clamp is over-tightened, it can cause the trim to bow or crack, so proceed cautiously. I learned this the hard way when I over-tightened and had to redo the joint the next day.
Check for Alignment and Make Minor Adjustments
Before the adhesive sets, double-check your alignment. The spring clamp keeps the pieces pressed together, but you may need to tweak their positions with your hands. If you notice a slight misalignment, loosen the clamp slightly and slide the trim into perfect position. After securing, remove the clamp carefully once the glue is tacky—usually after about 15-30 minutes. This careful approach ensures a seamless, professional finish.
Remove and Finish the Joints
Once the adhesive fully cures, gently release the spring clamp. Inspect the joint for gaps or overlaps; if needed, apply a minimal amount of caulk to fill small imperfections. During one project, I found that a quick swipe of painter’s tape along the joint prevented excess caulk from spreading onto the trim, saving me future cleanup time. Sand lightly if necessary, and proceed with paint or stain to complete the look.
This method not only speeds up installation but also drastically improves the quality of outside corners. With just a few simple tools—a spring clamp and patience—you can achieve tight, accurate joints that rival professional finish work.
While many DIY enthusiasts believe they understand the basics of home finishing tasks, misconceptions often lead to costly mistakes. For instance, a widespread myth is that sealing grout instantly makes it permanent. In reality, grout sealing is an ongoing process; neglecting proper maintenance can cause discoloration or surface breakdown over time, as emphasized by industry experts. Similarly, many assume that installing baseboards is straightforward if measurements are accurate, but overlooking the importance of proper expansion gaps can result in warping or cracking later, especially with changes in temperature and humidity. Advanced installers recognize that understanding the nuances of material compatibility, like choosing the right underlayment for flooring to prevent squeaks and moisture issues, is vital for longevity. An all-too-common mistake is rushing the curing process of adhesives or grout, which compromises adhesion and can cause joint failures within months. This highlights the significance of adhering strictly to manufacturer guidelines, as detailed in professional guides, to avoid costly repairs down the line. For showers, one underrated nuance is ensuring proper slope for drains; even a slight miscalculation can lead to pooling water, mold, and odor issues, despite the common belief that sealing is enough. Proper slope installation, supported by studies on drainage efficiency, is fundamental for long-term performance. Overall, mastering these advanced details elevates your craftsmanship from amateur to professional level. Want to avoid these pitfalls? Dive deeper into the latest flooring installation tips for 2025 and become a home finish expert. Have you ever fallen into this trap? Let me know in the comments.
Tools That Prolong Quality and Ease Maintenance
To keep your home finishing projects looking pristine over time, investing in the right tools is essential. For flooring, a high-quality pneumatic flooring nailer simplifies proper installation, reducing damage and ensuring consistent tension, especially when installing complex patterns or premium materials. When it comes to shower maintenance, a handheld grout cleaning brush, like the OXO Good Grips, allows you to reach and clean grout lines effectively, preventing discoloration and mold buildup—a common issue if neglected. For baseboards, a flexible corner painter’s tool helps during touch-up after installation, ensuring your edges stay crisp and reducing the need for frequent repainting due to paint bleed or uneven lines. Regularly using a microfiber mop with a gentle cleaning formula can extend the life of your flooring, especially hardwood and luxury vinyl plank, by removing dust that accelerates wear and tear. These tools, combined with proper technique, significantly reduce long-term maintenance burdens.
Adapting Your Approach for Future Trends
The trend towards smart home integration is influencing maintenance routines. For example, smart water sensors can immediately alert you to leaks under showers or behind appliances, allowing prompt action before costly damage occurs. As technology advances, expect more appliances to come with maintenance reminders and diagnostics, streamlining upkeep. To stay ahead, familiarize yourself with these innovations and consider integrating them into your home for peace of mind and ease of management.
How do I maintain my flooring and fixtures over time?
Consistency is key. Regular cleaning with appropriate products prevents buildup and deterioration. Scheduling annual inspections, especially for grout and caulk in showers, can catch issues early. Applying a fresh coat of sealant every few years on grout lines and stone surfaces preserves their appearance and prevents moisture infiltration. For floors, monitor for soft spots or squeaks, which might indicate subfloor issues requiring professional attention. Remember, using quality tools not only simplifies these tasks but also ensures durable results. Want to learn about the latest flooring installation trends? Check out this comprehensive guide for insights. Always use a moisture meter, like the Extech MO257, when evaluating subfloor conditions, referencing professional standards outlined by ASTM International to ensure your home remains safe and sound.
Scaling Up Towards Longevity and Success
As your projects grow larger or more complex, prioritizing maintenance can scale your success. Modular flooring systems, for example, can be easily replaced or repaired without ripping out entire rooms, saving time and money. Meanwhile, adopting a scheduled maintenance routine, such as biannual grout sealing or quarterly vacuuming of rugs and carpets, maintains beauty and functionality over years. Investing in better tools now, like a compact steam cleaner, can make deep cleaning quicker and more effective, especially for carpets and bathroom tiles. This proactive approach aligns with future trends emphasizing sustainability; well-maintained materials last longer, reducing waste and environmental impact.
Make Your Home Last with Simple Care
Incorporate tools and routines that match your specific finishes. For example, a soft cloth buff after cleaning hardwood floors preserves their shine and prevents scratches. When installing baseboards, double-check for proper expansion gaps and use a pneumatic nailer for even, secure fastening, reducing the need for repairs later. Remember, a little effort today avoids costly replacements tomorrow. Upgrading your maintenance toolkit with a quality safety harness, like the Guardian Fall Protection, can prevent mishaps during high-altitude tasks and keep you safe. Interested in more tips? Visit this resource on 2025 style trends and get inspired to keep your home looking stunning for years to come.
Reflecting on my journey with home finishing, I realize that the most valuable lessons often come from unexpected challenges. One insight that stands out is the importance of patience and experimentation: I once tried to perfect my outside corners by relying solely on measuring tapes and miter saws, only to find gaps and misalignments every time. It wasn’t until I embraced simple tools like spring clamps that I unlocked a new level of accuracy and efficiency. This experience taught me that sometimes, the most straightforward solutions—like gentle tension from a spring clamp—can dramatically improve your craftsmanship.
What Hidden Wisdom I Wish I Had Known Sooner
Less is more with tension: Over-tightening a spring clamp can damage delicate trim, so learning to gauge proper tension was a game-changer. Patience and subtlety often yield the best results.
The power of a steady hand: Using spring clamps as a third hand during installation reduces gaps, but I also learned that double-checking alignment before the glue sets prevents rework and ensures a seamless look.
Invest in quality tools: Cheap clamps might save money upfront but often lead to frustration. Trustworthy clamps with smooth operation make the process smoother and your finish more professional.
Practice makes perfect: Initially, I struggled with adjusting tension and positioning, but consistent practice helped me develop an intuitive feel, turning what once was daunting into a manageable task.
Understanding material behavior: Knowing how different trims respond to pressure and glue allowed me to adapt my technique, minimizing damages and ensuring longevity of my work.
Tools That Built My Confidence and Skill
A quality spring clamp set: Reliable tension and smooth operation are essential. I trust brands that offer adjustable force and easy release.
Patience and practice: No tool replaces experience—dedicate time to honing your skills with each project.
Embrace the Art of Flawless Finishing
To all home improvement enthusiasts: the path to professional-looking corners isn’t paved with complex gadgets or expensive materials alone. It’s about understanding the nuances of your tools, respecting material behavior, and trusting your growing skillset. Remember, each project is an opportunity to learn something new—failures included. By applying simple techniques like the spring-clamp method, you’re not just completing a task; you’re elevating your craftsmanship and cultivating patience. The joy of a perfectly finished corner is more than aesthetic—it’s a testament to your dedication and willingness to learn. Ready to transform your next project? Dive into more expert tips and stay inspired on your home improvement journey by exploring the latest flooring and finishing trends for 2025. What’s the next corner you’re excited to perfect? Share your thoughts below!


 While many DIY enthusiasts believe they understand the basics of home finishing tasks, misconceptions often lead to costly mistakes. For instance, a widespread myth is that sealing grout instantly makes it permanent. In reality, grout sealing is an ongoing process; neglecting proper maintenance can cause discoloration or surface breakdown over time, as emphasized by industry experts. Similarly, many assume that installing baseboards is straightforward if measurements are accurate, but overlooking the importance of proper expansion gaps can result in warping or cracking later, especially with changes in temperature and humidity. Advanced installers recognize that understanding the nuances of material compatibility, like choosing the right underlayment for flooring to prevent squeaks and moisture issues, is vital for longevity. An all-too-common mistake is rushing the curing process of adhesives or grout, which compromises adhesion and can cause joint failures within months. This highlights the significance of adhering strictly to manufacturer guidelines, as detailed in professional guides, to avoid costly repairs down the line. For showers, one underrated nuance is ensuring proper slope for drains; even a slight miscalculation can lead to pooling water, mold, and odor issues, despite the common belief that sealing is enough. Proper slope installation, supported by studies on drainage efficiency, is fundamental for long-term performance. Overall, mastering these advanced details elevates your craftsmanship from amateur to professional level. Want to avoid these pitfalls? Dive deeper into