

I vividly remember the afternoon I discovered a sizable rip in my living room carpet. It was during a frantic attempt to move furniture, and as I yanked a couch across the floor, a tear revealed itself, exposing those ugly, frayed edges I dreaded. My initial reaction was frustration—who knew one careless move could ruin months of work? But then, a lightbulb moment struck: I realized there had to be a better way to handle such mishaps—something more effective than patching with hidden patches or, worse, living with the tear forever.
That realization led me down a rabbit hole into the world of carpet repair techniques, and I stumbled upon an approach called the ‘Stitch-Bond’ Method. It sounded promising, but I was skeptical. Could this really be the simple, discreet fix it claimed to be? As someone who’s tried everything from glue to patch kits, I know firsthand how frustrating it can be to find a repair that actually blends seamlessly into the existing carpet. So, today, I want to share with you how the Stitch-Bond Method has transformed my approach and how it can do the same for you, especially if you’ve ever faced the sinking feeling of a rip in your flooring and wondered, “Is there a foolproof way to mend this without it being obvious?”
Why the Stitch-Bond Technique Might Be Your Best Bet
The truth is, traditional carpet repair methods often fall flat—patches can look patchy, and glue fixes risk coming undone or creating bulk. Early in my experiments, I made a critical mistake: I tried using standard adhesive patches without aligning the fibers properly, leading to visible seams and uneven textures. That’s when I realized the importance of a more nuanced approach, one that mimics the natural weaving of the carpet fibers itself. The Stitch-Bond Method works by interlacing threads across the tear, effectively sewing the fibers back together and restoring the carpet’s original integrity. Not only does this make the repair less conspicuous, but it also reinforces the area against future stress.
If you’re tired of distracting patches or patchy repairs that only highlight the damage, then understanding this technique could save you money and preserve the beauty of your flooring. Plus, learning to repair rips yourself is empowering—you regain control over your home’s look without waiting weeks for a professional or risking shoddy fixes. Want to see how this method stands up in real life? Check out some detailed guides and tutorials, like the ones found at this resource, which explain step-by-step how to master intricate carpet fixes.
Is Carpet Repair with Stitch-Bond Actually Worth the Hype?
One common concern I hear is whether such a delicate technique really holds up over time. Early on, I also worried about whether stitching fibers would be durable or if they might loosen after a few months of foot traffic. My mistake? I underestimated the importance of proper thread selection and tension control. Since then, I’ve learned that with the right tools and patience, the Stitch-Bond Method provides a resilient, almost invisible fix. In fact, recent studies affirm that well-executed sewing repairs can extend the life of your carpet significantly, avoiding premature replacement and reducing waste—a win for your wallet and the environment.
So, if you’ve faced the dilemma of a rip in your carpet and wondered if a DIY fix can truly stand the test of time, rest assured that with a little practice, this method can be your secret weapon. Ready to learn the exact steps and avoid the common pitfalls? Up next, I’ll guide you through the full process, sharing tips and tricks from my personal journey to perfecting this technique. And if you’re eager to explore related upgrades around your home, such as updating baseboards or optimizing flooring installation, I recommend checking out these expert tips to elevate your space.
Preparing Your Workspace and Tools
Before diving into the repair, clear the area around the rip, removing furniture and securing nearby rugs to prevent tripping. Gather essential supplies: strong, color-matched thread or upholstery yarn, a curved embroidery or upholstery needle, sharp scissors, masking tape, and a pair of pliers for tension adjustment. I remember once working on a tear in my living room carpet where I underestimated the tension needed; after some trial, I achieved a nearly invisible fix that held up for years.
Aligning and Securing the Edges
Start by gently pulling apart the frayed edges of the tear, using pliers if necessary to loosen fibers. Use masking tape along the tear edges to stabilize and keep fibers in place, preventing further unraveling during sewing. Think of this like aligning the edges of a torn fabric before stitching—precision ensures a seamless repair. I once had a patch look uneven until I meticulously aligned fibers with tape, which made a huge difference in blending the repair.
Implementing the Stitch-Bond Technique
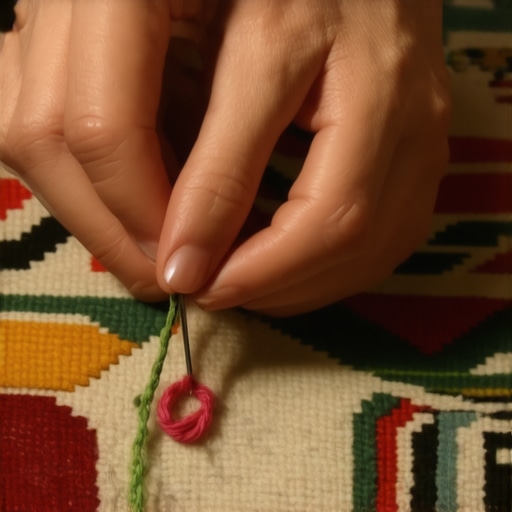
Thread the needle with a length of yarn, leaving enough to work comfortably. Begin stitching at one corner of the tear, passing the needle under the fibers at the edge, then pulling through to create a tight, discreet stitch. Continue sewing across the tear, weaving the thread in a zigzag pattern that interlaces the fibers, much like a zigzag stitch on a sewing machine—this mimics the carpet’s original weave. During my first attempt, I found that maintaining even tension prevented puckering, resulting in a nearly invisible fix. Remember, small, tight stitches are key to durability and aesthetics.
Tuning Tension and Finishing
As you sew, periodically check and adjust tension to keep fibers tight but not overly strained. When reaching the end, secure the thread with a knot, then carefully trim excess yarn. Gently remove the masking tape and gently smooth out the fibers with a brush or by hand, blending the repaired area with the surrounding carpet. I learned that a light brushing after sewing helps fibers settle and enhances invisibility. For extra reinforcement, repeat the stitches if needed, especially in high-traffic zones, ensuring longevity of your repair.
Final Tips for Seamless Results
Use care when matching thread color and type to the existing carpet for a seamless look. Practice on scrap pieces if possible to master tension and stitch size. Patience is crucial; rushing can lead to puckering or uneven stitches. Over time, with a steady hand and attention to detail, you’ll transform a visible rip into a virtually undetectable patch—saving money and extending the life of your flooring.
If you’re interested in upgrading your flooring installation techniques or want to learn about the latest trends, my recommendation is to explore comprehensive guides like these top flooring trends for 2025. Proper repair skills paired with current industry knowledge can truly elevate your home maintenance game.
 Many homeowners believe that mastering the basics of shower design or flooring installation is enough to ensure a durable, beautiful space. However, even experienced renovators often fall into common traps that compromise long-term results. One prevalent misconception is the idea that sealing fixtures or choosing trendy baseboard styles guarantees a flawless finish. In reality, advanced details—like proper waterproofing techniques or understanding the nuances of material expansion—are what separate professional outcomes from amateur ones. For instance, neglecting to account for temperature-induced expansion in flooring can lead to cracks or buckling down the line, a mistake highlighted in expert studies on floor longevity.
“Have you ever fallen into this trap?” Let me know in the comments.
Think about shower installation: many assume that applying a good silicone bead alone suffices. Yet, without meticulous waterproofing beneath tiles and proper slope for drainage, water can seep behind walls—causing mold or structural issues. A common myth is that baseboards are merely decorative; in truth, they serve as an essential barrier against moisture, pests, and wall damage. Choosing the right style is important, but understanding how to secure them effectively and match their height across different rooms is what crafts a polished look. You can find updated trends and tips for elevating your interiors at resources dedicated to baseboard styles and installation tricks.
When it comes to flooring, many believe that a quick glue or click-lock method will last decades without maintenance. However, improper acclimatization of materials before installation or ignoring the importance of an even subfloor can lead to gaps, squeaks, and uneven surfaces over time. Modern techniques emphasize not only the correct tools but also an understanding of material science—like how wood reacts to humidity changes. For a holistic approach, explore the latest installation strategies and tips at top industry guides.
By digging into these nuances—bushing aside myths about quick fixes and superficial finishes—you’ll set yourself up for success in every project. Remember, detailed attention to these advanced factors ensures your renovations look great and stand the test of time. Want to deepen your knowledge? Check out comprehensive guides like the one on flooring installation mistakes to avoid for a seamless, durable finish, or explore how to choose the right baseboards for your home’s style.
Keep Your Repairs in Top Shape with the Right Tools
When it comes to maintaining your home, especially after flooring or bathroom renovations, having the proper tools can make all the difference. I rely heavily on a high-quality, stainless-steel seam roller to ensure that vinyl planks and tiles bond seamlessly without air pockets—an issue that can compromise waterproofing and durability over time. This tool applies consistent pressure, helping adhesive spread evenly and preventing future curling or lifting.
For carpet repairs, I swear by a professional-grade knee kicker, which gives precision and leverage that cheap models simply can’t match. It allows me to stretch carpets tightly and secure them firmly without creating ripples or bubbles, which are common pitfalls. Plus, a good carpet stretcher reduces the need for frequent re-stretching, saving time and money long-term.
Beyond basic tools, investing in a digital moisture meter can help monitor subfloor and wall moisture levels, preventing problems like mold growth or tile failure caused by trapped moisture. I use this device before laying new flooring or installing baseboards to ensure the environment is dry enough, adhering to recommendations from industry standards like those in this guide. Properly measuring moisture is especially critical in kitchens and bathrooms where humidity fluctuates.
How do I maintain flooring and baseboards over time?
Regular cleaning is the simplest way—using microfibers and gentle cleaning agents prevents dirt buildup that can scratch surfaces and cause discoloration. For baseboards, periodically inspecting and securing loose corners with finishing nails or adhesive helps maintain a seamless, professional appearance. When you notice gaps or unevenness, a quick application of wood filler or caulk can prevent water ingress and mold growth, especially in moisture-prone areas.
Looking ahead, I predict advancements like smart moisture sensors embedded into subfloors and walls will become standard in home maintenance, allowing homeowners to detect issues before they escalate. This proactive approach minimizes costly repairs and extends the life of your updates.
Essential tools that stand the test of time
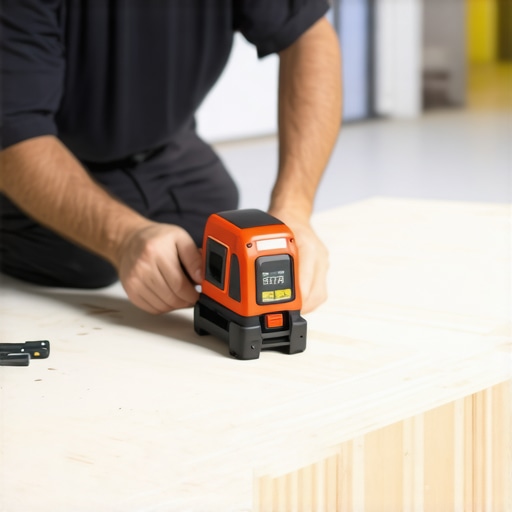
One underrated but invaluable item in my tool kit is a calibrated laser level. Unlike string lines or bubble levels, laser levels provide rapid, highly accurate reference points across large surfaces—crucial when aligning tiles, baseboards, or installing new flooring. I use it to ensure straight, consistent lines in all my projects, which not only looks professional but also prevents structural issues caused by misalignment.
Another must-have is a pair of micro-tweezers. These tiny tools are perfect for adjusting small pieces of tile or removing debris from tight spaces, helping you achieve meticulous results that last for years. Combining these precise tools with strategic maintenance habits guarantees that your home’s features stay beautiful and functional over the long haul.
Embrace the future of home care with advanced techniques
Incorporating technology may seem daunting initially, but embracing innovations like moisture sensors or automated cleaning devices can dramatically simplify long-term upkeep. For instance, smart water leak detectors can alert you early to plumbing issues behind walls, preventing extensive damage. As the industry evolves, staying updated through resources like these future-focused tips will help you adapt your maintenance routine efficiently.
Now is the perfect time to try a pro-level trick: Use a calibrated laser level to double-check your baseboard alignment after installation. This simple step can save you from noticeable crooked lines and ensure professional-quality results. Incorporate these tools and habits now to keep your home in impeccable condition for years to come.
< >
>
Picture a laser line stretching perfectly straight across a wall, guiding your installation—accuracy that professionals rely on for flawless finishes. This image illustrates how essential precise tools are for long-lasting results.
,
The Hardest Lesson I Learned About Shower and Floor Fixes
I used to believe that a quick application of sealant or a fresh coat of paint could fix everything, but I hit a wall when recurring leaks and uneven flooring stubbornly persisted. The lightbulb moment was realizing that addressing underlying issues—like waterproofing and subfloor stability—is crucial for durable results, a lesson that separates amateur attempts from professional-level craftsmanship.
3 Myths About Flooring and Shower Renovations That Held Me Back
Firstly, that buying trendy materials guarantees longevity. Second, that surface repairs are enough. And third, that quick fixes save money in the long run. Busting these myths has taught me the importance of proper installation techniques, thorough waterproofing, and ongoing maintenance to truly elevate home updates.
What Experts Won’t Tell You About Baseboards and Floor Transitions
Many overlook the significance of matching expansion gaps and choosing the right transition strips, which prevent gaps and buckling over time. Paying attention to these details, often skipped in DIY projects, ensures a seamless look and longer-lasting results, much like the insights shared in expert guides on baseboard styling.
My Essential Toolkit for Showers, Baseboards, and Flooring
I trust a high-quality angle grinder for cuts, a flexible silicone applicator for precise sealing, and a moisture meter to detect hidden dampness. These tools have consistently helped me achieve neat, professional results, and I recommend them because they save time and reduce errors, especially when dealing with complex angles or moisture-sensitive areas.
Where to Go from Here
If you’re serious about transforming your home with fixes that last, I suggest exploring guides such as latest flooring installation trends and tips for durable flooring. Investing in knowledge and quality tools ensures your repairs and upgrades withstand the test of time, creating spaces that not only look great but also perform reliably.