

I’ll never forget the sound—a sharp, metallic crack that echoed through my house at 3 AM. At first, I thought someone was breaking in. I grabbed a flashlight, walked into the living room, and saw it: my beautiful, seamless laminate floor had turned into a miniature mountain range. I had just spent three weekends meticulously laying planks across forty feet of open floor plan, ignoring the manufacturer’s suggestions about transitions because I wanted that perfect, uninterrupted look. Boy, was I wrong. That night was my crash course in the physics of thermal expansion. Most DIYers think they’re doing themselves a favor by skipping those T-moldings, but you’re actually setting a ticking time bomb. Today, I’m going to show you exactly why that T-molding is your floor’s best friend and how to hide it so well you won’t even care it’s there.
Your Floor Is Secretly Moving All the Time
I know, I know—you want that infinite wood look that flows from the front door to the back porch. But laminate isn’t a static object; it’s a composite of wood fibers that reacts to its environment. When the humidity spikes in July, those planks grow. When the heater kicks on in January, they shrink. If you have a run longer than 30 feet without a break, the cumulative force of that expansion has nowhere to go but up. I made the classic flooring installation mistake of tight-fitting my edges, and I paid for it with a floor that sounded like a drum every time I stepped on it. This is why your laminate floor sounds like a drum or, worse, starts to peak at the seams. According to the National Wood Flooring Association, wood-based products can expand significantly depending on environmental changes, often requiring dedicated expansion gaps every 25 to 30 feet to maintain structural integrity. If you ignore this, the locking mechanism of your planks will eventually snap under the pressure.
Does a Transition Strip Kill the Professional Vibe?
This is the biggest hang-up I hear from neighbors. They think a T-molding looks cheap or like a DIY hack. But let me tell you, a well-placed transition looks a thousand times better than a floor that’s buckling or popping out from under the perfect baseboards you just installed. I used to be a purist, but after seeing how the expansion gap rule saved my second project, I’m a believer. If you’re worried about aesthetics, the secret is matching the color perfectly or placing the molding in natural choke points like doorways. Have you ever walked across your floor and felt a weird bounce or heard a clicking noise? That might be your floor screaming for a break. Drop a comment or reach out—I’d love to hear if your floor is currently putting up a fight. It’s better to fix it now by learning the suction cup hack for gapped planks than to rip the whole thing up later.
Stop Your Floor from Buckling with Proper Spacing
Laminate is like a living organism in your living room; it needs room to breathe. I learned this the hard way during a kitchen renovation where I ran the planks through a narrow hallway without a single break. By the time I hit the thirty-foot mark, the boards were under so much tension that the slightest change in temperature caused a massive hump in the middle of the hall. The fix isn’t complicated, but it requires discipline during your step-by-step flooring installation.
Respect the Penny Gap Rule
You might think shoving the planks right against the drywall makes for a tighter look, but you’re actually choking the floor. I always use the penny gap rule for installing laminate near drywall. It’s exactly what it sounds like: leave at least a quarter-inch gap (about the thickness of a few stacked pennies) between the edge of the plank and the wall. If you’re working with heavy-duty laminate, go slightly wider. I once used actual spacers I bought online, but in a pinch, scrap pieces of the flooring itself work just as well to keep that perimeter consistent.
Handle Stubborn Seams Without Breaking the Lock
One mistake I see all the time is people getting frustrated with a gap and swinging a standard hammer. That’s a one-way ticket to ruined tongues and grooves. I remember a job in a chilly basement where the planks just wouldn’t click home. Instead of forcing it, I used the dead blow hammer secret for flat floor seams. The sand-filled head delivers a solid thud without the recoil, driving the planks together gently but firmly. If you still have a gap that refuses to close, don’t rip it up—try the suction cup hack for adjusting gapped laminate planks to pull them into place from a distance. 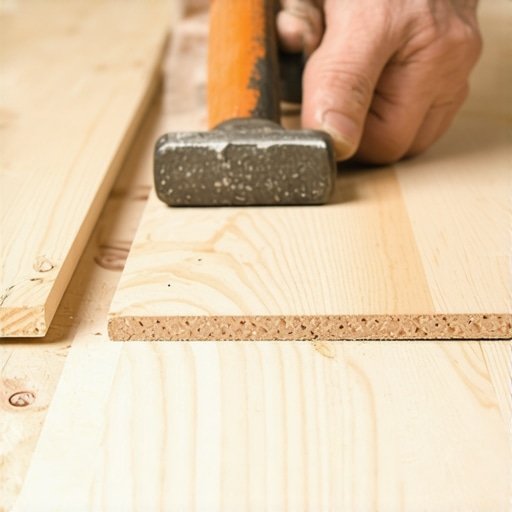
Getting the Doorways Right the First Time
Doorways are the ultimate test of a DIYer’s patience. Most people try to cut the flooring around the door trim, which always looks like a jagged mess. The pros don’t do that; they make the trim work for them.
Use the Under-Cut Move for a Seamless Look
Take a scrap piece of your flooring and a pull saw. Lay the scrap against the door jamb and saw through the trim using the scrap as a height guide. This is the under-cut move for fitting flooring perfectly under door casings. It allows the floor to slide underneath the wood, giving you a clean, professional edge while still providing that crucial expansion space hidden from view. It saves you from having to use ugly globs of caulk later.
Transitioning Without the Eyesore
When you hit a room transition, don’t just bridge it with a prayer. If the subfloor isn’t perfectly level, you’ll end up with a “bounce” that ruins the feel of the room. This often happens because of subfloor prep mistakes that make new vinyl planks sound hollow. Before you lay your T-molding, ensure the metal track is screwed into the subfloor—not through the laminate flooring itself. I once made the mistake of pinning the molding through the laminate, which basically locked the floor in place and caused a massive buckle three months later. If you finish the job and notice a slight gap between the molding and the wall, you can easily fix baseboard gaps without replacing the trim by using a bit of color-matched flexible filler.
If you think you’ve mastered the living room, wait until you step into the bathroom. Most people assume a shower pan is just a plastic tray you drop on the subfloor and forget. I’ve seen countless DIYers—and even some ‘pros’—try to level a wobbly base by just spraying expanding foam underneath. That is a recipe for a cracked drain flange in six months. In my experience, the only way to ensure a rock-solid foundation is to reject the ‘easy install’ marketing and go back to basics. The Tile Council of North America (TCNA) guidelines are very clear: a shower base needs full support to prevent deflection. This is why I always use the mud bed secret for rock-solid shower floors. Without that mortar support, your shower pan is sinking before you even turn on the water. Have you ever stepped into a shower and felt that terrifying ‘give’ under your heel? Let me know in the comments if you’ve faced the ‘sinking pan’ nightmare.
The Myth of the Quick-Fix Shower Base
The biggest ‘trap’ in bathroom remodeling is ignoring the pre-slope. Many installers think the waterproofing membrane does all the work, but if water sits on that liner because the subfloor is flat, you’ll end up with a moldy, stinking mess. I once ripped out a three-year-old shower that smelled like a swamp because the installer skipped the pre-slope. To avoid this, you have to understand why most DIY shower waterproofing fails at the drain. It’s usually about the transition between the slope and the flange. If you’re tiling, you also need to watch your tools. Using the trowel size mistake that ruins your shower tile bond can lead to hollow spots where water collects and eventually pops your tiles loose.
Why Does Your Brand New Carpet Look Like a Ruffled Ocean?
Everyone thinks the ‘knee kicker’ is the tool that stretches the carpet. That’s one of the biggest misconceptions in the industry. In reality, the kicker is for positioning and tucking; if you try to stretch a whole room with just your knee, you’re going to end up with wrinkling two years after install. According to the Carpet and Rug Institute (CRI) 105 standard, power stretching is mandatory for a professional installation. I’ve seen so many people make the knee kicker mistake that ruins new carpet tension. If you don’t reach that 1-1.5% stretch across the room, the backing will eventually relax and create those ugly ripples. Mastering carpet install secrets like the power stretcher is what separates a 20-year floor from a 2-year headache.
Stop Nailing Your Baseboards Into No Man’s Land
When it comes to the finishing touches, the biggest mistake is speed over precision. Most people just fire nails into the bottom plate of the wall and hope for the best. The problem? If that bottom plate is slightly recessed or the drywall has a ‘taper’ at the bottom, your baseboard will tilt inward, ruining your perfect 45-degree corners. You should never nail baseboards into the bottom plate only. Instead, find the vertical studs to pull the material flat against the wall. If your walls are particularly wavy, I recommend the shimming secret for making MDF baseboards look custom. It allows you to create a perfectly straight line even when the house is anything but. Have you ever fallen into the trap of over-nailing only to see the wood split? Drop a comment below and let’s troubleshoot your trim issues together.
I’ve spent thousands of dollars on fancy saws and laser levels, but there is one thirty-dollar tool that has saved more of my projects than any other: the moisture meter. Most people skip the moisture meter test every flooring pro uses because they think their subfloor looks dry enough. Trust me, looks are deceiving. If you’re installing over concrete, that slab acts like a giant sponge. I once rushed a basement job, only to see the laminate curl like a potato chip because the concrete was still off-gassing moisture I couldn’t see. Now, I never click a single plank together until I know the moisture levels are within three percent of the flooring material. It’s the difference between a floor that lasts thirty years and one that fails in three months. For your carpets, keep that power stretcher handy for periodic re-tensioning if you start to see waves, or learn how to fix a bubbling carpet without calling a professional if things get out of hand early on.
How Can I Keep These Surfaces in Peak Condition Over Time?
The secret isn’t just in the install; it’s in the everyday care. For showers, stop using harsh acidic cleaners that eat away at your grout and weaken the waterproof bond. I’m a huge fan of the toothbrush trick for cleaning stubborn shower grout with a simple baking soda paste. It takes longer, but it preserves the seal much better than a power scrubber. According to the IICRC S100 standard for professional carpet cleaning, you should be deep-cleaning your high-traffic areas every twelve to eighteen months to prevent soil from abrading the fibers. If you wait until the carpet actually looks dirty, the physical damage to the pile is already done. For your baseboards, keep a small container of that same flexible filler I mentioned earlier on hand. Houses settle, and you’ll likely need to fix cracking baseboard caulk as the seasons change and the wood expands.
Smart Tech and Sustainable Planks are the Future
Looking ahead to 2025 and beyond, we are seeing a massive shift toward smart flooring and ultra-sustainable materials. I’m already seeing moisture sensors that can be installed under shower pans to alert your phone the second a leak starts, potentially saving you from costly shower repairs down the line. We’re also moving away from cheap plastics toward high-performance mineral cores that don’t expand or contract like the laminate of old. If you want to stay ahead of the curve, check out these top trends in installation for 2025. My advice? Don’t be afraid to invest in a piece of equipment that feels too professional for a DIYer. Using the right gear like the pros do, especially when it comes to carpet install secrets, is what gives you that high-end finish. Go grab a moisture meter before your next project—it’s the single best investment you’ll make this year to ensure your hard work stays perfect.
Lessons from the Floor That Fought Back
The most profound realization I had after years of trial and error is that the floor is a living part of the house. It’s easy to treat it like a static surface, but my biggest ‘lightbulb moment’ came when I stopped fighting the physics of the materials and started working with them. If you take the time for expert flooring installation tips for 2025, you aren’t just laying planks; you’re building a foundation for your daily life. I’ve learned that a single high spot on a subfloor will haunt you with every step, making it well worth the extra hour of prep. Another lesson? Transitions aren’t failures of design—they are the safety valves that keep your hard work from buckling. Finally, never underestimate the power of the vertical finish; using the sanding block hack for seamless baseboard transitions can turn a standard room into a custom-looking masterpiece that looks like it was done by a high-end contractor.
Gear That Earned a Permanent Spot in My Truck
I’ve wasted plenty of money on gimmicks, but a few tools have become my absolute non-negotiables. First, a high-quality pull saw for door jambs provides a level of precision that oscillating multi-tools often lack for beginners. For those of you diving into soft surfaces, I highly recommend researching the best carpet types for high traffic areas in 2025 before you pull the trigger on a purchase; the right fiber choice is the difference between a floor that looks new for ten years and one that mats in two. I also never start a trim project without my miter saw dialed in using the 45-degree trick for perfect baseboard outside corners. These tools and techniques don’t just save time; they save your sanity when the project hits the inevitable ‘messy middle.’
#IMAGE_PLACEHOLDER_E#
Build Something That Lasts Long After You Move In
Your home is likely your biggest investment, and taking the lead on your flooring installation is an incredible way to build equity and personal pride. It’s completely normal to be nervous about that first cut or the first row of tile. Just remember that every professional you see started exactly where you are—with a wobbly shower base or a miscut plank. You now have the insider secrets, the physics-based rules, and the technical hacks to avoid the most common pitfalls. Trust the process, respect the expansion gaps, and don’t be afraid to take it slow. Have you ever struggled with a transition strip that just wouldn’t stay flat no matter what you tried? Let me know in the comments below!