It was a frustrating Saturday afternoon when I realized I had underestimated the importance of the Trowel-Angle Move while working on a high-end bathroom remodel. My large format tiles weren’t adhering uniformly, leaving me with uneven mortar coverage and a sinking feeling that I’d have to redo the entire section. That moment sort of felt like hitting a wall, but it also sparked a lightbulb that changed my approach altogether.
Why the Trowel-Angle Move Can Make or Break Your Tile Job
Since then, I’ve come to cherish this technique as a game-changer for guaranteed mortar coverage—especially with large format tiles. You see, the secret isn’t just in choosing the right trowel; it’s in how you angle it during application. The Trowel-Angle Move ensures the mortar spreads evenly, presses fully under the tile, and eliminates those pesky voids that lead to cracking or de-lamination down the line.
If you’re tackling a big tile project—be it a shower, floor, or feature wall—this method makes sure your tiles bond securely, preventing future headaches. And I promise, once you master this technique, your installation will look more professional and durable. Want to know how this simple trick can save your project? Keep reading, and I’ll show you step-by-step how to implement it for perfect coverage every time.
Is the Trowel-Angle Move Really Worth the Extra Effort?
Early in my career, I made a costly mistake—using a flat trowel and pressing down with brute force. It left air pockets and inconsistent mortar bedding, which caused problems later. It’s a common error I see among DIYers and even pros rushing through the prep. Trust me: taking the extra moment to angle your trowel correctly can dramatically improve your results. I’ve found this to be true time and again, and it’s backed by industry standards that emphasize proper mortar application for large tiles (learn more in the [Tile Craftsmens’ guide](https://tilecraftsmens.com/step-by-step-flooring-installation-from-planning-to-perfect-finish)).
In the next sections, I’ll walk you through the exact steps to master the Trowel-Angle Move, so you can achieve flawless, long-lasting results for your next project. Ready to upgrade your tile game? Let’s dive in!
,
Get Your Trowel Angle Right From the Start
Earlier in a bathroom renovation, I learned the hard way how critical this step is. When applying mortar, hold your trowel at a 30 to 45-degree angle, so the edges of the notched side press evenly into the substrate. I remember bouncing the trowel off the surface to spread the mortar thin, then tilting it slightly for compaction. This motion forces the mortar into every tiny nook and cranny, creating a uniform bedding for your tiles.
Locate the Ideal Spot and Simulate Your Technique
Before placing tiles, take a small amount of mortar and practice the Trowel-Angle Move on a spare piece of subfloor or backer board. Imagine pressing a paintbrush at the right angle to spread varnish smoothly; your trowel’s edge acts similarly. In my last project, I kept a spare tile nearby to test the mortar bed, adjusting my angle until I achieved a smooth, even layer. This ensures consistent coverage, minimizing voids that can cause future cracks.
Apply Mortar with Deliberate Motion
Begin at one corner of your work area. Scoop up a generous amount of mortar with the flat side of the notched trowel and spread it in a straight line. Then, tilt the trowel to the recommended angle so the notched side presses into the surface. Glide the trowel forward using a firm, even pressure—imagine you’re frosting a cake with a spatula. This ensures the mortar is pressed evenly under the tile, much like when I installed a large-format tile in my shower, where uneven mortar led to lippage. Proper bedding prevents that problem and guarantees long-lasting adhesion.
Check for Consistency and Rework if Needed
After spreading mortar on a section about the size of a tile, lift a corner of a tile gently to see the mortar’s profile. It should be a uniform, ridgeless layer that fills all voids underneath. If you notice gaps or air pockets, immediately rework that area. During my recent project, I found a few spots where the mortar was too thick or thin. I used the trowel to scrape and re-apply mortar, angling the edge to re-establish even coverage. This step prevents future tiles from cracking or de-laminating.
Tiling Time: Press and Spot Check
Place your tile onto the mortar bed gently and press down firmly with your palm or float. Twist slightly to seat it evenly. Use a level to verify flatness quickly. Ensure the tile is seated at the same height as neighboring tiles—this is where the initial proper mortar application pays off, preventing lippage. I once hurried this step, and the resulting uneven tiles required ripping out and redoing the entire section—a costly lesson.
Maintain Continuous Technique and Clean Tools
As you progress, keep your trowel at the correct angle, and don’t rest the blade on the substrate, which can cause smearing or uneven mortar application. Clean your trowel regularly with a damp sponge or rag to prevent mortar buildup that can alter your angle or spread. This consistent method dramatically improves your tile’s overall appearance and longevity, especially for large format tiles where precision becomes even more crucial. For detailed tips on setting durable and professional-quality floors, visit our comprehensive guide at Flooring Installation Tips.When tackling home renovation projects, many contractors and DIY enthusiasts alike fall prey to misconceptions that can compromise quality and durability. One prevalent myth is that choosing the most popular or expensive materials guarantees a flawless finish. However, even premium materials will underperform if installation nuances are overlooked. For example, improper subfloor preparation can lead to vinyl plank buckling or squeaky hardwood floors, regardless of the product quality. Regularly, I see people rushing through these preparatory steps, which results in costly rework—an expensive lesson many learn too late. It’s crucial to understand that proper subfloor leveling and moisture management are foundational to successful installation. Experts emphasize the importance of measuring moisture content and ensuring flatness before laying flooring, as highlighted in our guide on [transforming your floor with expert tips](https://tilecraftsmens.com/transform-your-home-expert-flooring-installation-tips-for-2025).
Many believe that once a shower niche or baseboard is installed, it requires no further attention. In reality, details like sealing edges thoroughly can prevent leaks and mold growth, especially in high-moisture environments. A common mistake is applying sealant without choosing the right type or proper application technique, which can result in water infiltration and damage. As discussed in our article on [shower repairs and longevity](https://tilecraftsmens.com/shower-repairs-when-to-fix-vs-replace-for-longevity), meticulous sealing is essential for durability.
Advanced installers know that seemingly small aspects like the beveling of baseboard inside corners or the precise scribing around uneven surfaces can vastly improve the overall look and fit. For instance, failing to scribe baseboards to fit perfectly can leave unsightly gaps that detract from the finish. A nuanced detail often overlooked is the back-beveling technique, which allows for tight, professional joints even on irregular surfaces—see our comprehensive guide on [baseboard installation techniques](https://tilecraftsmens.com/how-to-choose-the-perfect-baseboards-for-your-homes-style).
One trap that catches many off guard is the assumption that all adhesives or grouts are suitable for every application. Using the wrong type can lead to long-term problems such as grout staining or bond failure. Consulting expert recommendations and industry standards ensures compatibility, especially when working on large-format tiles or high-traffic flooring. You can learn more about this in our detailed overview of [durable flooring installation practices](https://tilecraftsmens.com/your-guide-to-durable-flooring-installation-for-a-stylish-home).
Have you ever fallen into this trap? Let me know in the comments. Remember, mastering the subtleties of installation—not just the big decisions—sets professional apart from the amateur, and saves you money and stress in the long run.
Keeping Your Installations in Prime Condition
Once you’ve mastered the art of a flawless installation, the next step is ensuring it remains beautiful and functional over time. Regular maintenance isn’t just about aesthetics; it prolongs the lifespan of your flooring, tiles, showers, and baseboards. Consistently inspecting for early signs of wear, such as grout discoloration or baseboard gaps, allows for timely repairs that prevent costly rebuilds. For example, sealing grout lines every couple of years using a high-quality grout pen or sealant can prevent stains and water infiltration, especially in bathrooms and kitchens. Also, addressing minor damage early, like scratching on hardwood or carpet fraying, keeps your space looking sharp without major overhauls.
My Go-To Equipment for Top-Tier Results
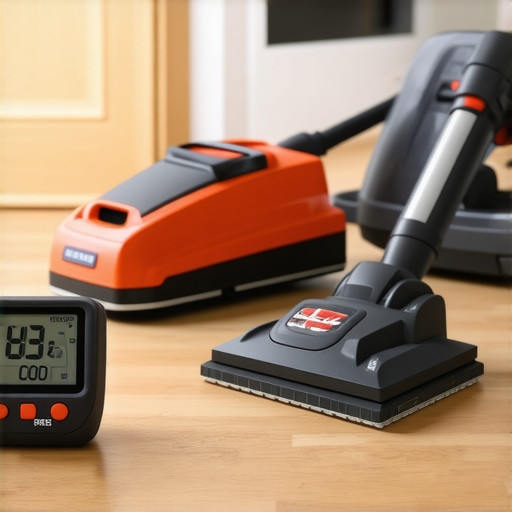
From cutting-edge tools to reliable maintenance products, I rely heavily on specific equipment to maintain the quality of my installations. A digital moisture meter is indispensable for checking moisture levels in subfloors before any installation. This device, like the Wagner Meters Orion 910, helps prevent issues like vinyl planks buckling due to excess moisture, as discussed in our detailed guide. For maintaining cleanliness, I swear by a commercial-grade HEPA vacuum, which efficiently removes dust and debris, ensuring the surface stays pristine and free of particles that can compromise adhesion or finish. When it comes to tools, a high-precision angle grinder fitted with a diamond blade is essential for accurate edging and scribing around irregular surfaces—refining the fit of baseboards or stone tiles with ease. Also, investing in a good-quality corner sander significantly reduces sanding time during detailing work and helps achieve smooth, professional finishes.
Nurturing Long-Term Results Through Smart Practices
Beyond equipment, adopting a disciplined approach to maintenance can yield remarkable results. Implementing a routine cleaning schedule tailored to your materials helps preserve their appearance. For instance, using pH-neutral cleaners for hardwood and tile prevents damage to the finish or grout lines. Additionally, installing a dehumidifier in moisture-prone areas like basements or bathrooms controls humidity and prevents issues like mold growth or warping. Regularly checking for environmental factors that could impact your installation, such as uneven subflooring or inadequate ventilation, enables preemptive corrections. Over time, this proactive mindset keeps your home looking fresh and prevents deterioration, giving you peace of mind that your investment will last for years.
How do I maintain my flooring and tiles over time?
Consistent inspections and timely touch-ups are key—by sealing grout lines periodically, cleaning with appropriate products, and addressing minor damages early, you set the stage for long-lasting beauty. Well-maintained tools like moisture meters and quality vacuums also support ongoing care. Want to ensure your home stays in top shape? Consider integrating these routines today and witness the transformation in your living space.
Remember, mastering maintenance is just as important as the installation itself. For more expert advice on prolonging the life of your floors and tiles, visit our comprehensive installation guide. Try adopting a regular grout sealing schedule or invest in a good dehumidifier—small steps that make a big difference over time.