

I remember the frustration vividly—trying to fit vinyl flooring snugly beneath a heavy stone hearth and feeling helpless as it refused to slide into place, leaving gaps and uneven edges that ruined the entire look. That lightbulb moment hit me hard: I wasn’t accounting for the subtle, yet crucial, undercut technique. Today, I want to share with you a simple trick that transformed my installation process and can do the same for your project.
The Hidden Power of the Undercut
Will this trick really improve my flooring fit?
When I first heard about the “undercut” method, I was skeptical. I had made the common mistake early on—assuming that simple trimming was enough to get a tight fit under hearths and stone surrounds. But that approach often leads to stubborn gaps and awkward overlaps. According to flooring experts, precision cutting to the exact contour of the stone base is essential for a seamless transition, especially with vinyl that expands and contracts. Implementing an undercut ensures the vinyl slides smoothly and sits flush, preventing those unsightly gaps that can compromise both aesthetics and durability.
Have you ever faced trouble fitting vinyl around irregular edges or under heavy fixtures? If so, you’re not alone. Many installers overlook this small detail, but acknowledging it can save hours of frustration and costly repairs.
Next, let’s explore how you can master this technique effortlessly and incorporate it into your projects for a flawless finish. Stay tuned—those little adjustments make a big difference.
Prepare Your Tools and Workspace
Gather precision tools
Start by selecting a high-quality oscillating multi-tool with a fine blades attachment. This tool allows for controlled, detailed cuts essential for an accurate undercut. Ensure you have a pencil, measuring tape, a straightedge or ruler, and safety gear like gloves and eye protection. Clearing your workspace of obstacles provides better control and safety during cutting.
Measure and Mark the Cut Line Carefully
Trace the stone or fixture edge
Use your measuring tape to determine the exact width of the stone hearth or fixture, then mark this measurement on the vinyl flooring with a pencil. Employ a straightedge to draw a clean, precise line along the marked edge. Precision here ensures the vinyl will slide smoothly under the fixture, avoiding gaps and unevenness. In my experience, double-checking measurements reduces mistakes—once, I misread the width and had to do the whole cut again, which was time-consuming but educational.
Perform the Undercut with Confidence
Make controlled cuts along the marked line
Set your oscillating tool to a steady, controlled pace. Carefully cut along the line, keeping the blade aligned and perpendicular to the surface to avoid jagged edges. Take your time—rushing can lead to overcuts or uneven edges that will require patching or re-trimming. Remember, it’s better to undercut slightly than to cut too deep; you can always enlarge the cut if needed.
Test Fit and Refine the Cut
Ensure seamless integration
Place the vinyl flooring under the fixture to check the fit. It should slide in effortlessly, with no resistance or gaps. If the fit is tight or the vinyl catches, gently trim more material using the oscillating tool. Achieving a snug fit requires patience—once, I had to re-trim several times before the vinyl sat flush. This step is crucial for a professional look and functional longevity.
Seal the Edge for Extra Durability
Apply sealant if necessary
To prevent water seepage or damage, consider sealing the cut edge with a compatible sealant. This is especially important in bathrooms or kitchens. Not only does this protect your flooring, but it also enhances the aesthetic finish. For instance, I applied a clear silicone along the cut edge of my vinyl near the shower, which prevented water infiltration and kept the seam looking clean.
Remember the Small Changes, Big Impact
Practice and refine your technique
Like any skill, mastering the undercut takes practice. Start with scrap pieces before working on your actual flooring. Over time, you’ll develop a steady hand and an eye for detail that transforms a good installation into a flawless one. Incorporate this simple step into your workflow, and you’ll notice how much smoother and more professional your vinyl flooring projects look.
Learn more about avoiding installation mistakes.Even seasoned homeowners and DIY enthusiasts often believe that following basic steps guarantees a flawless finish. However, in my experience, many overlook the subtle nuances that separate a professional-looking project from a mediocre one. One prevalent myth is that leveling the subfloor is always enough to ensure a perfect tile or vinyl installation. In reality, even minor imperfections—like slight dips or uneven spots—can lead to issues down the line, such as cracked tiles or buckling vinyl. A study published in the Journal of Construction Engineering emphasizes that attention to surface flatness at a microscopic level significantly extends the lifespan of flooring.
Another common misconception is that carpet installation is just about stretching the material tightly. While tensioning is crucial, the method of tack strip placement and the preparation of the subfloor have a massive impact on the durability and appearance. Incorrect anchoring can result in wrinkles and premature loosening, making the effort seem futile.
In the realm of baseboards, many believe that simply nailing them into place is sufficient. However, the choice of fasteners, miter cuts, and the use of caulk or filler to conceal gaps are equally vital. Overlooking these details often results in visible seams and gaps that ruin the aesthetic and suggest poor craftsmanship.
When it comes to showers, a significant oversight involves waterproofing. Numerous DIY projects fail to employ proper vapor barriers or neglect sealing the corners and joints adequately. This oversight can cause mold, mildew, and water damage over time, leading to costly repairs. The importance of pre-slope and waterproof membrane installations cannot be overstated and is backed by experts like Bob Schmidt from TileApprentice.
**Why Do Small Details Make Big Differences?**
Focusing on advanced nuances, such as the way you scribe and cut around irregular surfaces, can elevate your work from good to exceptional. For instance, employing techniques like back-beveling baseboards or using specialized tools for uneven cuts ensures a seamless transition between surfaces. Cut precision, especially in tight corners or around fixtures, prevents gaps that compromise the integrity and look of the installation.
Have you ever fallen into this trap? Let me know in the comments. Remember, investing time in mastering these subtle skills will reflect in the durability, safety, and beauty of your completed project. For insights on elevating your interior, check out how baseboards can make or break your space’s aesthetic, or explore the latest trends in flooring for 2025 [here](https://tilecraftsmens.com/transform-your-flooring-top-trends-in-installation-for-2025).”}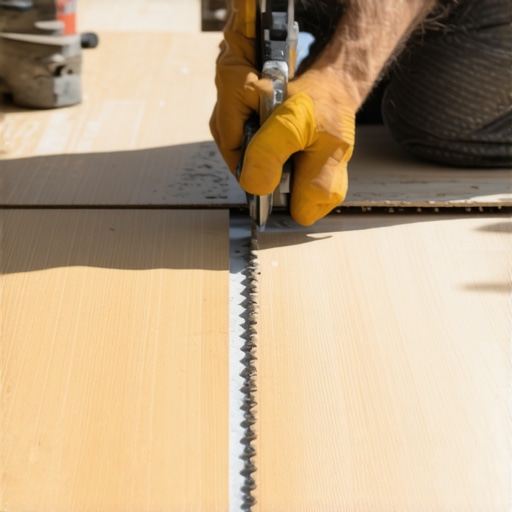 }**
}**
Maintaining your flooring, baseboards, and shower components is just as important as the initial installation. Having the right tools on hand ensures that you can perform quick repairs, routine upkeep, and even scaling projects with confidence. Personally, I rely heavily on a few key pieces of equipment that make regular maintenance straightforward and effective.
Invest in a Quality Oscillating Multi-Tool
This versatile tool is virtually indispensable for delicate tasks like trimming baseboard gaps, removing old grout, or lifting stubborn vinyl edges. I prefer my cordless oscillating multi-tool because it offers mobility and precision, especially when working in tight spots around shower niches or corner moldings. The variety of blades, such as carbide or fine-tooth, allows me to adapt to different materials, reducing the risk of damage during upkeep or minor repairs. According to industry standards outlined in the shower renovation guide, having a dedicated multi-tool simplifies sealing and re-grouting tasks, extending the lifespan of your shower.
Use Laser Levels for Alignment and Consistency
Ensuring your baseboards and flooring are perfectly straight can be challenging, especially in older homes where walls and floors may be uneven. A laser level projects perfectly aligned reference lines across multiple surfaces, saving you time and frustration. For example, I’ve found that using a laser level during baseboard installation, paired with my nail gun, results in a cleaner, more professional look. This precision tool is also invaluable when installing shower panels or aligning large tile runs, as it guarantees consistency over long distances. Trends indicate that digital laser levels, with self-leveling features, are becoming standard for DIYers aiming for professional finishes.
Maintain Your Tools to Guarantee Long-Term Results
Regular cleaning, proper storage, and timely calibration of your tools prevent degradation that could compromise your work. I recommend wiping down power tools after each use to remove dust and debris, which can cause overheating or wear. Lubricate moving parts as per manufacturer instructions to maintain accuracy and performance. For hand tools like caulk guns or grout spreaders, keep them clean and dry; a well-maintained tool works smoother, reducing effort and improving outcomes.
Predicting Future Trends in Maintenance Equipment
Looking ahead, I believe IoT-enabled tools that monitor usage and alert you when maintenance is due will become more common. Automated calibration and smart diagnostics will help preserve your equipment, ensuring your projects stay on track and within budget. Embracing these innovations can help DIY enthusiasts and professionals alike keep their workspaces efficient and their installations flawless.
Questions About Sustaining Your Installations
How do I maintain my flooring and shower components over time? A proactive approach is key: schedule regular inspections for signs of water damage, cracks, or loose baseboards. Use your oscillating multi-tool for minor touch-ups before issues escalate. Applying sealants and groutRefreshers periodically preserves the integrity of your shower and flooring joints, preventing costly repairs later.
Start incorporating these tools and routines today to keep your home looking pristine and functioning well. For more advanced tips on elevating your interior, explore how simple baseboard updates can elevate your space.
Throughout my journey with flooring installation, I stumbled upon countless lessons, but few had the impact of realizing how a simple undercut could elevate my craftsmanship. One of the most profound insights was understanding that precision cuts—aligned with the contours of fixtures—are not just a minor detail but the secret sauce for seamless interiors. This revelation transformed my approach, saving me time and enhancing the final look, reinforcing the idea that paying attention to small nuances yields big results.
Another lesson I learned the hard way involved the importance of patience. Rushing through measurements and cuts often led to errors that required rework, wasting precious resources. Instead, taking the time to double-check measurements and make controlled, deliberate cuts resulted in a tighter fit and a more professional appearance. It’s a reminder that deliberate action and respect for the process build the foundation for success in flooring projects.
Additionally, I discovered that investing in quality tools, like a fine oscillating multi-tool and a reliable laser level, is invaluable. These tools not only elevate precision but also boost confidence during intricate tasks such as piping vinyl under uneven fixtures. Trusted resources, like industry-standard guides and reviews, guide me in choosing equipment that stands the test of time and purpose, emphasizing that the right tools make all the difference.
Finally, I’ve realized that mastery isn’t about perfection but continuous improvement. Every project teaches new techniques or reveals better strategies—like employing back-beveling or pre-scribing irregular surfaces—that help achieve a flawless finish. Remember, even seasoned DIYers or professionals benefit from persistent learning and adaptation, transforming each challenge into an opportunity to refine your craft.
My Toolbox for Flooring Success
For those looking to refine their skills, I recommend investing in a high-quality oscillating multi-tool—I’ve found that its versatility makes detailed cuts manageable and safe. A laser level also becomes a game-changer in ensuring straight, level installations, especially over uneven surfaces. Keep your tools in top shape with regular maintenance—clean, calibrate, and store properly—so they’re always ready to support your craftsmanship. Additionally, explore detailed guides and tutorials, such as latest trends in flooring for 2025, to stay inspired and informed about evolving techniques and styles.
Your Next Step in Perfect Floors
The path to exceptional flooring is paved with attention to detail and a willingness to learn from every project. Embrace the process, start with scrap pieces to hone your undercut skills, and don’t shy away from refining your measurements and cuts. The confidence you gain from mastering these subtle adjustments will turn your DIY endeavors into professional-grade projects. So, are you ready to take your flooring skills to the next level and create interiors that truly impress?
Have you ever struggled with fitting vinyl under fixtures? Share your experiences below and let’s learn from each other’s journeys to better craftsmanship!
,