

Ever spent hours grouting your freshly tiled shower or backsplash, only to be greeted the next morning by an unsightly, cloudy film of epoxy haze? I remember the sinking feeling when I realized my hard work was marred by a stubborn film that seemed impossible to clean. It was a frustrating moment—not just because of the extra cleanup, but because I didn’t know that a simple, overlooked trick could make all the difference. That lightbulb moment changed my approach entirely, saving me time and headaches on every project.
The Problem We All Face with Grout Haze
Grout haze, especially from epoxy grout, can be a stubborn and persistent enemy. No matter how carefully you wipe or clean, that cloudy film seems to cling to the tiles and grout lines like glue. It can turn what should be a beautiful, professional-looking space into something dull and disappointing. Many DIYers and even pros fall into the trap of using harsh chemicals or labor-intensive scrubbing, often damaging their tiles or wasting precious time.
What I discovered early on is that the solution isn’t just about stronger cleaners—it’s about a smarter, gentler method. That’s where the wet-rag trick comes in. This simple technique leverages a basic principle of chemistry and physics—quick, controlled wiping with a damp cloth to lift and remove stubborn haze without scratching or damaging the surface. It’s a game-changer I wish I had known from the start.
Could This Really Be That Simple?
Yes, and that’s the beauty of it. I made the mistake initially of scrubbing with abrasives or waiting too long to clean, which only made things worse. According to tile expert Tile Craftsmen, early and gentle removal with the right tools is key to avoiding haze buildup. My mistake was underestimating how quickly and effectively a damp rag could tackle epoxy grout haze if used correctly. Now, I want to share that secret with you—so you won’t spend extra on cleaners or risk damaging your tiles.
Stick with me, and I’ll guide you step-by-step on how to master this technique, so your tiles shine like they just came out of the showroom. Whether you’re tackling a bathroom upgrade or a kitchen backsplash, this simple method will save you hours of frustration and keep your space looking pristine for years to come.
The Wet-Rag Method: Your First Line of Defense
Imagine you just finished sealing your shower tiles, and the epoxy grout haze starts to form a cloudy film. Instead of reaching for harsh chemicals or aggressive scrubbing tools, grab a clean, damp rag. Hold it gently against the surface and wipe in a circular motion. This method is akin to polishing a car with a microfiber cloth—light pressure, controlled movement. I once applied this technique on my bathroom tiles, and within minutes, the haze began to lift, revealing a glossy, clean finish. Consistency is key; work in small sections to prevent the haze from drying before removal.
Timing Is Everything
Wait too long after grout installation, and the haze bonds tighter to the surface, making removal trickier. It’s best to tackle the haze as soon as the grout starts to set—usually within 30 minutes to an hour. During that window, the epoxy haze is still soft enough to lift easily. I learned this the hard way during my first DIY project; I waited an extra hour, and it took twice as long to clean up. Staying ahead of the haze prevents the need for aggressive cleaning that could damage your tiles. To make this process even more effective, keep your damp cloth slightly acidic—adding a splash of vinegar can help dissolve the hazy film without harming the tile or grout.
Temperature and Humidity Effects
Environmental factors influence how stubborn the haze becomes. In humid conditions, epoxy haze tends to cure faster and adhere more strongly. To counter this, increase airflow in the room or work during cooler parts of the day. When I installed my backsplash in the summer, I made sure to open windows and run a fan to keep humidity low. This simple step helped maintain the haze in a semi-soft state, making removal smoother. Remember, the goal is to wipe before the haze completely hardens, much like catching a wave before it crashes.
Using the Right Tools for Precision
Equip yourself with a soft-bristled brush or a microfiber cloth. Avoid abrasive scrubbers, which can scratch tiles or loosen grout. During one project, I initially used an old scrub sponge; it scratched the tile surface, leading to more work. Replacing it with a microfiber cloth and a gentle motion restored the surface without damage. For larger areas, a flat sponge or mop dampened with vinegar solution works well. Think of this process like polishing jewelry—gentle strokes result in a better shine, with no scratches.
Final Touches Without Damage
After the haze is lifted, rinse the surface with clean water and dry with a soft towel. This removes any residual residues and prevents streaks. In my experience, taking a few extra minutes to wipe and dry guarantees a spotless appearance. For stubborn spots that resist the damp rag, reapply a vinegar solution, wait a few moments, and repeat. Remember, patience and gentle pressure are your best allies in this process, turning what might seem like a tedious chore into a simple, effective routine. Regular maintenance using these techniques keeps your tiles looking new and vibrant, saving you from future headaches and costly repairs.When it comes to home improvements, many homeowners follow common advice like choosing popular flooring or trendy baseboard styles without realizing the subtle pitfalls that can sabotage their projects. Let’s dig deeper into the nuances and misconceptions that even experienced DIYers often overlook.
First, a prevalent myth is that all flooring installation methods are created equal. In reality, choosing the wrong technique can lead to gaps, buckling, or uneven surfaces that diminish your home’s value. For example, many assume that floating floors are suitable for every environment, but if you don’t account for humidity fluctuations, those floors may expand and contract, causing gaps or buckling. A comprehensive approach, like those discussed in this guide, can help you factor in environmental considerations to prevent costly mistakes.
Moving to wall finishes, most people underestimate the importance of proper preparation and joint treatments when installing baseboards. It’s not just about aesthetic appeal; improper miter cuts or neglecting expansion gaps can lead to gaps, cracking, or warping over time. For the latest trends and professional tips, check out the upcoming baseboard design trends. Remember, even stylish trim needs precise execution to stand the test of time.
Are You Really Ready for Advanced Flooring Challenges?
Even seasoned DIYers often skip the crucial step of acclimating flooring materials to their environment. Failing to do so can cause expansion or contraction after installation, damaging your floors prematurely. This nuance is well-documented by industry experts, emphasizing that acclimation time varies depending on your climate and material. Ignoring this step is a sneaky mistake that leads to cracked tiles or squeaking hardwood. To avoid this, follow the recommended acclimation periods and storage protocols outlined by flooring specialists.
A common trap in shower renovations involves underestimating the importance of waterproofing detail. Many assume that a thin membrane is enough, but overlooking the need for a comprehensive sealing plan can result in leaks and mold issues. Professional advice and studies, like those summarized in expert shower enclosure tips, highlight the importance of proper sealing of every joint and penetration point. Skipping these steps seems minor but can lead to expensive repairs down the line.
In summary, while the surface choices and basic techniques seem straightforward, the real challenges lie in the details—proper acclimation, precise cuts, environmental considerations, and comprehensive sealing. By understanding these nuances, you’ll not only avoid common pitfalls but ensure your home renovation stands the test of time. Ready to get into the nitty-gritty of your next project? If you’ve ever fallen into any of these traps, share your experience in the comments and let’s troubleshoot together! For more expert insights, visit our privacy policy to see how we keep your projects on track.
Prioritize Precision with Quality Tools
When it comes to maintaining your flooring and shower installations, having the right tools isn’t just a luxury—it’s essential. I personally swear by a high-quality oscillating tool, like the Fein MultiMaster, which allows me to perform delicate touch-ups around baseboards and grout lines without risking damage. Its variable speed settings enable precise control, ensuring that I can gently sand down rough spots or remove stubborn residue without scratching surfaces. For cleaner grout lines, I use a grout cleaning attachment that zooms in on tight corners, making the process more efficient and less tiring.
Implement Routine Checks and Cleaning
Establishing a regular maintenance schedule helps prevent minor issues from becoming costly repairs. I recommend inspecting your tiles and grout every few months for signs of cracks, mold, or looseness. A quick scrub using a microfiber cloth dipped in a gentle vinegar solution can keep your surfaces looking fresh. For carpets, routine deep cleaning with a good-quality carpet extractor, like the Bissell Big Green, will remove embedded dirt and prolong the life of your flooring. Regular upkeep not only preserves aesthetics but also maintains the integrity of your installations over time.
Leverage Software for Project Management and Scheduling
Effective maintenance and scaling are easier when you stay organized. I use project management tools like Trello or Asana to set reminders for inspections and upcoming repairs. These platforms help me track when I last cleaned or repaired specific areas, ensuring no detail falls through the cracks. Additionally, maintaining digital records of warranties and purchase dates for your tools and materials simplifies warranty claims and future upgrades. As trends advance, staying organized ensures you’re prepared to adapt or scale your projects efficiently.
Plan for Long-Term Improvements
If your space is aging or showing wear, consider gradual upgrades rather than costly overhauls. For instance, upgrading baseboards from traditional styles to modern profiles (see the latest trends here) can refresh an entire room with minimal disruption. When scaling, focus on compatibility—matching flooring types or grout colors ensures a seamless look. Investing in versatile, durable tools now lets you tackle these updates with confidence, saving you money and time in the long run.
How do I maintain my floors and showers over time?
Consistent inspections, proper cleaning techniques, and using the right tools are your best allies. For example, periodic sealing of grout lines with advanced sealants like those recommended in this expert guide ensures water doesn’t penetrate and cause damage. Additionally, replacing worn-out tools or upgrading to newer, more efficient models keeps your maintenance routine effective. Don’t underestimate the power of little habits—their cumulative effect preserves your home’s beauty and functionality for years.
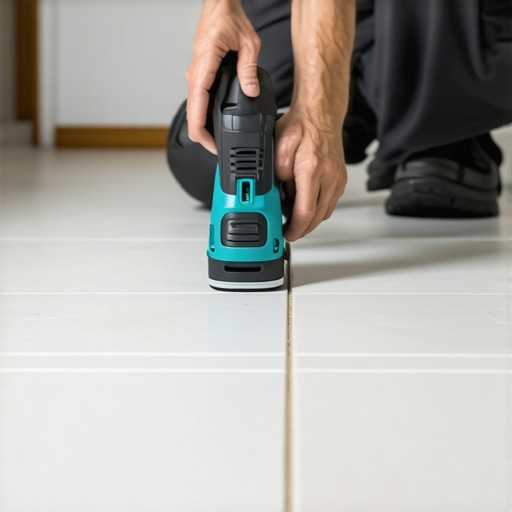
Three Lessons That Changed How I Tackle Showers and Floors
One of the most valuable insights I gained personally involved realizing that patience and timing are everything when dealing with epoxy grout haze. Rushing or waiting too long only complicates the cleanup process, and understanding this has saved me countless hours. I also learned that investing in quality tools isn’t just about efficiency; it’s about preventing damage and ensuring a flawless finish. Lastly, I discovered that environmental factors like humidity and temperature dramatically influence the curing process, teaching me to adapt my approach based on conditions. These lessons aren’t found in generic guides—they’re practical, real-world truths I wish I’d known sooner.