

I remember the exact moment I realized my staircase was turning into a relentless squeaky symphony every time someone stepped on it. It was late at night, and I was trying to watch a quiet movie, only to be jolted awake by that familiar, grating squeal. Frustration mixed with a bit of embarrassment—neighbors probably thought I was hosting a raucous party every evening! That’s when it hit me: this squeak wasn’t just an annoyance; it was a sign that my stair treads needed some serious attention.
Why Squeaky Stair Treads Drive Us Crazy—and How Wood Glue Can Help
Over the years, I’ve learned that squeaks often stem from loose or shifting stair treads. Traditional fixes like replacing entire steps or installing new subflooring can be costly and time-consuming. What surprised me the most early on was discovering that a simple application of wood glue, strategically applied with some patience, could completely silence those infuriating sounds. This revelation was a game-changer, proving that sometimes, the simplest solutions are the most effective. In this post, I’ll share my personal experience and practical tips to fix squeaky stairs using a straightforward wood glue technique that you can do yourself. Whether you’re a seasoned DIYer or just tired of the noise, I promise you’ll find this method accessible and rewarding.
Will Wood Glue Really Fix My Squeaky Stairs? Is It Worth the Hype?
Initially, I was skeptical. I had made plenty of renovation mistakes early on—like using too much adhesive or not preparing the surface properly—that led to more problems than solutions. Trust me, I’ve learned to avoid common pitfalls, such as applying glue without removing old debris or ensuring the treads are tightly secured first. The key is patience and proper execution, but the results have been worth it. For more tips on avoiding common flooring mistakes, check out this helpful guide. Now, let’s move on to how you can tackle those squeaks step by step. Ready to bring peace and quiet back to your staircase? Let’s dive in.
Secure Loose Treads with Wood Glue
Start by identifying the squeaky sections; lift each loose tread slightly to expose the gap. I once found a stubborn stair that squeaked only when stepped on the far edge. Carefully, I cleaned the area with a brush to remove dust and debris, ensuring the glue would adhere properly. Applying a generous bead of high-quality wood glue like Titebond along the side joint is key. Use a small brush or a spackling knife to spread the glue evenly. Then, press the tread firmly back into place and clamp or weight it down with heavy objects—stacking books worked when I fixed mine. Let the glue cure for at least 24 hours before testing the sleep-inducing silence of your stairs.
Inject Glue Into the Joints for a Tight Fit
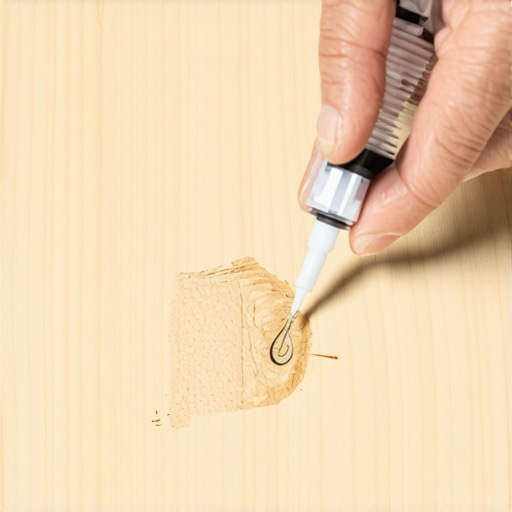
For stubborn gaps where the tread is still loose, insert a syringe or a plastic squeeze bottle filled with wood glue into the joint. Think of it as giving your stairs a precise dose of stability—just like a doctor administering medication. When I tackled mine, I drilled tiny holes at the corners of the joint, then injected the glue with a syringe, sealing the holes afterward with wood filler. This method ensures the glue penetrates deeply, creating a solid bond between the tread and the stringer or riser underneath. Afterwards, clamp everything securely and give ample curing time, so the squeak disappears for good.
Use Adhesive-Friendly Clamps to Hold Everything Tight
Clamping is crucial—imagine trying to glue two pieces of wood without pressure; the bond won’t form properly. When I glued mine, I used a set of bar clamps, adjusting the pressure to avoid damaging the wood. For narrow or awkward spots, a C-clamp or even a simple strap can do the trick. I wrapped a cloth around the clamp to prevent marking the wood. Tightening the clamps evenly ensures the joint remains snug, pressing out excess glue and maximizing contact. Keep the clamps in place until the glue fully cures, typically 24 hours, for a squeak-free result.
Smooth Out Excess Glue for a Clean Finish
Once the glue has cured, remove the clamps and scrape off excess with a putty knife or chisel. Finish by sanding lightly with fine-grit sandpaper to level out any uneven spots and prepare for repainting or refinish. When I refinished my stairs, this step made the final look seamless—almost indistinguishable from the original surface. Remember, a clean, smooth finish not only looks better but also prevents further damage or squeaking down the road.
Prevent Future Squeaks with Regular Checks
After fixing, walk your stairs to confirm the silence, then periodically check for loose treads or squeaks. Applying a bit of wood glue annually can reinforce the bond and extend the repair’s lifespan. Like most DIY fixes, patience and attention to detail make all the difference. If you want more guidance on related issues like flooring installation or baseboards, visit this comprehensive guide.
 Many homeowners jump into projects like installing baseboards, flooring, or showers believing they know the basics well enough. However, these assumptions often lead to overlooked details and avoidable mistakes. For example, a prevalent misconception is that choosing the same type of material everywhere ensures uniformity, but in reality, different rooms and conditions demand tailored solutions—like selecting moisture-resistant flooring in bathrooms instead of standard hardwood. Additionally, a common trap is underestimating the importance of proper surface preparation, which can cause issues such as gapping or squeaking later on. Hearing that “more adhesive” guarantees a better bond is another myth; excessive glue can actually compromise the material’s integrity, leading to future warping or detachment, as highlighted in expert guides on flooring installation mistakes. Advanced professionals also pay attention to subtle nuances, like controlling humidity levels during installation—particularly for wood or laminate—to prevent expansion gaps or buckling. These details, often overlooked by DIYers, significantly impact the longevity and appearance of your renovation. Have you ever fallen into this trap? Let me know in the comments. For those ready to elevate their project game, exploring baseboard styles that elevate your interior can be a game-changer. Remember, understanding these hidden nuances can save you time, money, and frustration in the long run.
Your Arsenal for Success in Home Renovation
Embarking on home improvement projects requires more than just the right techniques; having the proper tools is essential for delivering professional-quality results. Over the years, I’ve honed my toolkit to include equipment that not only facilitates efficiency but also ensures precision and durability, especially when working on tasks like installing baseboards, flooring, or showers.
My Favorite Power Tools for Precision and Speed
First on my list is the cordless impact driver. I rely on it for driving screws deeply into wall studs or subfloors without stripping the head. Its portability means I can work in tight corners or high elevations without dealing with cords. Pair it with board-specific bits for installing baseboards efficiently. For cutting materials, I prefer the miter saw with a positive stop system. It guarantees accurate miters when creating corner joints, which is vital for flawless finishes.
Essential Hand Tools for Detail Work
Nothing beats a high-quality combination square for checking angles and ensuring perfectly square cuts, especially when trimming baseboards or shower niches. I also swear by my claw hammer for adjustments and the set of chisels for fine detailing and fitting furniture or tile work. To finish surfaces smoothly, I use a multi-speed random orbital sander, which minimizes dust and provides consistent results.
What About Measuring and Layout?
Accurate measurements are the backbone of quality work. I depend on my laser distance meter for quick, precise readings over longer spans—saves me hours compared to tape measures. For marking and layout, I use a chalk line along with a carpenter’s pencil; combined, these tools help me achieve straight, long-lasting lines on walls or floors, preventing costly mistakes.
The Future of Tool Technology
Advancements like integration of smart sensors and Bluetooth connectivity are poised to revolutionize the way we approach home renovations. Imagine tools that track usage, suggest maintenance, or wirelessly update firmware for optimal performance. As I look ahead, I believe adopting these innovations will become standard, making projects more efficient and mistakes fewer.
How do I maintain my tools over time?
Regular maintenance is key to prolonging the lifespan of your tools. I always clean my power tools after each project, removing dust and debris that can cause wear. Lubricating moving parts and sharpening blades keeps everything operating smoothly. Additionally, proper storage—preferably in a dedicated toolbox or shed—protects tools from moisture and damage, ensuring they’re ready for the next big project. For instance, I recommend periodically checking pneumatic tools for air leaks, as suggested by industry experts, to prevent performance issues down the line. Incorporate these practices, and your tools will serve you reliably for years, preventing unnecessary delays or costly replacements.
If you’d like to see how specific tools can improve your project quality, start by trying a laser distance meter for precise measurements. Remember, investing in the right equipment and maintaining it properly is just as important as using the right techniques.
Ready to upgrade your toolkit? Consider adding a variable-speed orbital sander or a cordless impact driver today to make your next renovation smoother and more professional-looking.
The Hard-Earned Lessons Behind Flawless Home Refreshes
Throughout my home renovation journey, I’ve stumbled upon pitfalls that initially seemed minor but later proved costly—like rushing the surface prep or ignoring the subtle differences in material behaviors. One lightbulb moment was realizing that addressing the root cause of squeaks, rather than just silencing symptoms, prevents future frustrations and preserves the integrity of my floors. Also, I learned that nuanced techniques, such as injecting wood glue into tricky joints, can make the difference between a temporary fix and a lasting solution. These lessons, gained through hands-on experience, have shaped my approach to home upgrades, emphasizing patience, attention to detail, and understanding material intricacies.
Tools and Resources That Elevated My Approach
For those seeking reliable guidance and tools, I recommend starting with the latest flooring installation trends—staying ahead ensures your project isn’t outdated before it begins. A cordless impact driver has become indispensable, empowering me to tighten fasteners securely without damaging the wood. For precise measurements, I rely on a laser distance meter, which saves time and reduces errors. To refine details, quality finish sanders and clamps are my trusted companions—they turn rough edges into professional-looking results. These tools and resources, combined with continuous learning from expert articles and videos, help me achieve home improvements to be proud of.
Your Next Move: Elevate Every Inch of Your Space
Embarking on projects like fixing squeaky stairs or installing sleek baseboards might seem daunting, but remember—every successful home upgrade begins with a single step. The confidence you build through small wins accumulates into stunning results, transforming your living space into a sanctuary of comfort and style. Now’s the perfect moment to get your hands dirty, apply what you’ve learned, and enjoy the satisfaction of a job well done. Whether it’s silencing those stubborn squeaks or creating seamless transitions, your dedication will pay off. So, tell me—what’s the first project on your list to elevate your home’s beauty and function? Share your plans below, and let’s inspire each other to move forward with purpose!