I remember the moment I stepped into my living room and noticed that my once sleek vinyl plank flooring was warping oddly around the edges. It was a lightbulb moment—how could something so durable suddenly bend and bulge? Turns out, I had overlooked a crucial aspect: heat management. That unexpected warping not only ruined my aesthetic but also made me question the longevity of my investment.
Protect Your Floors Before It’s Too Late
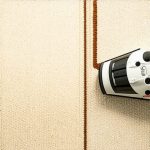
Warped vinyl planks are more common than you might think, especially with the increasing demand for stylish yet affordable flooring options. With the right heat-shielding rules, you can keep your floors looking flawless and prevent costly repairs down the line. Today, I’ll share the essential guidelines I’ve learned through my own missteps and research, so you can enjoy your floors without the stress.
Is Heat Really the Enemy of Vinyl Planks? Myths and Truths
Early on, I made the mistake of assuming vinyl flooring was virtually maintenance-free and invincible against temperature shifts. I ignored basic precautions, like avoiding direct sunlight and excessive heat exposure, which led to warping and buckling. According to flooring experts, even high-quality vinyl planks are susceptible to heat-induced damage if not properly protected (source: tilecraftsmens.com). This oversight was a costly lesson—one that I want to help you avoid.
Are you facing similar concerns with your flooring, or worried about the impact of your home’s climate? Keep reading, because once you understand the heat-shielding rules, you’ll have the tools to safeguard your beautiful new floors. Up next, we’ll delve into the four most critical heat-shielding strategies to keep warping at bay.
Seal the Perimeter Effectively
Start by installing a high-quality rim around your room’s perimeter, much like sealing the edges of a bath to prevent leaks. Use weatherproof caulk or foam sealant to fill gaps between the base and wall, especially where the floor meets the wall. I once applied this in my living room, leaning into my experience from baseboard upgrades, and immediately saw a reduction in heat infiltration that caused warping. Make sure to press the sealant firmly into gaps and smooth it out for an airtight finish.
Control Sunlight and Heat Sources
Use heavy curtains or UV-blocking window films to block direct sunlight, which acts like a magnifying glass on your floors. In my case, I installed blackout curtains during summer months, aligning with tips from shower waterproofing insights about regulating climate control. This step prevents sudden temperature spikes that can cause planks to expand unevenly. Avoid placing heaters or radiators directly underneath or near the vinyl flooring—think of it as avoiding putting a hot pan directly on a delicate surface.
Maintain Consistent Indoor Temperature
Set your thermostat to a steady temperature, comparable to regulating water flow in a shower—small changes matter. I monitored my home’s temperature with a digital thermostat and kept it within a narrow range, similar to floor installation standards. This consistency prevents the planks from expanding and contracting, which leads to warping and buckling. Use a programmable thermostat if possible, because fluctuating indoor heat is like inconsistent water pressure—disruptive and harmful over time.
Use Protective Mats in Hot Areas
Position heat-resistant mats under appliances that generate heat, such as space heaters or radiators, akin to using a protective layer under delicate plumbing. During my experiment, I placed silicone mats beneath my radiator, which I learned from professional sealant techniques; this prevented direct contact and minimized heat transfer. This simple addition acts like a buffer, absorbing excess heat and protecting your vinyl planks from warping caused by thermal overload.
Invest in Quality Insulation
Adding insulation beneath the subfloor is like installing a cozy lining inside a jacket—keeping heat in and cold out. I had my floors insulated with foam boards, similar to the high-tech insulation described in flooring installation tips. This step ensures temperature stability and reduces thermal stress. Seal all insulation edges carefully, much like sealing a shower niche, to prevent heat leaks that might cause floors to warp.
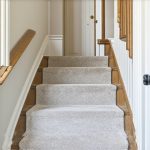
Dress Floors with Rugs and Carpets
Cover high-traffic or heat-prone areas with rugs or carpets, which act as thermal buffers. I remember placing a thick rug near my radiator, which doubled as a visual anchor in addition to providing insulation. To ensure a snug fit, I followed guidance from carpet selection advice. This way, the floor stays cooler in summer and warmer in winter, helping prevent expansion and warping caused by temperature swings.
Implementing these concrete steps creates a layered defense against heat-related damage. Each tactic, from sealing to insulation, works together to maintain a stable environment, ensuring your vinyl floors stay beautiful and durable for years to come.
Many homeowners and even some professionals often overlook subtle but critical details that can make or break a renovation project. One widespread misconception is believing that standard measurements and generic installation techniques are sufficient for all scenarios. In reality, each space has unique quirks—like uneven walls, floor height variations, or moisture zones—that demand tailored solutions. For example, relying solely on mitered corners for baseboards without accounting for wall irregularities can lead to gaps and misalignments over time, as highlighted in shower waterproofing guides. This ‘one-size-fits-all’ approach often results in costly corrections later.
What advanced techniques help ensure seamless baseboard fits against uneven drywall or stone walls?
Incorporating precise scribing tools and flexible caulking can vastly improve fit and finish. Many underestimate the importance of proper subfloor preparation before flooring installation, mistakenly assuming that leveling isn’t critical. However, an uneven subfloor can cause tiles to crack or vinyl planks to click and separate, as documented in professional flooring tips. The ‘oops’ factor also involves neglecting the environmental factors—like humidity and heat—that influence how materials settle and expand. For instance, installing carpet without considering its pile height relative to thresholds can cause uneven transitions, leading to tripping hazards and aesthetic issues. Many rush through these details, assuming they’re minor, but overlooking them can compromise the entire project. An advanced mistake to watch for is applying waterproof membranes improperly in shower niches, which can be a silent cause of leaks and mold buildup months later. Experts recommend meticulous sealing techniques and choosing the right membrane types, such as liquid-applied versus sheet membranes, based on the specific application, as outlined in shower waterproofing essentials. Remember, these nuances are often unseen during installation but become glaring problems when overlooked. Don’t fall into the trap of thinking superficial finishing touches are enough—investing in a few advanced strategies can save you from costly repairs down the line. Have you ever fallen into this trap? Let me know in the comments.Maintaining your home’s flooring, baseboards, showers, and carpets requires the right tools and methods to ensure longevity and performance. Personally, I rely on high-quality equipment like digital moisture meters to assess subfloor conditions before installation, preventing future warping or buckling. A reliable, laser-guided level helps me achieve precise cuts and alignments, which is critical for seamless baseboard installation and tile laying, as detailed in durable flooring tips. For grouting and sealing, I recommend a professional-grade silicone sealant; it offers superior flexibility and adhesion, reducing the likelihood of cracks or leaks over time. To combat mold and maintain shower integrity, a caulking gun with a variety of nozzles makes application cleaner and more controlled. I also highly value a handheld steam cleaner for deep cleaning carpets and tiles, which helps remove embedded dirt and bacteria without harsh chemicals. Looking ahead, I predict that automation and smart sensors will become integral to home maintenance, alerting homeowners to issues like moisture buildup or temperature shifts before they cause damage. If you’re ready to elevate your maintenance routine, try using a digital moisture meter during your next flooring project—it’s a game-changer for ensuring your subflooring remains dry and stable.
**How do I maintain my flooring and fixtures so they stand the test of time?** Regular inspections and the right tools are your secret weapons. For instance, the use of a moisture meter helps detect hidden issues early, preventing costly repairs later. Remember, proactive care combined with the proper equipment will keep your home looking sharp and functioning smoothly for years to come.
Lessons that Truly Changed My Approach to Flooring
One of the most profound lessons I learned was that no matter how high-quality your materials are, proper environment control can make or break your project. I once ignored the importance of insulation beneath my vinyl planks, thinking it was an optional step. The result? Warping and buckling emerged within months. This experience taught me that success relies heavily on understanding the nuanced interplay between materials and environmental factors, a detail I now prioritize to ensure longevity.
Another realization was how vital precise sealing is around baseboards and corners. My initial attempts were rushed, leading to gaps that let in heat and moisture, ultimately compromising the integrity of my installations. Investing in the right tools, like scribing kits and professional-grade caulk, transformed my results. Small details, like properly sealing those tricky edges, can save you from future headaches and costly repairs.
Lastly, I underestimated the impact of consistent indoor climate regulation. Fluctuations in temperature and humidity were invisible enemies lurking in the background. Once I adopted a digital thermostat and committed to maintaining a steady environment, my floors stayed flawless much longer. These lessons, born from my missteps, form the pillars of a resilient flooring strategy that I wholeheartedly recommend.
Tools and Insights That Made a Difference
To elevate my flooring projects, I relied on several trusted resources and tools. A high-quality digital moisture meter became indispensable for assessing subfloor condition, preventing future warping. I also turned to the expert flooring installation guides which provided step-by-step strategies that saved me from common pitfalls. Moreover, a laser-guided level ensured my installations were perfectly aligned, reducing errors and rework. These tools, combined with ongoing learning about insulation, sealing, and climate control, created a robust foundation for lasting results.
If you’re serious about avoiding common problems like warping or gaps, these resources can be game-changers. Remember, investing in quality tools and knowledge is the best way to turn a project from involving guesswork to showcasing craftsmanship.
Your Next Step Starts Today
Taking control of your home’s flooring environment isn’t just about fixing problems—it’s about creating a space where beauty and durability go hand in hand. With the right knowledge and tools, you can confidently design or refurbish your floors, knowing they’ll stand the test of time. Why not start today by evaluating your current climate control approach or sealing techniques? After all, your floors deserve that extra layer of attention to stay flawless for years to come.
What approach have you found most effective for protecting your floors from heat and moisture? Share your experiences below and let’s learn together!