Have you ever laid down a brand-new carpet only to discover the seams fraying, puckering, or lifting prematurely? I remember the first time I encountered this nightmare—a wedding of frustration and disbelief, especially when everything else in the room looked perfect. It was a lightbulb moment for me, realizing that even the best carpets can be vulnerable if not installed with the right iron-setting tactics.
Today, I want to share insights into how you can avoid your carpet seams failing by 2026. No more ripples, no more peeking seams—that’s the promise. Whether you’re a DIY enthusiast or hiring a professional, understanding these key tactics can save you headaches and replace uncertainty with confidence.
Getting to the Root of Carpet Seam Failures
The truth is, many carpet failures aren’t purely accidental—they happen because of overlooked details during installation. Specifically, improper ironing techniques can lead to weak seams that deteriorate over time. Early on, I made the mistake of rushing the process, assuming a standard iron temp would suffice. Guess what? That sabotage led to fraying and separation just a few months later. It was a costly lesson, but also a turning point that prompted me to learn the correct iron-setting tactics for flawless seams. Not just for aesthetic appeal but to ensure durability as well. For more on professional tips, check out this comprehensive guide.
Now, if you’re wondering whether these tactics are worth fussing over, I get it. Many folks dismiss ironing as a minor detail, but trust me, this small step can be the difference between a seamless look and an ongoing headache. Let’s tackle the common concerns so you can confidently move forward.
Prep the Surface Completely Before Ironing
Begin by ensuring the carpet edges are clean, dry, and free of debris. Use a utility knife to trim frayed fibers, making sure the edges align perfectly. I once rushed this step, only to find my seams fraying within weeks; a thorough prep saved me from that disappointment. Think of it like prepping a canvas before painting—without a smooth base, the artwork (or in this case, the seam) deteriorates quickly.
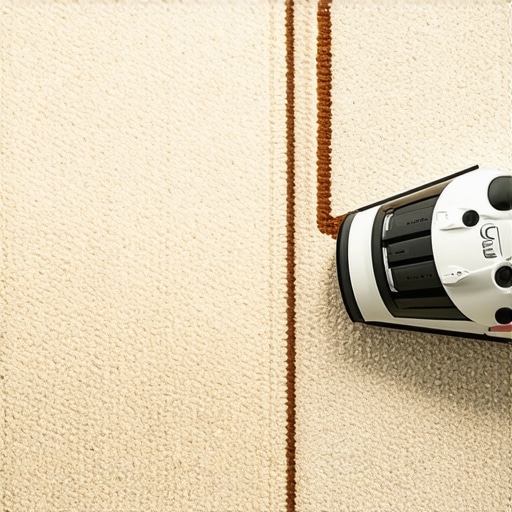
Set Your Iron to the Optimal Temperature
Use a medium to high heat setting, roughly 300°F (150°C). A too-cool iron won’t set the fibers properly, while excessive heat can scorch the material. I learned this through trial and error during a messy first attempt—my adhesive wasn’t bonding, and the seam was puckering. Now, I always test on scrap pieces first, akin to tuning a guitar before a performance, ensuring perfect harmony.
Apply Steady, Firm Pressure During Ironing
Once the iron reaches the desired temp, press it firmly onto the seam for about 15-20 seconds, moving in slow, deliberate motions. Avoid lingering in one spot to prevent burning. I recall fumbling through this—my hand trembled as I pressed too long, creating a shiny burn mark. Consistency is key: think of it like squeezing a tube of toothpaste—steady pressure produces the best result without mess.
Use the Right Seam Sealer or Adhesive
Choose a high-quality seam adhesive designed for carpets. Apply a thin, even layer along the seam’s edge before pressing with the iron. I once tried improvising with glue intended for other materials, which led to adhesive failure over time. For enduring seams, match your product to the carpet’s fiber type, similar to selecting the correct mortar for tile—it’s all about compatibility. For detailed product choices, review the guidelines in this expert resource.
Clamp or Weigh Down the Seamed Area
After ironing, apply weight or use clamps to hold the seam firmly while the adhesive sets, typically for 24 hours. I once left a seam to set without pressure; the result was a ridge that showed even after shaping. Think of it like pressing bread—application of weight ensures a flat, seamless loaf. You can use heavy books or specialized clamps, depending on the seam’s size and location.
Check for Smooth, Secure Seams and Address Gaps
Once cured, inspect the seam for any gaps or ridges. Apply additional adhesive or re-iron if necessary. For stubborn gaps, the scribing technique can be effective—similar to fitting stone to uneven walls. Proper finishing not only improves aesthetics but also prevents future fraying and lifting, extending the life of your carpet in high-traffic areas.
Many homeowners and even some professionals fall prey to misconceptions about how to properly install flooring, baseboards, or showers, often leading to costly mistakes that compromise durability and aesthetics. One widespread myth is that as long as measurements are correct, the installation will be flawless. In my experience, this oversimplification neglects critical nuances like substrate conditions and material-specific techniques, which can make or break the project’s longevity.
Another trap to avoid is trusting generic advice over tailored solutions. For example, choosing the same adhesive for a waterproof shower niche as for a standard wall can lead to leaks. Expert installers recommend consulting specific product guidelines and understanding how different materials interact under various conditions—this is a key detail often overlooked by DIYers. I learned this hard way early on; relying on broad-brush recommendations can cause issues like mold, mildew, or floor instability.
How can advanced surface preparation prevent long-term failures?
Proper surface prep is more than just cleaning. It involves assessing moisture levels, substrate flatness, and compatibility with the chosen finishes. Studies show that inadequate prep accounts for up to 85% of installation failures in flooring and waterproofing projects, emphasizing the importance of meticulous groundwork. For instance, ensuring the subfloor is properly leveled and dry can prevent issues like tile cracking or grout failure years down the line. For expert insights on this, visiting detailed guides on flooring installation can be invaluable.
When it comes to baseboards, many assume that simple mitered corners and caulk are sufficient for a clean look. However, advanced techniques like scribing or using flexible caulk, combined with understanding wall irregularities, can dramatically improve the final appearance and prevent gaps that compromise both design and insulation. For example, learning how to create tight, seamless joints on uneven surfaces can make your trim look professionally installed. Curious about the latest trends? check out baseboard styles in 2025.
When installing showers, the hidden pearl is waterproofing. Most amateurs skip detailed waterproofing steps, assuming sealing with grout is enough. In reality, neglecting waterproof membranes, drain slopes, or proper sealing can cause leaks that weaken the subfloor or wall framing. Professionals advocate a multi-layer waterproofing approach that is often misunderstood or misapplied. For guidance, explore curbless shower waterproofing methods.
So, next time you think about installing your flooring or finishing touches, remember: it’s the small, often overlooked details—like surface prep, material-specific techniques, and precise sealing—that determine the lasting success of your project. Don’t fall into the trap of assuming that basic measurements or generic advice suffice; instead, invest time in understanding these nuances for perfect results every time. Have you ever fallen into this trap? Let me know in the comments.
Maintaining your flooring, baseboards, and showers over time requires the right tools and a consistent approach. Investing in quality equipment ensures your installations remain pristine and durable, saving you money and headaches in the long run. One indispensable tool I personally rely on is a digital moisture meter, like the Tramex CM-exc100. This device helps me monitor substrate moisture levels precisely before sealing or applying finishes, preventing future issues like mold or delamination. Using a moisture meter consistently is vital, especially when dealing with areas prone to humidity, such as bathrooms or basements.
For cutting and shaping materials, I recommend a high-quality oscillating multi-tool. Its versatility allows for quick, accurate trimming of baseboards or removing old adhesive without damaging surrounding surfaces. I prefer brands like Fein or Dremel, which offer durability and precise control—crucial when scribing baseboards to uneven walls (see how proper scribing makes a difference). Regularly maintaining these tools, including cleaning the blades and calibrating the motor, ensures they operate at peak performance, extending their lifespan.
Power sanders with fine grit pads are excellent for preparing surfaces before applying sealants or paint, especially for baseboards and trim. I personally use an orbital sander from Makita, as it provides smooth finishes and minimizes swirl marks. Pairing this with quality abrasives prevents scratches that might compromise paint adhesion or sealant bonds. Remember, clean, well-prepped surfaces are fundamental for long-lasting results.
Installing high-quality sealants and adhesives, such as polyurethane-based caulks, is another crucial aspect. I always choose products that are specifically formulated for the material and environment—like silicone for shower niches or acrylic for baseboards. Using the right tools for application, such as a caulking gun with a variable flow control, helps achieve neat, consistent lines, reducing the need for touch-ups later (learn about sealing techniques). Proper maintenance of these tools, including regular cleaning and replacing worn parts, ensures a professional finish every time.
Looking ahead, digital project management software is becoming increasingly popular among pros, streamlining scheduling, material management, and documentation. I’ve recently adopted CoConstruct, which integrates with my workflow seamlessly, helping me track job progress and ensure timely maintenance checks. As the trend shifts towards smarter, connected tools, I recommend exploring these options to keep your installations in top condition over the years.
How do I maintain my flooring and fixtures to last for decades?
Routine inspections are key. Regularly check for signs of wear, loose baseboards, or developing cracks around shower tiles. Address issues promptly—replacing caulk, tightening fasteners, or polishing surfaces can prevent minor problems from escalating into costly repairs. Also, consider annual or bi-annual professional deep cleanings, especially for showers and carpets, to preserve their appearance and hygiene. Combining these practices with the right tools, like steam cleaners or specialized scrubbing pads (see maintenance for showers), can extend the life of your renovation investments.
In future, I foresee the integration of IoT sensors in home maintenance—monitoring humidity, structural shifts, or even adhesive health in real time. This technological evolution will make long-term upkeep more precise and proactive, reducing surprise repairs and saving costs. For now, adopting a systematic approach with quality tools remains your best strategy to keep everything working smoothly. Try implementing a moisture meter check before sealing your next subfloor; it’s a game changer for lasting results.
Throughout my years in home renovation, one lesson consistently reemerges: the smallest details make the biggest difference in flooring and finishing projects. I remember rushing through a bathroom upgrade, neglecting proper waterproofing and surface prep, only to face leaks and cracked grout months later. That experience cemented the importance of meticulous craftsmanship and reinforced my belief that mastering the nuances—like correct ironing tactics or surface assessment—transforms good results into extraordinary ones.
Prioritizing surface prep, material compatibility, and precise sealing isn’t just about aesthetics; it’s about ensuring your project withstands the test of time. This isn’t just theory—I’ve seen first-hand how applying the right technique, adhering to professional standards, and leveraging the correct tools can prevent issues that plague DIYers and pros alike. The key is understanding that the devil is in the details, which often remain invisible until they cause costly setbacks. Looking back, the biggest shift came when I stopped rushing and started focusing on the correctness of each step, from aligning carpet seams to sealing shower niches. That commitment to quality is what turns quick fixes into long-lasting investments.
Lessons From the Trenches: What I Wish I Knew About Seamless Installations
- Don’t overlook surface assessments: Ensuring your subfloor or wall surfaces are perfectly prepared saves headaches later. Subtle dips or moisture issues can sabotage the best installation.
- Master the art of material compatibility: Using the right adhesive, seam sealer, or waterproof membrane designed for your specific materials makes all the difference.
- Patience with curing times prevents future failures: Rushing the drying or setting process often leads to gaps or peeling. Trust the process for a flawless finish.
- Small tools make a big impact: Quality seam tape, moisture meters, and proper scribing tools streamline your work and improve longevity.
- Continuous learning elevates your craft: Reading expert guides and watching how pros handle tricky areas like uneven walls or complex drain setups has transformed my approach.
My Must-Have Arsenal for Perfect Installations
- Moisture Meter: This tool helps me detect hidden moisture issues before sealing, preventing mold and delamination in floors and showers. I trust models like the Tramex CM-exc100 for their accuracy.
- Oscillating Multi-Tool: A versatile gadget for cutting and scribing, it allows me to work precisely around uneven walls or corners, making tasks like scribing baseboards much easier.
- High-Quality Sealants: Polyurethane or silicone-based, chosen for their durability and flexibility, essential for long-lasting waterproofing and finishing touches.
- Professional-grade Adhesives: Compatibility is critical—using the right adhesive for the substrate and material helps avoid future lifting or gaps.
- Finishing Tools: Caulking guns with variable flow controls and precision blades ensure neat lines, saving time and providing a professional look.
Stay Inspired to Achieve Masterpiece Results
Remember, every detail you master today plants the seeds for a home that endures. Embrace the process, invest in quality tools, and don’t shy away from learning from setbacks. Whether it’s flawless carpet seams, perfectly scribed baseboards, or leak-proof showers, your dedication transforms spaces and uplifts your confidence. The journey to home perfection is ongoing—each project an opportunity to refine your craft and elevate your living environment. So gear up, stay curious, and trust that your commitment to quality will pay dividends for years to come.
What’s been your biggest challenge in ensuring a durable, professional-looking installation? Share your story in the comments below—I’d love to hear about your experiences and what you’ve learned along the way.
,


One thought on “Why Your 2026 Carpet Seams Fail: 4 Iron-Setting Tactics”
Jane Elizabeth Carter
April 15, 2026 at 5:20 amThis article highlights a critical aspect of carpet installation that’s often underestimated—iron-setting tactics. I recall a job where we overlooked the importance of precise temperature control and pressure application, which resulted in seams that started fraying within just a few months. It’s fascinating how such a small detail can significantly impact longevity.
Personally, I swear by testing on scrap pieces before working on the actual seam. It’s like tuning a musical instrument to get the perfect pitch. Also, I’ve found that using a seam sealer compatible with the carpet fiber makes a noticeable difference in durability. Does anyone have a preferred seam sealer that’s worked well over time? I’m curious about the products others trust for long-lasting results.