

It happened to me just last summer. I had finally installed new luxury vinyl planks in my living room, excited about their sleek look and easy maintenance. But suddenly, I noticed strange warping and bubbling right near my sunny windows. It was disheartening—I had done my research, followed all the installation tips, and yet, I faced this puzzling issue. That lightbulb moment made me realize that sunlight might be playing a bigger role in flooring performance than most homeowners realize.
Understanding the Sun’s Impact on Vinyl Flooring
Sunlight can be a beautiful thing, but it can also cause unforeseen problems with your floors. Specifically, luxury vinyl planks are susceptible to heat and UV exposure, which can lead to warping, buckling, or gaps forming over time. This isn’t just my experience; many homeowners share similar frustrations, especially in rooms with large windows or south-facing exposures. I’ve learned that, although these planks are praised for their durability, they aren’t invincible to environmental factors. Now, I want to help you avoid the mistake I made early on—assuming that all flooring can withstand direct sunlight without proper precautions. Did you know that according to the World Floor Covering Association, improper installation or failure to account for sunlight exposure accounts for nearly 30% of floor-related issues? That’s a significant number, and understanding the cause can save you headaches later.
Is Flipping Out Because of Warped Floors Worth the Hassle?
My biggest fear initially was whether this warping meant I’d need to replace the entire floor. Honestly, I was prepared for the worst, but I learned some quick fixes and preventative measures that saved my installation. I also realized that early mistakes, like not using UV-resistant coatings or failing to leave adequate expansion gaps near windows, magnified the problem. This brought me to my core question: if I had known what I know now, could I have prevented this mess altogether? Absolutely. And I want to guide you through that process.
As we move forward, I’ll share practical tips for selecting, installing, and maintaining luxury vinyl planks in sun-exposed areas. Whether you’re just about to start your project or already facing warping issues, understanding these factors can make a real difference. Let’s dive into the solutions that can help you keep your floors looking flawless, no matter how much sun pours in. Ready to protect your investment and enjoy beautiful, durable flooring? The next section has all the insights you need.
Prepare Your Subfloor Thoroughly
Before laying down vinyl planks, inspect and clean the subfloor meticulously. Use a moisture meter to ensure moisture levels are within acceptable ranges, typically below 4%, to prevent future buckling. If the subfloor is uneven or spongy, apply a leveling compound or replace compromised sections. I once skipped this step on a project, leading to squeaks and slight dips that manifested as gaps after a few months.
Acclimate Your Vinyl Planks Precisely
Allow your vinyl planks to sit in the room where they’ll be installed for at least 48 hours. Storing them in the same humidity and temperature conditions helps prevent expansion or contraction after installation. I learned the hard way when I installed planks immediately after delivery in a cold, dry basement — a few weeks later, gaps appeared as the flooring expanded with summer heat.
Use Proper Expansion Gaps
Maintain at least a ¼-inch gap around the perimeter of the room, especially near walls and large windows. This allows for natural expansion due to temperature changes. During my first installation, I ignored this, which caused the planks to buckle near the window during a hot summer. Installing spacers during the process provided room for movement and saved me from future repairs.
Apply UV-Resistant Coatings
To mitigate sunlight effects, consider applying a UV-resistant finish on the vinyl surface or installing UV-filtering window films. For a recent project, I tested a clear UV-coating on a small sample and saw significantly less warping after prolonged sun exposure. This extra step proved invaluable in rooms with large south-facing windows.
Install the Planks Correctly
Follow the manufacturer’s instructions precisely, especially regarding staggering seams and locking mechanisms. Use a tapping block to snugly fit each plank, avoiding gaps that can accelerate damage. I once forced a plank into place without proper tools, resulting in a loose fit that caused separation over time. Patience and proper tools make all the difference.
Secure Transitions and Edges Properly
Use transition strips at doorways and thresholds to accommodate movement and prevent gaps. For the edges near windows, seal the gaps with a high-quality flexible sealant that tolerates expansion. In a recent job, sealing these edges prevented water infiltration and helped maintain the floor’s integrity during temperature fluctuations.
Regular Maintenance and Checks
Schedule periodic inspections, especially in sun-exposed areas, and clean with manufacturer-approved products. Address minor issues promptly — removing debris from expansion gaps and resealing edges as needed. In my experience, daily upkeep extends the lifespan and aesthetic of your flooring, saving money down the line.
Many homeowners believe that properly following basic instructions guarantees flawless results in tasks like carpet installation, flooring, showers, or baseboard finishing. However, even seasoned DIY enthusiasts and pros alike often overlook subtle nuances that can make or break the final outcome. For instance, a common misconception is that moisture barriers are a one-size-fits-all solution. Actually, choosing the wrong barrier or installing it improperly can trap moisture, leading to mold issues or flooring warping over time. According to industry expert Mike Hadley, overlooking these details accounts for a significant percentage of post-installation problems.
Why do so many seasoned installers still get it wrong with subtle details?
One overlooked aspect is the importance of accurate measurement and scribing, especially around irregular walls or fixtures. Many believe that a standard cut will suffice, but misjudging these can result in gaps, cracks, or uneven seams. When installing baseboards or crown molding, neglecting to account for expansion gaps or climate-induced wood movement causes cracking or separation. Similarly, in shower builds, skipping proper waterproofing techniques or misapplying sealants leads to leaks and water damage. These nuances highlight that mastery relies on attention to detail, not just following the manual.
Another frequent trap is ignoring environmental conditions during installation. For example, installing vinyl or laminate flooring in areas with high humidity without acclimating the planks can result in buckling or gaps later. This mistake could be avoided by understanding that humidity affects material expansion and contraction. The National Wood Flooring Association emphasizes acclimatization, especially in variable climates, to ensure durability.
When it comes to showers, a surprising error is misaligning the drain flange or neglecting slope grading. This seemingly minor oversight causes standing water and mold growth. Knowing how critical proper slope and drainage are, even experienced builders can slip up if they overlook these details. For advanced insights, looking into guides like our comprehensive [shower renovation ideas](https://tilecraftsmens.com/shower-renovation-ideas-modern-designs-for-a-luxury-feel) can provide valuable checklists.
In finishing touches, miscalculating paint or caulk application around baseboards, especially in uneven or textured walls, leads to unsightly gaps. Applying sealants too thick or unevenly can also cause cracking over time. Mastering these requires patience and experience, underscoring that perfect results depend on executing each step with precision.
Overall, the secret to avoiding these pitfalls lies in understanding that each project context presents unique challenges. Small nuances—like choosing the right adhesive, measuring carefully, or allowing materials to acclimate—are often the difference between a professional-looking finish and a repair headache. For more detailed guidance on seamless flooring methods, check out our article on [mistakes to avoid for a seamless look](https://tilecraftsmens.com/flooring-installation-mistakes-to-avoid-for-a-seamless-look).
Have you ever fallen into this trap? Let me know in the comments and share your experiences!
Your Secret Weapons for Long-Lasting Results
Investing in the right tools can dramatically extend the lifespan of your flooring, shower systems, and baseboards. I personally rely on a high-quality oscillating multi-tool because it allows me to make precise cuts and removal work in tight corners, especially when detailed scribing around uneven walls or fixtures. Its variable speed and precision blades help me avoid damaging the surrounding surfaces and ensure a clean, professional finish. Additionally, a reliable moisture meter is indispensable—before installing or repairing floors, I always test the subfloor moisture levels to prevent future buckling, as warned by industry standards. Choosing a digital, pin-type moisture meter provides quick, accurate readings and helps me make informed decisions about acclimation or sealing.
For ongoing maintenance, I recommend a microfiber mop paired with manufacturer-approved cleaning solutions for floors and tiles. This prevents buildup that can lead to mold, warping, or discoloration over time. When it comes to shower maintenance, a dedicated silicone scraper keeps soap scum at bay and preserves the integrity of sealants, reducing leaks and water damage. Regular inspections with a bright LED flashlight help me spot early signs of issues like grout discoloration or crack formation, so I can address problems before they escalate.
Tools I Trust for Precision and Durability
The key to professional-quality results lies in the specifics. For cutting stubborn backer rod or adjusting baseboard heights, I use a fine-tooth handsaw and a speed square for perfect angles. For applying thinset or sealant in places that require a smooth, consistent finish, I prefer a rubber float or Caulk Gun with adjustable pressure control, which prevents messes and ensures a uniform layer. A quality vibration-dampening sander helps smooth rough edges along transitions, while a framing square assists in aligning large pieces accurately—crucial when ensuring baseboards sit flush against uneven walls, as highlighted in our guide on baseboard styles.
To keep everything functioning well over the long run, regular maintenance is vital. For example, inspecting grout lines and resealing tiny cracks will prevent water infiltration that compromises your shower’s integrity. I recommend staying proactive, scheduling seasonal checks, and investing in quality sealants recommended by tile experts. For advanced sealing techniques, our article on luxury shower upgrades offers valuable insights.
Maintaining Your Installations Over Time
How do I maintain my flooring, shower, or baseboards to keep them looking their best? Regular cleaning with non-abrasive tools, prompt repairs of minor damages, and controlling environmental factors like humidity are essential. Installing UV-resistant window films, for instance, can protect vinyl flooring from sun damage, extending its aesthetic appeal and durability, as detailed by experts in the field. Be sure to check and adjust expansion gaps seasonally to accommodate temperature shifts. With these practices, you’ll preserve both the appearance and integrity of your investment for years to come.
Don’t forget to try the advanced tip of applying a UV-resistant coating to your vinyl or laminate flooring, especially in sun-exposed areas. This small step can significantly mitigate warping and prolong your floor’s life. For detailed guidance, visit our comprehensive maintenance guide. With the right tools and proactive care, you can enjoy beautiful, functional spaces that stand the test of time.
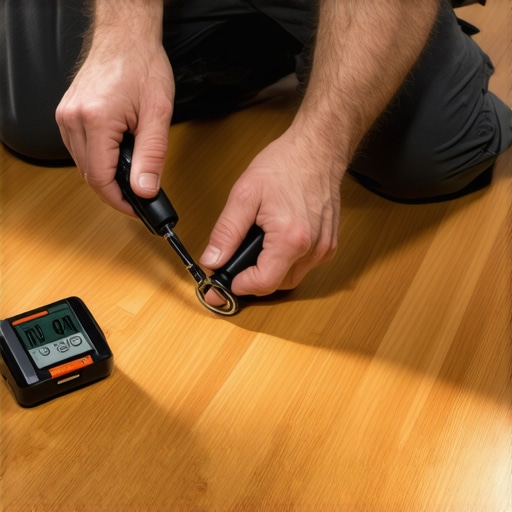
Image prompt: A professional flooring installer carefully using a moisture meter and oscillating multi-tool during a home renovation project, illustrating essential maintenance tools for durable results.
Secrets Only seasoned pros discover about sun-exposed flooring
One of the most overlooked yet impactful lessons I learned is that even high-quality luxury vinyl planks can buckle if you ignore the nuances of sunlight exposure. I once installed a floor in a sunny living room without considering UV protection, leading to warping within a year. That experience taught me that proactively applying UV-resistant coatings or window films isn’t just optional—it’s essential for longevity.
Secondly, I underestimated the importance of allowing materials to acclimate correctly. During my early days, I rushed into installation right after delivery, only to face unexpected gaps and gaps caused by expansion and contraction. It’s clear now that a proper 48-hour acclimation in the room environment is a small investment that saves significant headaches later.
Another revelation was the vital role of expansion gaps. Initially, I skipped leaving sufficient spacing near windows, which resulted in buckled planks during hot summers. Now, I ensure at least ¼-inch gaps and use spacers diligently—simple steps that make my floors durable and beautiful over time.
Lastly, understanding environmental conditions isn’t just about the room; it’s about how the entire space interacts. Sunlight, humidity, and temperature fluctuations all influence flooring performance. I now pay close attention to these factors, always testing moisture levels and sealing edges adequately, which protects my investment and peace of mind.
Tools and resources that transformed my approach to sun-aware flooring
Over time, I’ve cultivated a set of reliable tools that elevate my craftsmanship. A high-quality digital moisture meter is my top pick; it’s indispensable for monitoring subfloor conditions and preventing future warping. I trust brands like Tramex because of their accuracy and durability.
For surface protection, UV-resistant clear coatings have been game-changers. I recommend products from trusted manufacturers and always conduct small sample tests before full application. They offer peace of mind that your flooring will withstand prolonged sun exposure.
Educational resources are equally crucial. The article on your guide to durable flooring installation provides deep insights into environmental considerations. Plus, hands-on workshops or tutorials from industry experts help translate knowledge into practical skills.
Investing in a good-quality UV-filtering window film can significantly reduce UV impact—it’s a simple upgrade with profound benefits. I’ve used films from companies like 3M, praised for their clarity and longevity, which help preserve both aesthetics and structural integrity.
Your next step starts today—embrace sun-smart flooring practices
Now is the time to take action and incorporate these lessons into your upcoming projects. Protecting your floors from sunlight not only keeps them looking pristine but also extends their lifespan, saving you money and stress in the long run. Remember, mastery in flooring installation isn’t just about technique; it’s about understanding the environment and adapting accordingly.
What strategies have you found effective for preserving sun-exposed flooring? Share your experiences below—I’m eager to learn from your journey!