

I remember the moment vividly. I was stepping out of my shower, tile squeaking underfoot, when I noticed that unsightly crack running across the shower floor. It struck me then—how something so seemingly simple could cause such a persistent frustration. That lightbulb moment made me realize that many homeowners face this issue without fully understanding why it happens or how to fix it effectively.
Cracks in Shower Floors: A Common Headache
Cracked shower floors are more than just an eyesore; they can lead to water leaks, mold growth, and costly repairs if not addressed promptly. The root cause often surprises many: movement underneath the tile, known as uncoupling, which occurs due to the natural settling of your home or improper installation. Over time, this movement causes stress at the tile’s surface, resulting in cracks. It’s a problem that sneaks up on you, even when your shower was perfectly functional just a few years ago.
Is Uncoupling Fix Really Worth the Hype?
I’ll admit, I was skeptical at first. I’d watched a few online tutorials claiming that simple fixes could solve decades-old cracking issues. But my early mistake was not understanding that if the underlying problem isn’t addressed, cracks will just come back. Without proper uncoupling, you’re essentially just patching a sinking boat. To truly resolve this, I discovered a method called the uncoupling membrane, which creates a flexible barrier between the substrate and the tile, absorbing the movement and preventing cracks from spreading. This fix, in my experience, made a significant difference—saving me money and time in the long run. If you’re tired of repeatedly repairing cracked tiles, it’s worth exploring how uncoupling can offer a lasting solution.
Prepare Your Workspace and Gather Materials
Before diving into repairs, clear the shower area of all personal items and ventilation fans to avoid dust spread. Gather essential tools such as a grout saw, putty knife, epoxy filler, a rubber mallet, a chisel, sandpaper, and safety gear like gloves and goggles. Having everything ready saves time and prevents mid-project interruptions.
Remove Damaged Tiles and Assess the Subfloor
Careful Demo of Cracked Tiles
Start by gently scoring the cracked tile with a grout saw to remove grout around it. Use a chisel and rubber mallet to carefully lift the tile without damaging surrounding ones. This process is akin to removing a stubborn piece of Lego—firm but controlled pressure is key. During my first attempt, I underestimated the size of the break and caused collateral damage, so take your time.
Inspect and Repair the Subfloor
Once the tile is out, examine the subfloor for cracks, rot, or movement. If you see movement or unsound material, fix it before proceeding. Apply shims or replace compromised sections with plywood or cement board, ensuring a flat and stable surface. For my bathroom, I glued and screwed new plywood sections, which stabilized the area and prevented future cracking. This step is crucial and similar to repairing a foundation before building a house.
Apply Uncoupling Membrane for Lasting Durability
To prevent future cracks, install an uncoupling membrane over the repaired subfloor. This acts like a shock absorber, distributing movement and reducing stress on tiles. Adhering the membrane is straightforward—lay it flat, cut to size, and press down firmly, much like laying a giant sticker. During my project, I used a peel-and-stick membrane, which simplified installation and provided excellent flexibility. This step dramatically extends the lifespan of your shower floor, aligning with expert advice from shower repair guides.
Reinstall Tiles and Ensure Proper Adhesion
Apply a high-quality thin-set mortar to the back of your tiles with a notched trowel—think of it as spreading peanut butter evenly. Set the tiles carefully onto the membrane, pressing firmly to ensure full contact and good adhesion. Use tile spacers to maintain consistent grout joints. When I did this step in my bathroom, I double-checked each tile’s level with a spirit level, preventing those annoying lippage issues. Proper bonding prevents future cracks and water leaks.
Grout and Seal for Final Finish
Allow the mortar to cure according to the manufacturer’s instructions—usually 24 hours. Mix grout thoroughly, apply it with a rubber float, and press it into the joints, removing excess at a 45-degree angle. Like smoothing icing on a cake, this step ensures a smooth, waterproof surface. Finish by sealing the grout with a high-quality grout sealer to resist stains and moisture—directly related to maintaining a long-lasting shower floor.
Final Checks and Maintenance Tips
Once everything is set and dry, clean the surface and check for any unevenness or gaps. Regularly inspect for signs of movement or cracking to catch issues early. Maintaining your shower by avoiding harsh chemicals and ensuring proper ventilation can significantly prolong your repair work’s effectiveness. Remember, meticulous preparation and steady execution are your best allies in fixing cracked shower floors effectively.
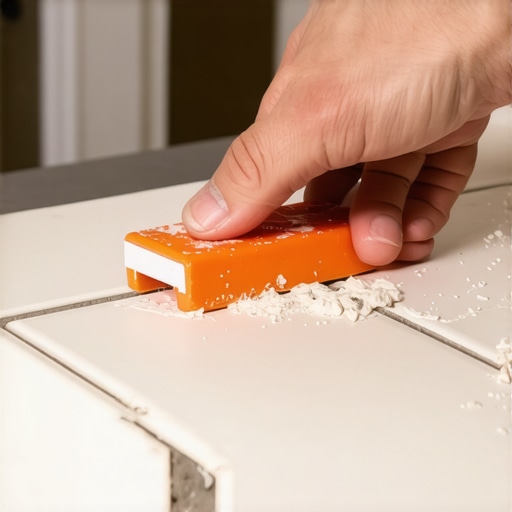 Many homeowners assume that following basic instructions guarantees flawless results when installing showers, baseboards, flooring, or carpets. However, the real challenge lies in understanding and executing the intricate details that differentiate a professional finish from a quick fix. One common myth is that choosing the highest quality materials alone ensures durability—while material quality matters, improper preparation often leads to failure, as highlighted in expert guides on durable flooring installation. For instance, in shower renovations, neglecting proper slope and waterproofing can cause leaks regardless of tile quality, a mistake discussed comprehensively in shower longevity tips. Another advanced pitfall involves underestimating the effects of environmental conditions; for example, humidity and temperature fluctuations can cause floorboards or carpets to warp or gap over time, especially if moisture barriers or expansion gaps aren’t correctly implemented, as per industry standards.
Are you aware of the nuanced calibration needed for seamless baseboard joints? Many tend to miter corners at 45 degrees without considering the actual wall contours, leading to visible gaps or uneven cuts. The secret to perfect mitering involves precise measurement and sometimes back-beveling, techniques covered in baseboard styling. Similarly, in carpet installation, the common mistake isn’t just stretching but making sure the underlayment is correctly installed and tensioned; too loose or tight can drastically reduce the carpet’s lifespan and aesthetic appeal. This is echoed in carpet installation secrets.
What about the most overlooked aspect—attention to detail during transitions? Whether between flooring types or around fixtures, neglecting proper T-molding or threshold installation leads to tripping hazards and uneven surfaces. Precise calculations and allowances for expansion are critical, and bypassing this step often results in costly repairs down the line.
Let’s explore a question that often puzzles even seasoned DIYers: How do environmental factors influence long-term installation integrity? Experts agree that accounting for seasonal changes and ventilation can prevent warping, cracking, and grout failure. For example, a study published in the Journal of Building Engineering emphasizes that moisture control plays a pivotal role in the durability of flooring and tilework. Recognizing these nuances allows you to plan more effectively, avoiding pitfalls like moisture accumulation under floating floors or grout deterioration.
Have you ever fallen into this trap? Let me know in the comments. Mastering these hidden details transforms a basic project into a durable, professional-looking finish—a necessity for any serious homeowner aiming for long-term satisfaction.
How Do I Keep My Installations Working Seamlessly Over Time?
Maintaining your flooring, tiles, and baseboards requires more than just occasional cleaning. Investing in the right tools ensures your work remains durable and visually appealing for years. One essential device I swear by is a high-quality rubber mallet. Unlike regular hammers, a rubber mallet provides controlled force, preventing damage to delicate tiles or moldings during adjustments or re-alignments. For precise cuts, a tungsten-carbide-tipped utility knife helps achieve clean edges, especially when trimming baseboards or vinyl planks; I prefer this over standard blades because it maintains sharpness longer and reduces chipping, saving me time and effort.
Another tool worth mentioning is an automatic grout removal tool. When undertaking repairs or updates, removing old grout efficiently without damaging neighboring tiles accelerates the process and ensures a cleaner surface for new grout. I find a diamond-grit hand pad invaluable for scrubbing and polishing joints, particularly after sealing grout lines. Supplement these physical tools with high-quality software, such as digital angle finders, which improve precision in miter cuts for baseboards, directly translating into a more seamless appearance—an aspect that subtly elevates the overall finish.
Staying organized with a comprehensive repair kit stocked with epoxy fillers, sealers, and caulking guns allows me to respond quickly to any unexpected issues, ensuring longevity. For ever-evolving trends and to verify that your materials meet current standards, consulting resources like this guide on durable flooring helps you select appropriate supplies. Regular maintenance, like inspecting for loose grout or cracks, is vital; I recommend setting a quarterly reminder to check these details, preventing small issues from turning into costly repairs.
What About Tools for Long-Term Results
In the long run, the best tool is consistent proactive upkeep. For example, employing a microfiber mop and pH-neutral cleaner keeps surfaces free from damaging residues. To combat moisture-related issues that can lead to cracking or warping, installing a hygrometer in your bathroom or basement helps monitor humidity levels, enabling timely interventions. I also advocate the use of silicone-based sealants for grout lines because their flexibility accommodates minor shifts, reducing the chance of future cracks. As environmental conditions evolve, so should your maintenance approach, making tools like moisture meters and flexible sealants indispensable.
Preparing for Future Scale and Upgrades
Looking ahead, I predict that smart home integrations will play a larger role—for instance, moisture sensors linked to app alerts can notify you of leaks or humidity spikes before visible damage occurs. Smart maintenance devices will become standard for protecting investments in high-traffic areas or luxury renovations. To stay ahead, consider incorporating predictive maintenance tools now; this proactive approach preserves your installations and minimizes disruption.
How Do I Maintain Showers and Floors Over Time?
The key lies in routine inspections and immediate attention to minor issues like grout deterioration or tile shifting. Use specialized tools, such as a drain camera to check beneath floors or behind walls, revealing hidden problems early. Applying a consistent sealing schedule—guided by product recommendations—can prevent water infiltration and extend the lifespan of tile and grout, which is supported by expert advice on shower longevity. Small investments in quality tools and regular maintenance routines ensure your home remains the sanctuary you envisioned, avoiding costly repairs down the line.
Incorporate advanced methods like using a laser level for precise alignment of floor tiles or baseboards, which I personally use for flawless results. These tools might seem minor, but their impact on long-term durability is significant. So, why not try deploying a laser level during your next project? It might just transform the way you approach home upgrades and maintenance, saving time and enhancing professionalism.
The Hardest Lesson I Learned About shower,baseboards,flooring installation,carpet install
One of my most valuable insights was realizing that superficial fixes only delay the inevitable. For example, patching cracked tiles without addressing the uncoupling beneath is like putting a bandage on a leaking pipe—short-term relief but long-term disaster. I also learned that investing in the right tools and materials, like quality uncoupling membranes and precise leveling tools, makes a huge difference in the durability of the finish. Finally, I discovered that understanding environmental influences such as humidity and temperature can save you from future headaches, emphasizing the need for proactive maintenance rather than reactive repairs.
Smart Resources That Elevated My Renovations
My go-to source has been this comprehensive guide on durable flooring installation, which offers practical tips grounded in industry standards. I also rely heavily on the latest flooring trends for 2025 to stay ahead of the game. When it comes to specific tools, a quality notched trowel and a laser level help me achieve professional results every time. These resources have helped me understand the nuances that differentiate a DIY patch from a permanent solution.
Your Next Step Toward Flawless Floors and Showers
Embarking on your own repair journey can be intimidating, but remember that attention to detail and patience are your best allies. Start small, educate yourself with trusted resources, and don’t shy away from investing in quality tools. Your home’s floors and showers are more than just functional—they’re expressions of your care and craftsmanship. With each project, you gain confidence and mastery. So why not turn that cracked tile or uneven baseboard into an opportunity to elevate your space? Your perfect, long-lasting repair awaits—are you ready to take the first step?