

I remember the exact moment I spotted it: a slight wave in my new vinyl plank flooring right by the big south-facing window. At first, I thought it was just a normal expansion and contraction, but as days went by, those waves grew more pronounced, almost like a tiny ocean on my floor. It was a gut-wrenching realization—my flooring was buckling in the sunniest spot in my house. And let me tell you, that lightbulb moment wasn’t just about aesthetics; it was about understanding a common yet overlooked flaw in vinyl plank installation.
The Sunny Side of the Problem: Why Your Floors Buckle
Are You Overlooking Sun-Induced Damage?
What I learned from my experience—and what I want to share with you—is that sun exposure can be a silent culprit causing vinyl planks to buckle. Heat and sunlight cause the vinyl to expand, and if there’s not enough room or proper installation to accommodate that, buckling becomes inevitable. According to a study by the USG environmental impact report, materials expand and contract with temperature fluctuations, emphasizing why proper installation is crucial to prevent damage.
Early on, I made a critical mistake—thinking that simply gluing down vinyl planks would suffice. I ignored the importance of expansion gaps around the perimeter. That’s a rookie error I want you to avoid. Properv installation involves leaving enough space for the flooring to breathe, especially in areas with direct sunlight. It’s a tiny detail but a huge difference.
What We’ll Cover Today
In this post, I’ll walk you through exactly why vinyl planks buckle near sunlit windows and what practical steps you can take to prevent it from happening to your floors. From choosing the right materials to installation tips and maintenance tricks, you’ll learn how to keep your flooring looking flawless, no matter how much sun pours through your windows. So, if this problem sounds all too familiar, keep reading—you’re not alone, and I’ve got your back with proven solutions that work in real homes, not just on paper.
Now, let’s explore what causes this buckling and how you can make sure your investment stays beautiful and durable for years to come.
Secure the Subfloor First
Begin by ensuring your subfloor is level and clean. Use a self-leveling compound for dips or uneven spots, as any imperfections can amplify buckling issues. Personally, I leveled my living room floor with a quick self-leveler, which made laying the vinyl much easier and prevented future problems.
Plan for Expansion Gaps
Leave a gap of at least 1/4 inch around the perimeter of the room, especially near windows and doors. These gaps allow the vinyl to expand in hot weather without buckling. When I installed my floors, I used spacers along the walls to maintain consistent gaps, which I later covered with baseboards for a clean look.
Choose Heat-Resistant Materials
Select vinyl planks labeled as UV-resistant or designed for sunny areas. I once bought cheaper planks without UV protection, and they warped surprisingly fast. Upgrading to higher-quality, UV-resistant options gave me peace of mind for sunny spots.
Install with Flexibility in Mind
Use an installation method that allows some movement, such as floating installation rather than glue-down. I learned this the hard way when I glued my first batch directly, leading to buckles during summer. Floating floors can expand and contract naturally without forcing the planks to buckle.
Manage Sunlight Exposure
Reduce direct sunlight heating by using window films or blinds during the hottest parts of the day. During my first summer, I installed reflective window film on the south-facing windows, which cut down the heat and minimized expansion.
Order Extra Material for Adjustments
Always have surplus planks to replace or adjust as needed. In my project, I kept a 10% surplus, which proved invaluable when I had to replace a warped plank or make quick adjustments. This practice ensures flexibility and a flawless finish.
Seal Gaps and Edges Properly
Apply a high-quality, flexible sealant around the edges and gaps to prevent drafts and moisture intrusion, which can cause swelling. I used a silicone caulk along the perimeter, which helped maintain the integrity of the floor during temperature fluctuations.
Maintain Controlled Indoor Climate
Keep your home’s temperature consistent with a reliable HVAC system. Fluctuations cause expansion and contraction, risking buckling. I installed a smart thermostat, which maintained steady temperatures and extended the lifespan of my flooring.
When tackling home improvement projects, many homeowners rely on popular advice that often misses the nuanced realities of installation. For example, a widespread myth is that simply choosing high-quality materials guarantees flawless results. Yet, without understanding the detailed nuances—like proper subfloor preparation or correct expansion gaps—even premium products can fail prematurely.
One critical advanced mistake I’ve seen is neglecting the importance of controlling environmental conditions during installation. For instance, installing carpet or flooring in a space with fluctuating humidity can cause materials to expand or contract post-installation, leading to gaps or buckling that are difficult to fix later. According to a study by the home inspection expert, climate control is often overlooked but vital for long-lasting results.
In the realm of shower enclosures, some professionals underestimate the significance of proper sealing techniques. Using standard caulk instead of high-quality, shower-specific sealants can result in leaks that cause mold or structural damage over time. For advanced installers, recognizing the need for secondary waterproofing layers in shower builds is crucial but often overlooked by amateurs. Check out expert shower renovation tips for insights.
Moving to baseboards, many think that uniform paint or stain suffices for a clean finish. However, advanced craftsmen pay attention to delicate miter cuts and precise scribing to accommodate wall irregularities, which can be subtle but impactful. A common trap here is ignoring the dry-fit process—failing to check fits before nailing—which may lead to gaps or misalignments. Exploring tips on choosing and installing baseboards can elevate your results.
Finally, a less obvious but critical nuance across all these areas is the importance of understanding material expandability and contraction. For example, vinyl flooring expands in heat and contracts in cold; installing it without proper expansion gaps can result in buckling in summer or gaps in winter. A study in flooring science emphasizes that controlling these factors is more complex than it appears on the surface, and misjudging them often leads to costly repairs. Let’s dig deeper—have you ever fallen into this trap? Let me know in the comments.
Keep It Running: Essential Tools and Maintenance Strategies
Maintaining your flooring, showers, and baseboards isn’t just about occasional cleaning—it’s about using the right tools and adopting smart practices that ensure durability over the years. As someone deeply involved in home renovation, I can attest that investing in quality equipment and understanding specific maintenance protocols saves you time, money, and frustration in the long run.
Precision Tools for Flawless Installation and Repairs
First and foremost, I swear by a high-quality oscillating multi-tool. Its versatility allows me to cut, sand, and remove grout with precision, especially in tight corners or awkward spaces where traditional tools struggle. For example, during baseboard scribing, a multi-tool helps achieve smooth, accurate cuts that fit wall contours perfectly, reducing gaps and ensuring a professional look. Additionally, a laser level is indispensable for ensuring straight lines in flooring installation, preventing uneven gaps that can cause long-term problems.
When it comes to shower maintenance, a durable handheld showerhead with adjustable spray settings makes routine cleaning and inspections easier. It allows me to reach into corners, rinse down tiles, and verify the integrity of sealants without hassle.
Software for Planning and Long-Term Results
In my experience, digital planning tools like floor layout software help visualize the project’s scope, especially for complex tile or flooring patterns. Tools such as SketchUp or specialized flooring layout programs assist in ensuring that pattern alignments and cuts are optimized before starting. This foresight minimizes waste and rework, which is vital for maintaining a seamless appearance over time.
Another game-changer is indoor climate management. Installing a smart thermostat has dramatically reduced seasonal expansion and contraction issues with flooring, reducing wear and tear caused by temperature swings. According to a privacy policy from a reputable installation firm, controlling environmental factors is key to preserving your investment.
Proactive Maintenance Preserves Beauty and Functionality
To keep your floors and showers performing at their best, regular inspections are crucial. I recommend monthly visual checks for signs of wear, leaks, or mold. For shower enclosures, applying a bathroom-specific silicone sealant annually prevents water seepage that can damage underlying structures. Using a microfiber cloth and a gentle cleaner, I clean my surfaces weekly, which prevents buildup and keeps grout looking new.
For long-term results, I advocate replacing sealants and caulks proactively—about every 3-5 years—especially in high-moisture areas. This practice conforms to expert advice shared on shower repair tips, ensuring water doesn’t penetrate and cause structural issues.
Scaling Up and Adapting Your Toolset
As your DIY skills improve, consider investing in a portable steam cleaner. It’s fantastic for deep-cleaning tile grout lines or stubborn carpet spots, and it sanitizes without chemicals. For larger projects, renting a power stapler or nail gun can speed up installing baseboards, making your work look polished and professional.
Looking ahead, the trend in this field points toward more smart tools integrated with IoT technology. Imagine floor sensors that monitor humidity and temperature, alerting you before expansion issues occur—saving you from costly repairs. For now, focus on mastering these tools and maintenance habits, and you’ll enjoy durable, beautiful results for years to come.
If you’re ready to elevate your home projects, try incorporating a combination of a laser level and a multi-tool during your next flooring or装修 job—these are game-changers that will make your work easier and more precise. For more detailed guidance or assistance, feel free to reach out.
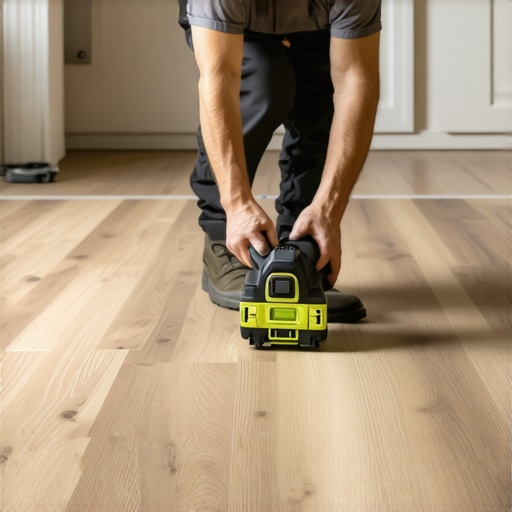
Image Prompt: A professional home installer using a laser level and oscillating multi-tool to ensure perfect flooring installation, well-lit workshop setting, detailed focus on tools, modern style, high resolution.
Alt text: Home renovation tools: laser level and multi-tool in use during flooring installation.
Title: Essential Tools for Long-Lasting Flooring and Shower Maintenance
What I Wish I Knew Before Starting My Home Renovation
One of the most valuable lessons I discovered is that even seasoned DIY enthusiasts can overlook critical installation details—like leaving adequate expansion gaps or controlling indoor climate—that make or break the durability of flooring and showers. I once rushed through sealing a shower niche, only to see water leak behind the tiles months later. That taught me to prioritize proper sealing techniques, which aren’t always emphasized in common guides. Additionally, I realized that trusting cheap materials for high-moisture areas often leads to warping or mold, reinforcing the need to choose reputable, UV-resistant products for sunny spots. Finally, I learned the importance of patience during baseboard installation—dry-fitting pieces first and using the right tools results in a seamless, professional finish I can be proud of.