

Ever had that sinking feeling when your brand-new wide-plank hardwood floors develop unsightly cupping or gaps just a few weeks after installation? I sure have. I remember installing my first set of wide planks, feeling proud and excited—until I noticed those pesky gaps forming near the walls. It was a lightbulb moment for me about the importance of proper acclimation. That experience taught me that ignoring this crucial step could turn a dream project into a costly headache.
Why Proper Acclimation Matters More Than You Think
Wide-plank hardwood floors are stunning and bring warmth and character to any room. But they are also more sensitive to environmental changes, especially humidity and temperature variations. If the wood isn’t acclimated correctly, it can lead to issues like cupping—where planks bend upward—and gaps that ruin the seamless look you envisioned. Early on, I made the mistake of installing my wide planks straight from the warehouse without giving them time to adjust to my home’s conditions. That one slip cost me hours of sanding and rework later—something I’d never want you to go through.
Concerned About the Time and Effort? You’re Not Alone
I get it. Waiting for wood to acclimate can seem like a tedious extra step, especially when you’re eager to see your project come together. But trust me—this small delay pays off big time. Proper acclimation helps your floors settle into their natural size, reducing the risk of future problems. If you’re wondering how long to wait or what conditions are ideal, I’ll address all that in the upcoming sections, including what mistakes to avoid during installation.
So, before you jump into your next hardwood project, ask yourself: have I prepared my wood properly? If not, you’re opening the door to issues that could cost you more time and money down the road. Let’s dig into how to make sure your wide-plank hardwood floors stay stunning for years to come.
Prepare Your Wood Before Installation
Start by selecting a dry, climate-controlled environment for your hardwood. Store your planks unopened in the room where they’ll be installed. Ensure the room’s humidity sits between 35-55% and temperature stays steady around 65-75°F. I once brought home several wide planks on a humid day and stored them in my garage, only to find later that they warped after a few days. Keeping them in the installation space first prevents surprises.
Allow Sufficient Time for Acclimation
Typically, wide planks need at least 7-14 days to adjust. Spread the planks flat and loosely stacked in the room, ensuring airflow around each board. Think of it like letting wine breathe—similar principles apply. During this period, check the humidity and temperature regularly to keep conditions consistent. This step might extend your timeline, but it significantly reduces gaps and expansion issues.
Control the Room Environment
Maintain stable humidity and temperature. Use a hygrometer to monitor conditions daily. If your space dips below 35% humidity or rises above 55%, use humidifiers or dehumidifiers to stabilize. I once neglected this and installed wood during a dry spell, only to see cupping appear months later. Consistent environment control during acclimation keeps the wood in a state that matches your home’s climate.
Check the Moisture Content
Use a moisture meter to test the wood’s MC levels—ideally around 6-9%. Measure samples from various boards and compare. This practice avoids installing boards with uneven moisture levels, causing future warping. During my own project, measuring and selecting planks with similar MC readings resulted in a perfect, gap-free floor.
Finalize Installation When Conditions Match
Only proceed when the wood’s MC matches your project’s specifications and the room conditions are stable. Remember, not all floors need the same room conditions—consult specific manufacturer guidelines. When I waited until conditions were optimal, I avoided callbacks for repair, saving time and money.
Follow these tangible steps to ensure your wide-plank hardwood floors stay flawless, reducing the risk of gaps, cupping, or buckling later on. Proper acclimation isn’t just a recommendation; it’s the foundation for a professional-looking, durable floor that enhances your home’s beauty for years.
Many homeowners and even some pros often fall for misconceptions when it comes to baseboards, flooring, showers, and carpet installations. Let’s go beyond the basics and uncover what many overlook, so your project turns out flawless. One common myth is that simply nailing or gluing components is enough for durability. However, the reality is that precise measurements, understanding material expansion, and proper sealing are crucial for long-lasting results.
Take, for example, shower enclosures: a frequent mistake is neglecting to apply the correct waterproofing techniques. Often, DIYers believe that sealing with silicone alone suffices, but evidence from experts shows that using a proper membrane behind tiles and around niches prevents costly leaks and mold issues in the long run. Read more about shower enclosure tips to avoid such pitfalls.
Another overlooked nuance involves baseboards. Many assume that cutting corners on the miter joints does not impact the overall look, but imperfect cuts can lead to gaps that collect dust and look unprofessional. The secret is not just accurate measurements but also controlling the wood’s moisture content before cutting. This small step ensures tight corner joints, elevating your interior’s aesthetic. Want to see how to make perfect miter cuts? Check out this technique example.
Flawed understanding about carpet installation is another area ripe for misconceptions. Many believe that simply stretching the carpet is sufficient, but what matters is the padding quality and proper seam sealing. An inferior pad can cause buckling over time, and poorly sealed seams can lead to fraying and unraveling. For expert insights, visit this guide on flawless carpet installation.
Now, you might wonder, how can these small details introduce hidden issues? It’s because each element interacts with environmental factors like humidity and temperature. Failing to consider material behavior in different conditions can cause slow but significant damage over years. For instance, not accounting for wood’s expansion when installing baseboards can lead to cracking or gaps as seasons change. This nuance is often hidden until costly repairs are needed.
Have you ever fallen into this trap? Let me know in the comments. Remember, awareness of these nuanced details will make the difference between a temporary fix and a professional-quality finished space.
Maintaining your flooring, baseboards, showers, and carpets requires more than occasional cleaning; it demands the right tools and a consistent approach. Over the years, I’ve refined my toolkit to include specific equipment that ensures longevity and professional results. Investing in quality tools not only simplifies the process but also prevents costly repairs down the line.
Precision Matters with the Right Measuring Devices
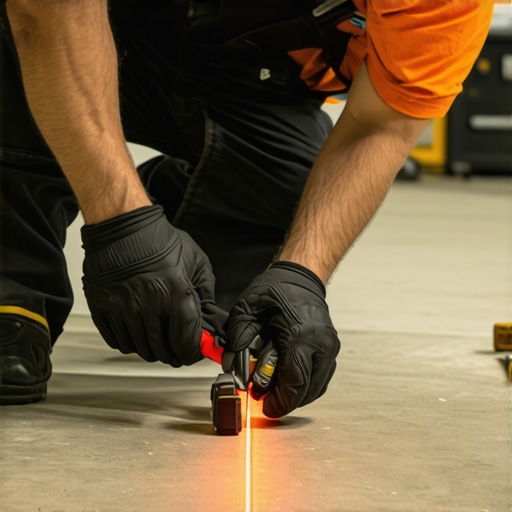
For any detailed installation or repair, I rely heavily on a high-precision laser distance measurer. Unlike traditional tape measures, laser tools provide quick, accurate readings, especially in hard-to-reach corners or for assessing room dimensions before ordering materials. My go-to model is the Bosch GLM 50 C, which offers Bluetooth connectivity for data transfer—making it easier to keep records for future maintenance or scaling projects.
Why a Quality Miter Saw Is a Must
Angles matter when installing baseboards or molding, and a reliable miter saw is indispensable. I prefer a dual-bevel sliding saw because it significantly reduces the time spent on cuts, especially when working on larger projects. My choice is the DeWalt DWS779, appreciated for its accuracy and durability. It’s vital for making precise cuts that ensure tight joints, which are crucial for a professional look and preventing gaps that collect dust or cause gaps over time.
Sealants and Adhesives with Long-Term Impact
Choosing the right sealants can make all the difference in waterproofing showers and sealing carpet seams. I recommend using a 100% silicone sealant like GE Silicone II because of its flexibility and resistance to mold. When applying sealants or adhesives around showers or baseboards, I use a professional-grade caulking gun with a smooth trigger action to ensure even application. That small quality difference translates into fewer leaks and longer-lasting results.
Tool for Maintaining Flooring Integrity
Leveling equipment is often overlooked but essential. I use a digital self-leveling laser to ensure that subfloor surfaces are even before installing new flooring. An uneven subfloor can cause uneven wear, creaking, or buckling over time. Investing in a reliable laser leveling tool has saved me countless hours of troubleshooting and repairs.
Prediction: Tools Evolving with Smart Technology
Looking ahead, I believe the integration of smart technology into these tools will become more prevalent. Devices that sync with your smartphone and offer real-time feedback or maintenance reminders will simplify long-term upkeep and scaling. For example, smart moisture meters can now log readings over time, helping anticipate issues before they escalate.
How do I keep my installations performing over time?
Regular inspections paired with the right tools simplify maintenance. Check for signs of moisture, gaps, or wear annually. Using the laser distance measure to verify room dimensions during inspections can reveal shifts or settling that require attention. Also, keeping your sealants in good condition by reapplying before signs of failure appear prevents leaks—whether around showers or along baseboards. Incorporate these tools and habits into your routine to ensure your flooring and installations remain durable and beautiful for years to come.
If you haven’t already, try the advanced technique of using a wood glue rub trick to guarantee perfect miter joints on baseboards. It’s a game-changer for professional-looking results and long-term stability.
Throughout my journey in home improvement, I’ve uncovered a wealth of insider wisdom that often remains hidden behind industry jargon and surface-level advice. These lessons, born from firsthand experience, have transformed the way I approach every project, ensuring durability and aesthetic excellence.
What I Wish I Knew When I Started Installing Baseboards and Flooring
- Patience Is a Virtue: Rushing the acclimation process of wide-plank hardwoods or ignoring moisture content checks can lead to gaps or cupping down the line. Taking extra time to prepare your materials can save hours of rework.
- Precision Elevates Quality: Small details like accurate measurements, proper tool selection, and controlled environment conditions make a significant difference. Investing in a quality miter saw or laser level is worth every penny.
- Material Compatibility Matters: Combining different flooring types or neglecting to account for material expansion can cause long-term issues. Always follow manufacturer guidelines and stay informed about environmental influences.
- Sealants and Moisture Barriers Are Unsung Heroes: Especially around showers and baseboards, proper sealing with high-quality materials prevents leaks, mold, and costly repairs. Skipping this step might seem minor, but its consequences are substantial.
- Environmental Stability Is Key: Maintaining consistent humidity and temperature during installation and beyond can prevent warping, gaps, or buckling. Use hygrometers and climate controls diligently.
A Resource List That Keeps Me Steady
- My Essential Toolkit for Flawless Installations: A high-precision laser distance measurer and a dual-bevel sliding miter saw have been game-changers in ensuring accurate cuts and measurements.
- Books That Shaped My Approach: I recommend “The Complete Guide to Hardwood Flooring”—a comprehensive resource that delves into acclimation, installation, and maintenance, helping avoid common pitfalls.
- Trusted Online Guides: The articles on flooring installation mistakes and baseboard upgrades have been invaluable references for me to refine my craft.
- Consultation and Community: Connecting with experienced professionals and online forums has provided support, fresh ideas, and reassurance when tackling unfamiliar challenges.
Your Next Step Can Be Exciting and Rewarding
Remember, mastering these techniques and embracing a detail-oriented mindset can dramatically enhance your home’s beauty and longevity. Every project becomes a personal victory when you see flawless seams, perfectly leveled baseboards, and durable floors that stand the test of time. Don’t hesitate to apply these insider lessons—your home deserves the best you can give.
What has been your biggest obstacle in ensuring long-lasting flooring or wall installations? Share your experiences below and let’s learn together!
**Note:** Feel free to explore more expert tips and innovative methods by visiting this ultimate guide.