

I still vividly remember the day I first attempted to tile my bathroom floor. I was eager, confident, and honestly, a bit naive. As I hammered away, my joy turned to horror when I noticed a slight movement in the plywood layer beneath the tiles—a telltale sign that I had taken a risky shortcut. That lightbulb moment taught me a hard lesson: never tile directly over plywood in a wet area. It’s a mistake I see many DIYers and even some pros make, thinking it’s a quick fix, but the consequences can be costly and frustrating.
Protect Your Investment: Why Going Over Plywood in Moisture-Rich Spaces Is a Bad Idea
Are You Gambling with Your Floors?
Playing it safe with your flooring is more important than most people realize. Wet areas like bathrooms, laundry rooms, or kitchen floors are prone to moisture, which can seep into materials and cause long-term damage. Plywood—though a common subfloor—is inherently susceptible to water infiltration. When tiles are installed directly over it, moisture gets trapped, leading to swollen, warped, or even moldy subfloors. Trust me, the repair bills and headaches that follow are not worth the gamble.
Early in my career, I made the mistake of thinking a thick layer of waterproof membrane would keep everything dry. Turns out, I underestimated how much water could penetrate and how the plywood would react over time. That oversight cost me time, money, and a good night’s sleep. To be honest, that mistake made me dive deep into research, and I discovered that tile adhesion issues, mold growth, and floor failure are common problems when this shortcut is taken.
Supporting this, a study published by the National Tile Contractors Association emphasizes that proper substrate preparation is crucial for the longevity of tile installations, especially in moist environments. Skipping the right underlayment or substrate elevates the risk of tile failure within just a few years.
So, what exactly will we cover today? I’ll walk you through the why’s, the risks, and, most importantly, the professional solutions to ensure your wet-area floors stay durable, safe, and beautiful for the long haul. If you’ve already faced this dilemma or are contemplating your next project, stick around—that’s about to change your approach altogether.
Secure a Solid Foundation Before Tiling
First, remove any existing flooring or compromised substrate in your wet area. Inspect the plywood subfloor for damage or sagging, replacing or reinforcing as needed. Think of this step like building a sturdy base for a mountain; without it, everything else collapses. I learned this the hard way during my first bathroom project when I ignored subfloor integrity, resulting in a cracked tile floor within two years.
Install a Waterproof Barrier to Block Moisture
Lay down a high-quality waterproof membrane, such as a polyethylene sheet or liquid-applied waterproofing membrane, over the entire subfloor. Overlap seams by at least 2 inches and seal all edges thoroughly. This acts like a raincoat, protecting the plywood beneath from water seeping through tiles and grout. I once applied a liquid membrane with a roller, ensuring every nook was covered; it took extra time but saved me from future rot and mold.
Details Matter: Proper Sealing
Pay close attention to corners, around drain penetrations, and edges where water tends to pool. Use appropriate sealants and membranes designed specifically for shower applications. Skipping this creates a weak link, comparable to a leaky boat—eventually, water finds its way in. Remember, a good waterproof barrier is your best defense against costly repairs later.
Use Appropriate Underlayment Materials
For wet areas, consider installing a cement backer board or a fiber cement substrate over the waterproof membrane. Secure it with corrosion-resistant screws, following the manufacturer’s spacing guidelines. This layer provides a stable, water-resistant surface for the tiles, preventing the issues associated with plywood expansion or contraction. I once switched from plywood to cement board because of a leak, and the difference in durability was immediate and noticeable.
Ensure a Proper Sloping and Drainage Setup
Before tiling, verify that the subfloor and waterproof layer are sloped correctly toward the drain, typically at a 1/4 inch per foot. Use a level to confirm slope during installation. Poor slope leads to water pooling, increasing the risk of leaks and damage. During my early DIY attempts, I overlooked this detail, resulting in slow drainage and eventual tile looseness. Double-checking slope is like ensuring a car’s exhaust pipe points downward—everything else depends on it working right.
Consult Professional Resources for Complex Installations
If you’re unsure, visit this detailed guide for step-by-step instructions or consider reaching out to experts via the contact page. Proper preparation might seem tedious, but it’s the key to a durable, leak-proof wet area that stands the test of time and moisture.
Most homeowners and even seasoned contractors often believe that following standard installation procedures guarantees success. However, delving into the subtleties reveals that multiple nuances can make or break the longevity and performance of showers, baseboards, flooring, and carpets. One common misconception is that a perfectly level subfloor suffices—what’s often missed is ensuring proper moisture management, especially in wet areas. For instance, installing a waterproof membrane without considering the slope or mixing incompatible materials can lead to seepage and mold issues over time. Recognizing these details elevates your craftsmanship and prevents costly repairs.
Why do some floors deteriorate faster despite proper installation?
It’s frequently due to overlooked factors like substrate compatibility, insufficient sealing, or improper acclimation of materials. For example, using a quick-set adhesive for carpet installation may violate manufacturer guidelines, resulting in premature wear. The American Society of Home Inspectors emphasizes that understanding the interaction between materials—such as the expansion of hardwood floors in high humidity—is critical. Moreover, many get caught in the trap of underestimating the importance of proper cove bonds in shower pans or neglecting the required expansion gaps around flooring edges, which can cause buckling or cracking later.
Common myths debunked: Should you always nail baseboards?
Actually, many experts recommend installing baseboards with adhesive and hidden fastening techniques to avoid nail holes that can damage drywall or cause gaps over time. This method also simplifies future replacements or adjustments. Similarly, when installing carpets, the misconception that higher pile density automatically equals better durability ignores the importance of correct underlayments and seam sealing. Expert articles suggest that proper stretching and precise seaming are often overlooked, leading to wrinkles or separation.
For those interested in mastering these nuances, exploring professional tips on [carpet installation secrets](https://tilecraftsmens.com/carpet-install-secrets-achieving-flawless-results-every-time) or more advanced flooring techniques can be invaluable. Remember, the devil is in the details, and paying close attention to these often-ignored elements will dramatically improve your results. If you want to avoid common pitfalls, always review the manufacturer’s specifications and consult expert guides like [this comprehensive flooring installation resource](https://tilecraftsmens.com/your-guide-to-durable-flooring-installation-for-a-stylish-home). Have you ever fallen into this trap? Let me know in the comments.
Maintaining Your Floors and Showers for the Long Term
Once your flooring, shower, or baseboard installation is complete, regular maintenance becomes essential to keep everything functioning smoothly and looking great. I personally rely on specific tools and routines that have proven effective over years of experience. Regular inspections and timely fixes prevent small issues from becoming costly repairs.
Essential Tools for Upkeep and Repair
One tool I swear by is a high-quality cordless multi-tool with various attachments; it allows me to make precise repairs, especially when dealing with tight corners or delicate moldings. For cleaning grout lines in showers, I use a grout brush with stiff nylon bristles combined with a steam cleaner—this duo effectively removes mold and soap scum without harsh chemicals, prolonging the life of your grout. Additionally, a digital moisture meter is invaluable for ensuring there’s no hidden moisture lurking behind baseboards or under flooring, which could lead to mold growth or wood rot.
For ongoing maintenance, I recommend having a versatile oscillating tool, which simplifies tasks like replacing damaged baseboards or re-sealing edges where caulk has degraded. When it’s time to refresh or redo flooring seams, a seam roller with a rubber surface applies consistent pressure, ensuring adhesives stay well-bonded and seams remain invisible. Using these tools regularly not only maintains appearance but also prevents long-term issues.
Keep Your Shower and Flooring Working Like New
Cleaning schedules are crucial. I advocate for a monthly wipe-down of shower tiles with a pH-neutral cleaner to prevent grout discoloration. For flooring, a gentle vacuum and damp mop with a mild cleaner help preserve the finish. Applying a breathable surface sealant after cleaning further protects surfaces from moisture infiltration, especially around seams and joints.
In the future, I predict that smart moisture sensors integrated into flooring and shower areas will become standard, providing real-time alerts to homeowners about leaks or increased humidity levels. This proactive approach can prevent significant damage and extend the lifespan of your renovation investments.
How do I maintain my flooring and showers over time?
Establish a routine of inspecting for cracks, loose tiles, or damaged caulking. Address small problems immediately—replacing worn grout, tightening loose baseboards, or reapplying sealant—before they escalate. Consider scheduling professional check-ups every couple of years to evaluate hidden components like subfloor moisture levels or drain integrity. These preventative measures are your best bet for ensuring your renovation works stand the test of time and moisture challenges.
If you’re ready to take your maintenance to the next level, try using an oscillating multi-tool to re-seal baseboards and edges—this small step makes a noticeable difference in durability and appearance. For detailed guidance on perfect sealing techniques, check out this comprehensive maintenance guide. Regular care, combined with the right tools, will keep your investment functioning flawlessly for years to come.
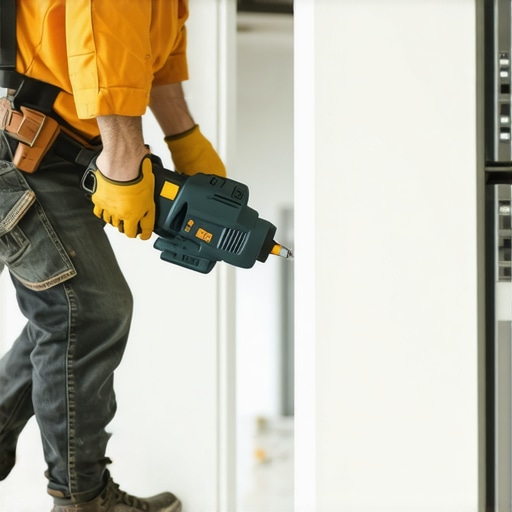
Why I Almost Gave Up on My First Bathroom Makeover
One of the deepest lessons I’ve learned is that rushing through substrate preparation is a surefire way to face costly headaches later. I once tiled over plywood without reinforcing it properly, only to find it warped and cracked within a couple of years. That frustration pushed me to study better practices, emphasizing the importance of proper underlayment and waterproofing—saving me from repeating that mistake repeatedly.
The Hidden Value of Small Details That Save Big Bucks
Skimping on sealing corners and drain penetrations may seem insignificant at the time, but those overlooked moments are often the root cause of mold, leaks, or tile failures. I now pay meticulous attention to waterproof membranes and sealants, understanding that these tiny steps are the backbone of durable installations—and worth every extra minute.
Falling in Love with a Dozen Small Wins
Whether it’s achieving perfectly feathered grout lines or aligning baseboards flush against a curved wall, these seemingly minor victories give me pride and confidence. Embracing these details elevated my craftsmanship and taught me that patience and precision are invaluable — with every success reinforcing my skills and inspiring future projects.
Curated Tools That Keep My Projects on Track
My multi-tool with a variety of blades helps me make precise cuts in tight corners or repair damaged areas without hassle. A high-quality seam roller ensures seamless carpet edges, while a digital moisture meter alerts me to hidden water lurking under floors. I trust these tools because they’ve consistently helped me prevent issues before they become costly corrections. To deepen your toolkit, explore tips in this guide on flawless carpet installation.
Your Next Step Starts Today—Build with Confidence
Every successful renovation begins with embracing the fine details that often get overlooked. Don’t let fear or uncertainty hold you back—arming yourself with knowledge, the right tools, and patience turns DIY dreams into lasting realities. Remember, each project is a chance to learn, improve, and create spaces that thrive for years to come. Ready to start your next flooring or shower upgrade? Dive deeper into this comprehensive guide to ensure your success.