

It was one of those mornings where I stepped onto my freshly cleaned carpet and immediately felt a strange, unsettling bumpiness under my feet. At first, I thought maybe I hadn’t dried the carpet properly, or perhaps there was a hidden wrinkle I overlooked. But as I inspected closer, I realized the carpet was actually uneven—lumpy, wavy, almost like a landscape of tiny hills and valleys. That lightbulb moment hit me hard: I had just gone through a deep steam clean, expecting a sleek, smooth surface, but instead, I was met with a bumpy mess.
How Can a Deep Clean Make Your Carpet Feel Worse Than Before?
This phenomenon isn’t uncommon among homeowners who treat their carpets to a deep steam cleaning. While it seems straightforward—use hot water and suction to banish dirt—it can sometimes introduce new problems. The main culprit? Improper drying and the way the carpet fibers respond to moisture and heat. When too much water is used or drying is rushed, the backing of the carpet can loosen or shift, causing ripples and bumps to form.
What’s frustrating is that many folks, myself included early on, assume that a professional steam cleaning will restore their carpet’s original plushness. But without proper technique and follow-up, you might end up with the opposite—a surface that’s even more uneven than before. According to carpet installation experts, uneven drying is among the top causes of post-cleaning bumps. Improper foot traffic during the drying process can also leave the fibers distorted, creating permanent ripples.
Have you ever faced this bumpy carpet dilemma after cleaning?
If yes, you’re not alone. I’ve been there, scratching my head, wondering what went wrong. The good news? There are practical solutions—many of which I’ve discovered through trial, error, and plenty of research. In the next sections, I’ll walk you through the common mistakes that lead to bumpy carpets, and the simple steps you can take to restore that smooth, comfortable surface you’re after. Whether you’re doing it yourself or considering pros, understanding the cause is key. And if you’re curious about the intricacies of flooring installation or want to avoid mistakes in other projects, check out some helpful resources like carpet installation secrets—they can save you time and headache down the line.
Prepare the Area Before Restoring Your Carpet
Clear and Inspect
Start by removing all furniture, rugs, or obstacles from the carpeted space. Carefully inspect the surface for excessive wrinkles or ripples that need attention. During my recent attempt, I noticed some minor bumps that I knew I could fix with proper techniques.
Dry the Carpet Thoroughly
Ensure the carpet is completely dry before attempting to smooth it out. Use fans or industrial dryers if necessary. Rushing this step often leads to lingering bumps, so patience here is key.
Stretch and Reposition the Carpet
Use a Carpet Stretcher
Employ a power stretcher similar to what professionals use. Start at one end and gradually pull the carpet tight, working your way across the room. I once used a manual tool in a tight corner, which helped tighten loose fibers effectively.
Trim Excess Edges
If the edges are too loose, cut away excess to prevent wrinkles. Be precise with your cuts to maintain a clean, professional look.
Secure the Carpet Properly
Reattach with Tack Strips and Adhesive
Lay down new tack strips if needed, and use a strong carpet adhesive to secure the edges. Proper attachment prevents future buckling. I found that applying small sections of adhesive and pressing firmly yielded the best results.
Focus on Baseboards and Transitions
Ensure that baseboards and transitions between rooms are not pulling or pinching the carpet, which can cause ripples. Using flexible caulk or adding a slight expansion gap can provide room for fluctuations. For a seamless look, check out baseboard updates.
Final Checks and Adjustments
Walk over the carpet carefully, pressing down on bump-prone areas. Use a carpet brush to lift fibers and smooth out minor uneven spots. Allow the adhesive to cure completely before replacing furniture. My experience showed that patience here paid off in achieving a plush, even surface.
Prevent Future Bumps
Regular maintenance and timely re-stretching prolong the smoothness of your carpet. If installing new carpet, pay attention to proper techniques like professional installation tips to avoid these issues altogether.
Many homeowners and even seasoned DIYers often believe that straightforward installation tips are enough to ensure a perfect finish. However, the reality is that there are nuanced challenges many overlook, leading to costly errors down the line. For instance, a frequent misconception is that one size fits all—assuming that techniques suitable for carpet installation are directly applicable to tile or baseboards. But in truth, each material demands specific considerations; for example, the importance of proper expansion gaps becomes critical for hardwood floors to prevent buckling, a detail often underestimated by amateurs. Moreover, many think that simply aligning patterns or seams is sufficient, ignoring the underlying importance of subfloor flatness, which, according to flooring material experts, directly impacts long-term durability and aesthetics. Sometimes, the hidden nuance lies in pre-installation preparation, such as ensuring moisture barriers are correctly installed, which is vital for preventing future flooring failures—an aspect highlighted in recent studies on moisture management in flooring systems. “Have you ever fallen into this trap?” Improper techniques can introduce issues like uneven surfaces, warped materials, or cracked grout. An advanced mistake to avoid is neglecting the thermal expansion of materials like vinyl or wood, especially in climates with significant temperature fluctuations, which can cause seams to open or buckle over time. For shower installations, a seemingly small oversight is neglecting to slope shower floors correctly, leading to standing water and mold issues—something experts caution against, emphasizing the importance of a proper slope to drain. In the case of baseboards, skipping the detailing of precise miter cuts or ignoring the need for caulking at joints can result in gaps that not only look unprofessional but also allow drafts and dust infiltration. For those seeking flawless results, paying attention to these details pays off. A comprehensive understanding of these advanced nuances can make the difference between a good installation and a truly professional finish. For more tips on achieving seamless tile layouts, check out our article on carpet installation secrets. Remember, rushing through preparation or ignoring material-specific requirements often leads to problems that are expensive to fix later. So, always take the time to learn each project’s subtle details—your future self will thank you. Want to dive deeper into expert techniques? Discover how to choose the right materials and ensure they’re installed correctly from the start.
Maintaining your flooring, showers, and baseboards isn’t just about occasional cleaning—it’s about having the right tools and routines to ensure durability and aesthetic appeal over time. Investing in quality equipment can save you money and prevent costly repairs down the line. One tool I highly recommend is a Ryobi cordless multi-tool, which I’ve used repeatedly for precise trim adjustments and grout touch-ups. Its oscillating head allows me to get into tight corners around baseboards and shower niches without damaging surrounding surfaces.
Why Quality Tools Matter
Using professional-grade equipment ensures that maintenance tasks are performed efficiently and effectively. For example, a high-quality grout removal tool with carbide blades, like the Dremel 560, makes replacing or repairing grout lines a straightforward process, avoiding inaccuracies that could lead to water leaks or mold growth. When managing complex installations, I find that having a laser level, such as the Bosch GPL 3, keeps all elements aligned—critical for a seamless and long-lasting finish.
Establishing a Routine for Long-Term Results
Consistency is key. I set monthly check-ins to inspect for signs of wear in baseboards, loose tiles, or grout cracks. Regularly applying a silicone sealant around shower edges using a caulking gun minimizes water infiltration and prevents damage. For instance, when re-sealing my shower, I opt for a mildew-resistant silicone, which maintains its integrity over years of moisture exposure. Also, leveraging software like The Tile Doctor’s maintenance scheduler helps me track when to perform deep cleans or re-seals, extending the lifespan of my installations.
Scaling Up and Future-Proofing Your Installations
As your home evolves, so should your tools and maintenance strategies. Upgrading to smart sensors—like moisture detectors connected through a home automation system—can inform you instantly of leaks or humidity spikes, protecting your investments. When planning a larger renovation, considering durable materials such as engineered hardwood with moisture barriers or epoxy coatings for showers will save headaches later. Keep abreast of emerging trends in flooring and bathroom upgrades through trusted resources and manufacturer updates. For example, the latest in waterproofing membranes, detailed in recent technical bulletins, can dramatically enhance durability.
How do I maintain my flooring and showers over time?
Implementing a regular maintenance schedule, using the right tools like a quality grout saw or a steam cleaner designed for tiles, can preserve your surfaces beautifully. A strategic approach—such as weekly inspections combined with monthly deep cleaning—ensures problems are caught early. For shower maintenance, applying a weekly spray of a pH-neutral cleaner like Black Diamond Stoneworks’ The Not Show Clean helps prevent soap scum buildup and microbial growth. Adopting these habits, along with knowing what advanced techniques to try, will make your projects last far longer. For instance, regularly applying a penetrating sealant on grout joints can ward off discoloration and damage, akin to the professional sealing methods recommended by industry experts.
Remember, the key to keeping your home’s installations in top shape is continuous care and having a well-equipped toolkit. Why not try incorporating a multi-purpose maintenance spray or a laser leveling tool into your routine this month? Small upgrades like these can significantly influence the longevity of your flooring and fixtures.
Stay proactive: explore advanced tips and strategies in professional guides and don’t hesitate to invest in tools that can make your maintenance efforts more effective and less time-consuming. Your future self will thank you for the extra effort now!
Lessons That Changed My Approach to Flooring and Baseboards
- One of my biggest mistakes was rushing the drying process after deep cleaning carpets; now I always ensure complete dryness to prevent ripples. It’s a small step that saves hours of frustration later.
- I once underestimated the importance of meticulous subfloor preparation, which resulted in uneven surfaces. Investing time in a thorough inspection upfront makes a huge difference in the final look.
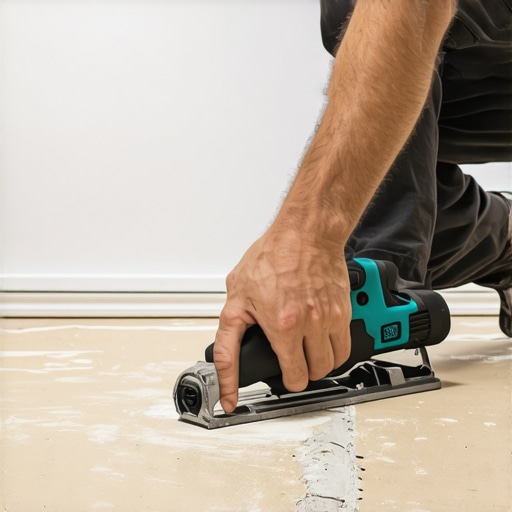
- Using professional-grade tools like a laser level and power stretcher transformed my DIY projects from amateurish to polished. Quality tools are worth every penny for lasting, flawless results.
- I learned that paying close attention to expansion gaps and proper caulking around baseboards can prevent future cracks and gaps, saving me from costly repairs in the long run.
- Understanding material-specific nuances, such as moisture barriers for laminate flooring and the need for proper slope in showers, has made my renovations much more durable and professional-looking.
Tools and Guides That Elevate My Home Projects
- Carpet Installation Secrets: This comprehensive guide taught me precise techniques for stretching and proper seam alignment, making my carpets look professionally installed. Check it out here.
- Baseboard Makeover Tips: Upgrading old baseboards with the right cuts and sealants gives any room a fresh feel. I rely on expert advice from this resource.
- Creating a Spa-Like Shower Experience: For bathroom upgrades, professional insights into proper slope and waterproofing saved me from leaks and mold issues. Find out more here.
- Deep-cleaning and Maintenance Tools: A high-quality grout scrubber and moisture meters have helped me maintain pristine surfaces. Regular inspections with these tools extend the life of my renovations.
Your Next Step Toward Perfect Floors and Elegant Details
Transforming your home with smooth flooring and perfectly crafted baseboards isn’t just about aesthetic appeal—it’s a celebration of your dedication and attention to detail. Every successful project begins with a willingness to learn and a commitment to quality. Don’t be discouraged by initial setbacks; instead, view them as valuable lessons that sharpen your skills. With the right tools, expert guidance, and a bit of patience, you can achieve results that elevate your space’s beauty and functionality. Start today, and remember—great floors and stylish baseboards are within your reach! How will you apply these insider lessons to your next project? Let me know below.