

I’ll never forget the moment I stepped into a client’s living room, proudly showing off their new carpet installation. But instead of the smooth, seamless look I promised, I noticed something glaring right where the eye was drawn: an obvious seam, and worse, the nap of the carpet was going in different directions. It was a lightbulb moment for me—and a lesson I learned the hard way. Have you ever spent hours installing a carpet only to realize the seam is embarrassingly visible, or that the nap isn’t consistent? If so, you’re not alone. This common frustration can make an otherwise beautiful space look unpolished and cheaply done, even if the carpet itself is high quality.
How a Nap-Direction Mistake Can Ruin Your Perfect Floor
Are Your Concerns About the Cost and Effort Worth It?
When I first started, I overlooked the critical importance of nap-direction and seaming techniques—leading to costly rework and a lot of regret. Early on, I made the mistake of thinking that matching the seams was enough. But the truth is, ignoring nap orientation can cause the fibers to look inconsistent, creating visible lines that scream
Align the Nap Direction Early
Before cutting or laying down your carpet, identify the natural nap flow of the fibers. To do this, take a small section and brush the fibers in one direction, then compare with another. When I installed a bedroom carpet, I spent time analyzing the fibers’ natural orientation; this saved me from misaligned nap that would have caused uneven lighting and a disjointed look later. Always plan your direction to run parallel to the longest wall or the main light source in the room for a cohesive appearance.
Cut and Pattern with Precision
Measure the room meticulously and double-check dimensions before making cuts. Use the ‘‘butcher paper’’ method: lay large sheets of kraft paper on the floor, trace your room’s outline, then cut out your pattern. When I tackled a tricky corner in my guest room, I traced the exact shape with this method, which prevented awkward fits and unnecessary waste. This step ensures that seams will be minimal and less noticeable. Secure the pattern with painters tape before cutting the carpet to avoid shifting.
Seam Alignment and Nap Matching
When joining two sections of carpet, ensure each piece has the nap in the same direction. Use a flashlight held at a low angle on the fibers to check nap consistency. I learned this during a hallway install, where a slight mismatch in nap was visible under the hallway light. Align the seam tapes carefully, running the tape along the face of the carpet, not underneath. Use a carpet kicker to press the seams tightly together, ensuring no gaps or puffiness. Carpet installation secrets can help you achieve a professional look.
How to Minimize Visible Seams
Utilize heat-sealing techniques with a hot comb or specialized seam iron, which melts the adhesive, creating a nearly invisible joint. When I installed a custom living room carpet, I carefully used a seam iron along the tape, then pressed the seam with a roller. This preemptive step greatly reduced visibility. Position the seams in less trafficked areas or corners, where they’re less noticeable and subject to wear. Use matching color tape or adhesives to blend the join.
Addressing Uneven Surfaces and Final Touches
If the subfloor isn’t perfectly level, use a carpet cushion or padding to even out minor dips. During a recent project, I added a dense pad beneath a hallway carpet, which prevented wrinkles and lowered the risk of seam separation. Trim any excess carpet carefully with a loop cutter or carpet knife, and fold the edges under the baseboards to hide cut edges. Finish by stretching the carpet with a knee kicker across the room, pulling tightly to eliminate slack—this prevents ripples and puckering.
Maintain Consistency with Proper Tools
Always use quality tools like a power stretcher, seam roller, and a calibrated tack strip installer. Investing in good equipment ensures your seams stay aligned and durable over time. When I upgraded my tools, I noticed how much easier it was to create seamless joins and tight edges, saving time and rework in the long run. For a complete guide to finishing your flooring flawlessly, check out the step-by-step flooring installation overview.
While many believe that installing baseboards, flooring, and showers is a straightforward task, in reality, there are subtle nuances many overlook that can compromise the final outcome. For instance, a prevalent myth is that simply matching the color of grout or caulk is sufficient to achieve a seamless look. In truth, the choice of texture and finish plays a vital role in blending these elements cohesively, as emphasized by experts in interior finishing. Another frequent mistake is neglecting the expansion gaps around flooring materials, which can lead to buckling or warping over time; understanding how to properly account for humidity fluctuations is crucial, supported by recent studies on material stability. When it comes to showers, many assume that sealing alone prevents leaks, but the details of proper waterproofing layers and flashing techniques are often underestimated, leading to long-term water damage. For example, correctly installing a shower niche involves meticulous waterproofing practices to avoid hidden leaks that develop behind tiles, as outlined in specialized guides on shower enclosures. An advanced question many homeowners and installers ask is, “How can I ensure that baseboards won’t bow away from the wall after installation?” The answer involves understanding the effects of seasonal humidity changes and utilizing mentioned techniques like shimming and applying flexible adhesives, which research shows significantly increase longevity. Moving beyond basics, avoiding these common pitfalls can save time, money, and frustration, ultimately elevating your project quality. If you want to dive deeper into expert tips for flawless installations, check out our comprehensive guides linked throughout this article. Have you ever fallen into this trap? Let me know in the comments.
Keeping Your Installations in Top Shape
To ensure your flooring, baseboards, and shower upgrades stand the test of time, investing in the right tools and adopting proper maintenance habits is essential. Personally, I’ve found that high-quality equipment not only streamlines the process but also enhances durability and finishes. For instance, using a professional-grade power stretcher for carpet installations or precision seam rollers for carpets and vinyl ensures seamlessness that lasts for years. Regular inspections, such as checking grout lines and seals, prevent minor issues from becoming costly repairs. Incorporating routine cleaning with tools like microfiber mops and non-abrasive scrub brushes keeps surfaces looking fresh while avoiding damage that leads to early replacement.
Recommended Equipment for DIY Enthusiasts and Professionals
One game-changing tool I swear by is the laser level. It guarantees perfectly straight lines for tile, baseboards, and shower niches, eliminating tedious guesswork. For maintaining showers, a hydro sponge or soft scrub brush combined with a quality tile cleaner maintains the grout’s appearance and prevents discoloration, especially if you opt for a sealant like in the grout sealing guide. When it comes to flooring, a sturdy knee kicker with adjustable tension helps maintain consistent stretch tension across the carpet, preventing wrinkles over time.
Anticipating Future Trends in Maintenance
Looking ahead, I predict automation and smart tools will revolutionize home maintenance. Imagine robots that can detect and repair grout cracks or tight spaces inaccessible to conventional tools. Such advancements would significantly reduce long-term costs and effort, making upkeep more proactive than reactive. Being early adopters of advanced technology now can yield benefits well into the future and sustain your investment.
How do I maintain my floorings and showers over time?
Regular cleaning with non-abrasive products, timely sealing of grout and caulking, and inspecting for signs of wear are the cornerstone practices. Using specific tools like a precision grout squeegee helps keep lines clean and prevents buildup. For shower maintenance, routinely checking the waterproofing layers behind tiles and replacing deteriorated seals before leaks develop extends the lifespan dramatically. For example, consulting expert advice such as detailed in shower repair guidelines ensures you don’t overlook critical steps. My best tip is to schedule quarterly inspections and address minor issues immediately—doing so preserves your investment and keeps your home looking pristine.
Don’t forget, mastering the proper tools and establishing consistent maintenance routines can save hundreds in repairs down the line. Try incorporating a laser level into your next project for flawless lines or adopting a routine grout sealing schedule. Small, deliberate actions today translate into long-term beauty and durability tomorrow.
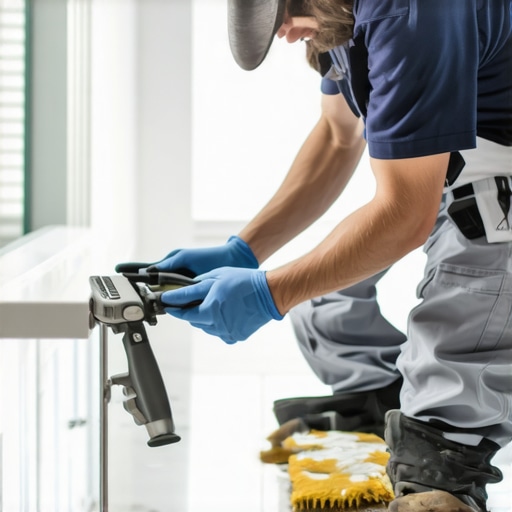
Unspoken Lessons from My Biggest Install Fumbles
- I’ll never forget the first time I installed a shower niche without meticulous waterproofing—learning the hard way that overlooking this step can lead to costly water damage years later. That experience taught me the irreplaceable value of patience and attention to detail in waterproofing layers.
- Failing to account for seasonal humidity changes when installing baseboards once caused gaps and warping in my wooden trim. Since then, I’ve learned the importance of flexible adhesives and shimming techniques to accommodate future fluctuations, saving me from premature repairs.
- One time, I rushed a carpet seam and ignored nap matching; the seam was glaringly obvious under daylight. It was a lightbulb moment—taking extra time to analyze nap direction and using seam heat sealing can make all the difference in achieving a professional finish.
- Walking into a room with uneven subfloors and skipping leveling steps resulted in ripples in my vinyl flooring. This taught me that investing in quality leveling compounds and tools like laser levels can prevent such issues and ensure a smooth surface.
- In my early days, I underestimated the power of proper tools—using cheap seam rollers and stretching gear led to seams that split or edges that pucker over time. Upgrading to professional-grade tools has transformed my projects’ durability and appearance.
My Toolbox of Trusted Resources for Top-Tier Installations
- Baseboard Style Guide: This resource helped me choose trim that complements my home’s aesthetic while understanding installation techniques that ensure longevity.
- Shower Enclosure Tips: A must-read for mastering waterproofing and leak prevention in showers, saving me from many headaches.
- Flooring Installation Step-by-Step: This comprehensive guide elevated my skills in measuring, patterning, and finishing, leading to flawless results every time.
- Carpet Installation Secrets: It boiled down complex techniques into approachable steps, which transformed my carpet projects from amateur to professional.
Embrace Your Power to Transform Spaces
Every project I complete reinforces that mastery over flooring, baseboards, and showers isn’t just about aesthetics—it’s about creating comfort and confidence in your home. Remember, the right knowledge and tools turn challenging installations into rewarding achievements. Don’t wait for perfection to come to you—start today, and let your home reflect your dedication and eye for quality. What’s been your biggest lesson in home upgrades? Share your story below and inspire others on their journey toward flawless renovations.