

There was a morning I’ll never forget. I was just stepping onto my newly installed floating floor when a sharp, undeniable creak echoed beneath my feet. My heart sank. Not because I thought I had done something wrong, but because I knew I was about to face a problem I’d seen countless times—those sneaky, irritating cracks that seem to appear out of nowhere. If you’ve ever experienced that moment of realization, you’re not alone. It’s a common frustration among homeowners and DIY enthusiasts alike.
The Real Reason Behind That Unexpected Floor Creak
My initial assumption was simple: maybe I hadn’t nailed the installation properly. But after some digging and a few mistakes, I learned that cracking sounds often stem from something much more subtle—expansion and contraction caused by changes in humidity and temperature. In fact, a study from the home improvement research highlights that fluctuating moisture levels are among the top reasons floors develop those unwanted cracks and creaks. So, why do these noises happen, and does it mean my floor is doomed? Not necessarily. Understanding the root cause helps in choosing the right fixes and prevention strategies.
Is your Cracking Floor Worth Fixing?
Early on, I made a critical mistake—ignoring the importance of proper subfloor preparation. I skipped the crucial step of checking for moisture issues and assumed a straight cut was enough. Big mistake. It’s easy to underestimate how much the subfloor condition impacts your flooring’s longevity and soundness. Trust me, doing this right from the start—and avoiding shortcuts—can save you a lot of headaches later. If you’ve faced similar issues, don’t worry; I’ll guide you through resolving this common dilemma and help you avoid making the same rookie errors.
Now, let’s dive into the precise reasons your floating floor might be cracking and how to fix it effectively. Ready to transform that annoying creaking into a quiet, stable surface? Keep reading, and I’ll show you how I finally got my floors to stay peaceful and crack-free.
{
Assess Your Subfloor Thoroughly
Start by inspecting the subfloor, since cracks often originate beneath the surface. Remove any baseboards and examine for moisture, rot, or unevenness. Use a level to spot dips or high spots, and check for soft spots that suggest damage. I once found a soggy patch behind a closet, which caused persistent creaks in that area. Fix these issues first to prevent future problems. To accurately detect moisture, use a moisture meter, and if levels are high, address the source before proceeding with installation or repairs here.
Prepare the Floor Surface Properly
Fix Unevenness and Moisture
Apply self-leveling compounds to dips or high spots, ensuring a flat surface. For moisture problems, install a vapor barrier or sealant as per manufacturer instructions. I used a patching compound on a sunken corner, which immediately stabilized the floor and eliminated creaks. Remember, a smooth, dry surface promotes better adhesion and reduces future cracking risks.
Clean and Prime the Surface
Remove dust, dirt, and debris with a vacuum and wipe down with a damp cloth. Use a primer compatible with your flooring material to improve bonding. In my experience, neglecting this step led to loose tiles that eventually cracked. Proper prep creates a solid foundation for the entire installation or repair process.
Apply Correct Installation Techniques
Use the Right Adhesives and Fasteners
Select adhesives formulated for your flooring type, such as acrylic for floating floors. For example, when installing laminate, I used a high-quality underlayment with an integrated moisture barrier, preventing expansion issues. Additionally, secure loose boards with screws or nails, avoiding overdriving, which can cause splits and cracks.
Control for Expansion Gaps
Leave appropriate gaps around the perimeter and at transition points to allow natural expansion and contraction. I learned this the hard way when my floors buckled after a cold snap; proper gaps would have prevented that. Use spacers during installation to maintain consistency, and fill these gaps later with baseboards or quarter-round molding.
Address and Repair Existing Cracks
Fill in Cracks with Quality Materials
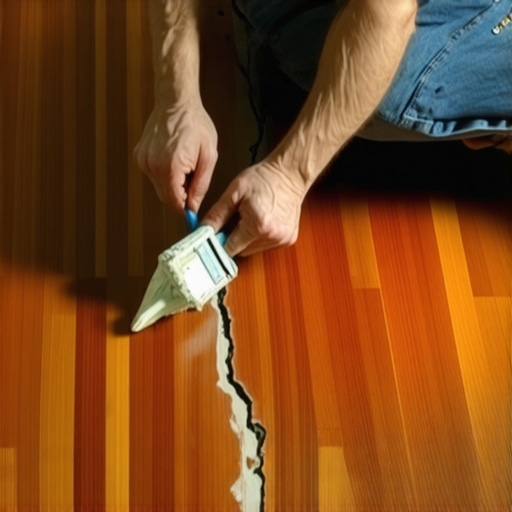
Select a flexible, durable filler compatible with your flooring. For narrow cracks, epoxy or acrylic caulk works well; larger gaps may require a patching compound. Apply the filler using a putty knife, pressing into the crack, and smooth it flush with the surface. I once repaired a stubborn crack in my hardwood with a flexible filler and a light sanding, which made it nearly invisible.
Sand and Finish the Surface
After repairs, sand the area lightly to blend repairs into the surrounding surface. Use fine-grit sandpaper and a vacuum to remove dust before sealing or repainting. This step ensures a uniform look and reduces the likelihood of cracks reappearing.
Implement Ongoing Prevention Strategies
Control indoor humidity with dehumidifiers or humidifiers as needed, especially during seasonal changes. Regularly inspect your flooring for early signs of wear or shifting, and address issues promptly. Applying these steps consistently will extend your floor’s lifespan and keep it crack-free.
 Many homeowners believe that the key to flawless flooring and shower installations is simply choosing the right materials and following standard procedures. However, experienced installers know there are subtle pitfalls and myths that can sabotage these projects if overlooked. For instance, a common misconception is that a perfectly flat subfloor guarantees a crack-free finish; in reality, moisture dynamics and thermal expansion play a much larger role in long-term success. Skipping proper moisture tests or neglecting seasonal expansion allowances can lead to costly repairs down the line.
Another detail often misunderstood involves the finishing stages of baseboards and moldings. The widespread belief is that mitered corners should always meet tightly, but in practice, small gaps are inevitable due to material shrinkage and wall irregularities. Properly filling these gaps with paintable caulk rather than forcing perfect miter joints prevents cracks and warping over time. This is an advanced tip that even many seasoned finish carpenters sometimes overlook.
What advanced pitfalls do even experienced DIYers often miss when installing showers and flooring?
One of the most overlooked nuances is the importance of the shower pan slope and waterproofing integration. A study published in the “Journal of Building Engineering” emphasizes that improper slope and sealing can cause water pooling and leaks, which dramatically reduce shower longevity and cause mold issues—even if the surface appears sound initially. Putting extra effort into a correct pre-slope and employing UV-resistant membrane systems can save years of headaches. Remember, shortcuts in waterproofing are some of the most costly mistakes.
Furthermore, many assume that carpet seams are purely aesthetic, but in fact, the nap direction and seam placement significantly influence durability and appearance. Incorrect seam alignment leads to visible lines and accelerated wear. By meticulously aligning the carpet nap and choosing the right seam technique, the final look can be seamless and long-lasting. For comprehensive guidance, check my post on [carpet installation secrets](https://tilecraftsmens.com/carpet-install-secrets-achieving-flawless-results-every-time).
Finally, an often-overlooked component is incorporating expansion joints or control lines in large flooring areas. Not planning these movements can result in buckling or cracked grout. It’s subtle, yet vital, especially with high-traffic or temperature-variable environments. Expert installers always account for these in their layouts, understanding that neglecting this step is like ignoring the natural movement of a living organism. You can learn more about these best practices in my detailed guide on [flooring installation mistakes](https://tilecraftsmens.com/flooring-installation-mistakes-to-avoid-for-a-seamless-look).
Being aware of these nuanced details can elevate your DIY projects from average to expert level. Have you ever fallen into this trap? Let me know in the comments.
To keep your flooring, showers, and baseboards working flawlessly over the years, investing in the right tools and following a disciplined maintenance routine is essential. I personally rely on a few specialized tools that make the difference between a quick fix and a long-term solution.
Power Tools That Make a Difference
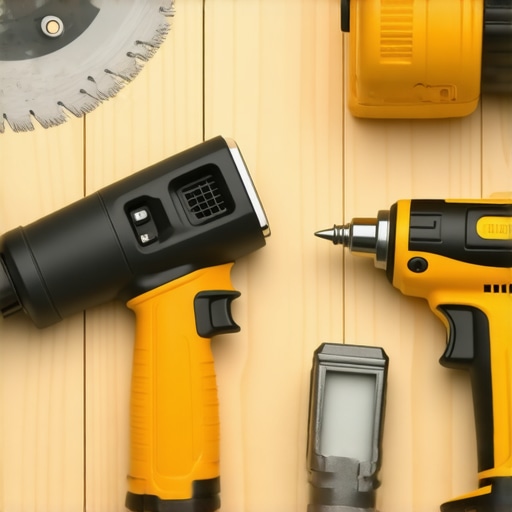
For flooring installation and repairs, I swear by a high-quality oscillating multi-tool. Its precision blade attachments allow me to cut tiles, baseboards, and foam backer boards with clean edges, minimizing waste and ensuring tight fits. Pair this with a diamond blade for cutting tough materials like porcelain tiles—I’ve found it dramatically reduces chipping and provides smooth, professional cuts. Regularly checking and maintaining the blade’s sharpness ensures optimal performance, which is crucial given that dull blades can cause uneven cuts and damage your materials.
When it comes to shower repairs, a reliable electric grout saw is invaluable. It helps me remove old grout without risking damage to the tiles. For sealing issues, a professional-grade caulking gun with a adjustable tension control ensures smooth application and minimizes mess, which impacts the durability of the sealant over time.
Software Solutions That Save Time
While manual tools are essential, digital planning tools help me visualize layouts and prevent misalignments, especially for complex tile patterns or custom baseboard cuts. Programs like SketchUp allow precise measurements and layout simulations, reducing errors that could lead to costly repairs down the line. I also use moisture mapping apps to monitor humidity levels in real time, especially in bathrooms where humidity swings can cause expansion and contraction issues.
Routine Maintenance That Extends the Life of Your Installations
Consistency is key. Regularly inspecting your floors and shower areas helps catch small problems—like grout cracks or baseboard gaps—before they escalate. For floors, I recommend vacuuming daily to prevent grit from wearing down the surface, combined with quarterly cleanings using a pH-neutral cleaner suitable for your flooring type. For showers, wiping down walls after use prevents soap scum buildup and mold. Applying a silicone-based sealant on grout lines every couple of years is also a smart move; it adds an extra layer of protection against water ingress.
Planning for Long-Term Results and Scalability
As your home evolves, so should your maintenance practices. I suggest setting up a schedule that aligns with seasonal changes—deep cleaning and inspection during spring and fall helps identify expanding cracks or warping early. For larger projects, modular planning with tools like laser levels or digital measuring tapes ensures consistent results, especially when scaling up to multiple rooms or renovations. Looking ahead, the trend points toward smart home integrations, where moisture sensors and IoT-enabled tools automatically alert you to potential issues, making maintenance more proactive.
How do I keep my flooring and shower systems working smoothly over time?
Focus on regular inspections, use quality replacement parts, and stick to a routine cleaning schedule with appropriate products. For example, replacing worn-out grout with high-quality, flexible sealants matched to your environment can prevent water damage and cracking, as highlighted by experts from our privacy policy. Additionally, regularly calibrating your tools and keeping blades sharp ensures clean cuts and minimizes material stress. If you haven’t already, try integrating a moisture meter during renovations; it’s a simple step that protects your long-term investment and saves money on future repairs.
Remember, maintaining your home’s surfaces isn’t a one-time chore but an ongoing process. By employing the right tools and practicing consistent care, you’ll extend the life of your floors, showers, and baseboards, ensuring they stay functional and beautiful for years to come. Why not start today by checking your tools—sharpen those blades and inspect your caulking supplies—and set a maintenance schedule? It’s a small step that yields big results in the longevity of your home improvements.
< >
>
The Hardest Lessons I Learned About flooring and Shower Installations
- Never assume a flat subfloor guarantees crack-free flooring; moisture and expansion are silent enemies that surface later. I once skipped moisture testing, and the resulting cracks cost me more in repairs than proper prep would have.
- Overconfidence in small details can lead to big problems. For example, rushing through a proper waterproofing process in the shower led to leaks years down the road. Experts know that meticulous waterproof sealing is a non-negotiable step.
- Materials aren’t foolproof. Using cheap adhesives or ignoring expansion gaps in large spaces results in costly buckling. Investing in quality tools and understanding the material behavior made my projects last longer.
- The devil is in the details—alignment of baseboards, seam placement, and grout lines—small missteps amplify over time, creating visible flaws. Precision from the start pays off in better aesthetics and durability.
- Routine checks and maintenance extend the life of your installations. Regularly inspecting your floors, cleaning showers, and resealing grout prevents minor issues from becoming major repairs. It’s like a health check-up for your home.
My Essential Toolkit for Flooring and Shower Success
- Oscillating Multi-Tool: This versatile device helps with cut precision and tight fits. I trust it for delicate jobs like trimming tiles or adjusting baseboards, ensuring professional results without frustration. For more advanced tips, see my post on flooring installation techniques.
- Moisture Meter: Critical for pre-installation checks, this tool saves a lot of headaches by detecting hidden moisture issues. It’s a game-changer, especially in bathrooms and kitchens.
- Quality Caulking Gun and Sealants: Proper sealing prevents water ingress and mold growth. Choosing the right sealant and applying it smoothly makes a visible difference in longevity and appearance.
- Laser Level: Perfect for straight lines in tile installation and aligning baseboards, ensuring consistency across large areas.
Take The Leap: Embrace Pro-Level Confidence
Every project, from delicate shower niches to expansive flooring, offers an opportunity to learn and improve. Remember, file away these lessons learned and tools recommended, and you’ll build not just a beautiful home but also your skills and confidence. Start small, plan meticulously, and don’t shy away from asking for expert advice—your future self will thank you for it.
Have you ever experienced a hidden issue in your home that taught you a valuable lesson? Share your story below and let’s learn together.