

I remember the moment vividly: I was sweeping my living room, and suddenly, I noticed a strange bump along the new laminate flooring. It was subtle at first, just a slight elevation, but it quickly became more noticeable as I walked across the room. That’s when I realized—my carefully installed floor was developing peaks along the seams. It was a lightbulb moment for me. I knew I wasn’t alone in this frustration, and I had to find out what was going wrong.
Recognizing the Problem: When Your Laminate Floors Start to Peake
Peaking at the seams isn’t just an eyesore; it can signal underlying issues with the installation or the environment. Many homeowners and DIYers face this problem, especially after some seasonal changes or quick fixes that overlook crucial steps. The key is understanding why these peaks form and how to prevent them from worsening or recurring.
Is Peaking Really That Common—or Just a Cosmetic Nuisance?
Surprisingly, peaking is a common complaint among laminate flooring users. According to flooring experts, improper acclimation, subfloor issues, or using the wrong installation techniques can all contribute to these unwanted ridges. Early in my own process, I made the mistake of ignoring the importance of acclimating the planks to my home’s humidity levels, which only worsened the problem. This is exactly why I want to share my experience: to help you avoid similar pitfalls and ensure your floor remains smooth and level.
So, what’s the takeaway? Peaking isn’t necessarily a sign that your flooring is doomed—it often points to installation errors or environmental factors that can be corrected with the right knowledge. Today, I’ll walk you through the common causes, prevention tips, and effective repair strategies. Whether you’re planning a new installation or fixing an existing one, understanding these details will help you achieve a flawless finish and extend the life of your flooring.
If you’re facing this issue now and feeling unsure, don’t worry. There are tried-and-true methods to address and even prevent peaking. Ready to get your floors looking as good as new? Let’s dive into the practical steps to fix and prevent those annoying seams from peaking again.
Secure the Subfloor First
Start by ensuring your subfloor is stable and level. Use a long spirit level or a laser level to identify high and low spots. If you notice unevenness, address it with a self-leveling compound, applying it carefully with a trowel. I once encountered a bent section over a worn subfloor and fixed it by pouring leveling cement, which smoothed out the peaks and created a solid base. Remember, a stable foundation is the key to avoiding future peaking issues. For more in-depth info, check out our guides on durable flooring installation.
When it comes to home improvement, many assume they know the basics. However, *true expertise* involves understanding nuanced mistakes many overlook. For example, in shower renovations, a common misconception is that sealing the edges with silicone guarantees a waterproof barrier. In reality, the key is proper prep work—considering the slope, waterproofing membrane quality, and drain placement—which often gets underestimated. Experts stress that neglecting these details can lead to leaks and costly repairs, as highlighted by industry veterans in [shower renovation](https://tilecraftsmens.com/upgrade-your-bathroom-the-ultimate-shower-renovation-guide).
Why do so many installers overlook the importance of proper subfloor preparation?
This is a subtle yet critical point. Many think that leveling compounds or quick fixes can compensate for uneven subfloors, but this can cause future issues like squeaks, cracks, or seam peaking. The advanced secret is detecting micro-unevenness before installation and addressing it with precise pre-slope techniques or decoupling membranes—steps well detailed in our guide to [durable flooring installation](https://tilecraftsmens.com/your-guide-to-durable-flooring-installation-for-a-stylish-home). A trap to avoid here is assuming high-quality materials alone can fix structural flaws; the foundation must be solid first. Moreover, with carpet installation, many buy into the myth that thicker padding always equals better comfort. While padding influences feel, too plush or improper padding can cause seam separation or uneven wear. Using the right padding for traffic levels and incorporating proper stretching techniques prevents ripples and bubbles—crucial details covered in [carpet install secrets](https://tilecraftsmens.com/carpet-install-secrets-achieving-flawless-results-every-time).
Advanced professionals also recognize that baseboards aren’t just decorative — they serve as a finishing touch that enhances the room’s aesthetic and hides potential imperfections. A common mistake is installing baseboards too tightly, which can prevent expansion and cause warping or splitting. The correct approach involves leaving an expansion gap and using flexible caulk or joint compound to account for seasonal movement. For stylish updates, see [baseboard styles](https://tilecraftsmens.com/baseboard-styles-that-elevate-your-interior-design).
How do improper installation techniques lead to long-term failures in flooring projects?
One crucial nuance is seasonal humidity change. Many think installing flooring is a simple ‘set and forget’ task; however, materials like wood and laminate are sensitive to moisture fluctuations. Failure to acclimate materials and use appropriate expansion gaps triggers buckling, gaps, or peaking over time. The advanced tip is adjusting installation strategies to local climate conditions, which is elaborately discussed in [your flooring installation guide](https://tilecraftsmens.com/your-guide-to-durable-flooring-installation-for-a-stylish-home). Remember, even premium flooring can fail if environmental factors are ignored—it’s a trap many fall into by rushing the process or skipping acclimation. To sum up, becoming an expert means embracing these nuances—anticipating problems before they become visible and choosing the right techniques and materials accordingly. Have you ever fallen into this trap? Let me know in the comments.
Keeping It Working: Tools I Recommend for Durability
Maintaining your flooring, shower, or baseboards over time demands the right tools. One item I swear by is a high-quality, calibrated moisture meter. It ensures your subfloor humidity remains within optimal levels, preventing future issues like peaking or warping. I personally use the Tramex Moisture Meters because of their accuracy and durability, especially when verifying concrete or wood moisture levels before installation, aligning with recommendations in our comprehensive guide to flooring installation. A laser level is another invaluable tool, providing precise alignment for tiles, baseboards, or shower niches. My preferred model is the DEWALT DW089LG, thanks to its long-range capabilities and clear cross-line projection, which makes intricate alignments faster and more accurate. Remember, the longevity of your renovation depends heavily on meticulous alignment and measurement. For longer-term results, investing in these tools upfront saves time and prevents costly rework.
Another essential piece of equipment is a quality oscillating multi-tool with a variety of blades. It simplifies tasks like removing old grout, trimming sealant, or making precise cuts in tight corners. Personally, I recommend the Fein MultiMaster for its reliability and the range of accessories available, as detailed in our installation tips. Regular maintenance involves cleaning tools after each project, lubricating blades, and inspecting for wear. This practice extends their lifespan and maintains their precision, ensuring your work always meets professional standards. In the future, I predict a rise in smart tools equipped with connectivity features that track usage and alert you for maintenance—making ongoing care even easier.
How do I maintain my flooring and fixtures over time?
Keeping your home features in top shape requires routine inspections and timely upkeep. For flooring, periodic deep cleaning with pH-neutral cleansers preserves the finish. Inspect seams on laminate floors or grout lines in tiles to catch early signs of separation. For shower installations, regularly check caulk and sealant—applying fresh silicone when needed to prevent leaks. Baseboards and trim should be examined for gaps or warping, especially after seasonal shifts, and adjusted accordingly. Using flexible caulks or bio-based sealants can accommodate expansion and contraction, reducing the risk of splitting or warping.
Lastly, establishing a maintenance schedule—say, every six months—ensures minor issues don’t escalate into costly repairs. Combining proper tools with a proactive approach can extend the lifespan of your improvements significantly. For example, a simple yet overlooked step is using a silicone-first rule for shower joints, which minimizes leaks and mold formation over time. By consistently applying these strategies, you turn a quick renovation into a lasting, worry-free upgrade.
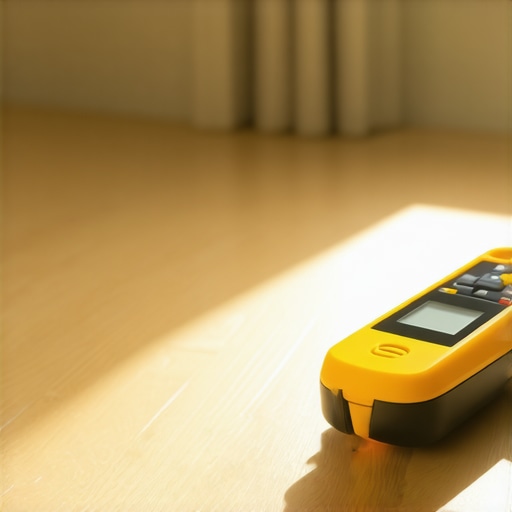
Advanced homeowners are now exploring automated moisture monitoring systems that sync with smart home apps, providing real-time alerts for environmental changes. Incorporating such technology can be a game-changer in maintaining flawless flooring and fixtures, especially in areas prone to humidity fluctuations. Consider trying out one of these innovative solutions to stay ahead of potential issues and preserve your home’s beauty for years to come. To learn more about ensuring your flooring remains in prime condition, visit our comprehensive guide on durable flooring installation.
Lessons That Cut Through the Noise
- My biggest breakthrough came when I finally understood that my subfloor’s micro-unevenness was quietly causing my peaking issues. Ignoring tiny irregularities and relying solely on surface fixes only delayed the inevitable. Now, I always check with a moisture meter and precise levels before starting any installation, which saves headaches down the line.
- Another lesson was realizing that seasonal humidity swings can make or break your flooring success. I used to install without considering my climate, leading to gaps and buckles later. Acclimating materials and accounting for expansion always makes my work more durable and looks better in the long term.
- Overconfidence in selecting high-end materials without proper preparatory steps is a mistake I won’t repeat. The best floors and showers come from a solid foundation and attention to detail during installation, not just the quality of products used. Education about installation techniques is invaluable—and that’s why I keep learning from trusted resources.
Tools and Resources That Make the Difference
- My go-to moisture meter, like the Tramex, is essential for ensuring precise moisture levels and preventing future issues. It’s a small investment that guarantees your work’s longevity, especially in variable climates.
- The DEWALT DW089LG laser level is my preferred tool for perfectly aligned tiles and baseboards. Accurate measurements minimize corrections and help achieve a seamless look that lasts.
- An oscillating multi-tool, such as the Fein MultiMaster, is invaluable for delicate tasks like grout removal or trimming sealant. Its versatility speeds up the project and leads to professional results.
- For a comprehensive approach, I recommend exploring our detailed guide on durable flooring installation. It’s packed with expert tips that I personally use in every project, saving time and ensuring quality.
Transform Your Space, and More Than Just Your Floors
Implementing these insights and tools isn’t just about fixing peaking seams or uneven surfaces—it’s about elevating your entire home environment. Every project is an opportunity to learn, improve, and craft spaces that bring you joy. Don’t wait for problems to set in; start applying these principles today and see how much difference proper preparation and knowledge can make. Ready to refresh your home’s floors and showers with confidence? Your journey to a flawless finish starts now.