

I’ve been there—standing in my living room, eyes fixed on that annoying wave running across my brand-new carpet. No matter how much I tried to smooth it out, it just wouldn’t lie flat. It felt like the floor had betrayed me, and I wondered if I’d made a terrible mistake during installation. That lightbulb moment? Realizing that the problem wasn’t me or the carpet, but how it was stretched—if at all.
The Hidden Culprit Behind Carpet Bubbles
When you lay down new carpet, it might look perfect at first. But within weeks, those unsightly bubbles or ripples can appear, making your space look sloppy instead of cozy. The culprit is often insufficient stretching during installation. Here’s the truth: Without proper tension, carpets tend to loosen over time, especially in high-traffic areas or rooms with seasonal humidity swings. This isn’t just a cosmetic issue—loose carpet can also be a trip hazard and a breeding ground for dirt and pests.
My early mistake was assuming that a good-quality carpet would stay flat on its own. I didn’t realize that extensive power-stretching, the technique seasoned installers swear by, can prevent most of these problems. In fact, professional installers use a method called power-stretching to ensure that the carpet is taut and firmly anchored, reducing the chances of bubbles forming months later. Want to see how this simple step can save you headaches down the line? You’re in the right place.
Is Carpet Power-Stretching Really Worth the Hype?
Initially, I doubted whether a technique so seemingly straightforward could make such a difference. I remember a tech guy telling me that not stretching the carpet properly is a leading cause of bubbling—yet I still hesitated. The good news? With the right tools and a bit of know-how, power-stretching isn’t just for pros anymore. It’s a game-changer that turns a DIY nightmare into a DIY win.
So, if you’re tired of those unsightly bumps and want to keep your new carpet looking sleek for years, the key is in the stretch. Curious how to do it yourself or when to call in the experts? Keep reading. Next, we’ll dig into the step-by-step process that guarantees a flawless, wrinkle-free carpet, saving you from future hassle and expense.
Before we jump in, have you already faced this issue? Drop a comment or visit our contact page.
Prepare Your Workspace and Gather Tools
Start by clearing the room entirely, removing furniture, and ensuring the subfloor is clean and dry. Gather essential tools like a power stretcher, knee kicker, knee pads, a utility knife, chalk line, and a rubber mallet. Wearing gloves can help prevent blisters during stretching.
Lay the Carpet and Mark the Excess
Unroll the new carpet in the room, leaving a few inches around the edges for trimming. Use a chalk line to mark the desired measurements, ensuring the carpet is aligned properly with the room’s layout. Cut off any excess without losing control of the edge.
Secure the Carpet and Set Up for Stretching
Use carpet tacks or staples along the edges to temporarily hold the carpet in place. Focus on anchoring the carpet at the edges first, especially at the walls and transitions. This step prevents shifting during the stretching process.
Begin Power-Stretching with Precision
Attach the Power Stretch Tool
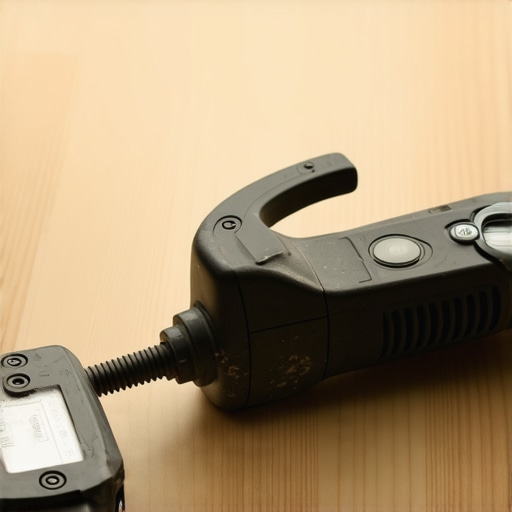
Position the power stretcher against the wall or a fixed point. Engage the release mechanism and extend the pole, making sure the head is aligned with the center of the room. This tool applies uniform tension, critical for a smooth finish.
Move Systematically Across the Room
Start from a corner opposite the doorway. Use the power stretcher to pull the carpet tight towards the wall, working in straight lines across the room. Avoid overstretching, which can cause ripples at the seams or near transitions.
Use the Knee Kicker for Tight Spots
In areas where the power stretcher can’t reach or for final adjustments, employ a knee kicker. Position the cushioned end against the carpet and tap gently to tighten. This helps eliminate small wrinkles and smooths the surface.
Trim and Secure Excess Carpet
Once the carpet is taut and wrinkle-free, trim the excess along walls and doorways with a sharp utility knife. Fold back the edge slightly and secure with tack strips or staples to prevent future movement. Ensure seams are aligned properly, and use a seaming iron if necessary for butt joints.
Final Inspection and Cleanup
Walk the room to identify any remaining wrinkles or loose areas. Reapply the power stretcher or knee kicker as needed. Vacuum thoroughly to remove debris and settle the fibers, finalizing your flawless installation.
My first attempt involved a rush job without using the power stretcher, resulting in stubborn bubbles I couldn’t fix easily. After properly applying the technique, the wrinkles vanished, and the carpet looked professionally installed. Remember, patience and proper tools are key to avoiding future headaches.
For a comprehensive understanding of the best carpet options for your space, visit this guide.
Many homeowners and DIY enthusiasts believe that installing baseboards, flooring, or upgrading a shower is straightforward—if you follow the basic steps, everything will turn out fine. However, this common misconception overlooks the intricate details that can make or break the longevity and aesthetic appeal of these elements. Let’s dig deeper into some nuanced mistakes that often trip people up and the subtle considerations that elevate a good installation to a professional finish.
Why It’s Not Just About Measuring Correctly
Everyone emphasizes accurate measurements, but the real nuance lies in anticipating how materials respond to environmental changes. For example, hardwood floors expand and contract with humidity fluctuations, leading many to ignore proper expansion gaps. Missing these can cause buckling or gaps over time, despite an initially perfect install. Experts recommend using moisture meters and understanding regional climate patterns, like in this guide, to plan effectively for these subtle shifts.
Similarly, with showers, many skip the importance of the waterproofing layer beneath the tiles. It’s not just about sealing joints well; the entire cavity must be prepared with proper membranes and slopes, or you risk leaks and mold lurking behind the walls. Overlooking this nuance can lead to costly repairs long after the project looks finished.
Common Myths That Can Sabotage Your Projects
One pervasive myth is that baseboards only serve decorative purposes. In reality, they conceal imperfections, cover expansion gaps, and protect walls from kicks and scuffs. Installing them without considering how they’ll transition around uneven surfaces or flooring transitions can result in visible gaps or misalignments. Check out this article for design trends that won’t compromise functionality.
Another myth revolves around the idea that higher-cost materials automatically guarantee durability. While quality matters, improper installation can negate these advantages. For instance, using nails instead of adhesive or not securing a shower curb correctly will cause issues regardless of material strength. The true secret lies in understanding how materials behave under load and environmental stress—details often ignored by amateurs.
Mastering Advanced Mistakes: The Role of Subtle Detailing
Advanced installers know that tiny details, like the angle of cuts and the way seams are sealed, greatly influence the final outcome. For example, improper miter cuts on baseboards can leave gaps that are hard to conceal, while overlooked expansion joints may lead to cracking. A small detail like sealing seams with the right caulk type—like silicone instead of latex—can prevent water ingress and subsequent damage. These nuances are backed by studies from industry experts emphasizing precision, such as in this research.
Remember, achieving a professional look isn’t just about following steps but understanding the underlying principles that control material behavior and longevity. Mistakes at this level often go unnoticed until failure occurs, which is why learning these nuances pays off in the long run.
Have you ever fallen into this trap? Let me know in the comments. For more insights on elevating your home projects, explore the latest baseboard trends or check out tips for flawless flooring installation.
Keep It Working: Essential Tools and Maintenance Strategies
To ensure your home improvements stand the test of time, having the right tools and maintenance routine is key. As someone who’s spent years refining installation techniques, I can vouch for specific equipment that makes all the difference. For flooring, I rely on a high-quality pneumatic flooring nailer—specifically the Bostitch RN46-1. Its reliability and consistent power mean I can secure planks properly, reducing movement over the years. For carpet, I prefer a power stretcher like the Roberts 10-018—it ensures a taut surface that resists bubbles and wrinkles, especially when combined with a quality knee kicker for tight spots.
Maintaining these tools is straightforward—clean the air fittings after each use, replace worn pads, and store them in a dry place to prevent rust. These practices preserve tool performance and save money over time. For shower installations, I recommend a good-quality tile wet saw with a diamond blade—my go-to is the Dewalt D24000—because precision cuts are vital for waterproofing and aesthetics. Regularly checking the blade’s sharpness and replacing it when dull prevents chipping and ensures clean edges, which are crucial for preventing leaks.
Looking ahead, the trend is shifting towards smarter, more connected tools. Imagine laser-guided trowels or digital moisture meters that sync with your smartphone, providing real-time data and avoiding costly mistakes. Investing in these advances now can future-proof your projects.
How do I maintain my installation equipment over time?
Effective maintenance involves cleaning your tools after each job—removing dust, debris, and material buildup. For pneumatic tools, drain the moisture from compressors regularly to prevent corrosion. Lubricate moving parts as recommended by manufacturers; for example, using lightweight machine oil on pneumatic fittings keeps air flowing smoothly. Store tools in climate-controlled areas to prevent rust and degradation. Remember, well-maintained tools operate more efficiently and last much longer, saving you both time and money on repairs or replacements.
For DIY enthusiasts aiming for professional results, I highly recommend trying the method of checking your tools before each project with a quick calibration. A simple test with a moisture meter before laying tiles or installing flooring can reveal hidden issues caused by humidity variations—details that, if missed, can cause long-term problems like buckling or mold. For expert-level recommendations and detailed procedures, visit this guide.
By investing in quality tools and developing a disciplined maintenance routine, you not only improve longevity but also elevate your craftsmanship. Preview the upcoming trends in flooring installation to stay ahead, and don’t hesitate to implement advanced techniques today—your future self will thank you.
Throughout my journey in home improvement, I’ve realized that it’s the little details and lessons learned along the way that truly define the quality of a project. The biggest breakthrough came when I understood that proper technique, patient prep, and an eye for subtle nuances can turn a standard installation into a masterpiece. Learning from mistakes and embracing continuous learning transformed my approach—and it can do the same for you.
What the Pros Won’t Tell You About Flawless Finishes
- Never underestimate the power of precise measurements—quite often, setbacks happen right here. But more importantly, anticipate material responses to environmental changes, like humidity shifts affecting hardwoods and carpets. Tools like moisture meters become your best friends in predicting issues before they arise.
- Small details, like an angled cut or sealing seams with the right caulk, can make your work look professionally done rather than just functional. These are the things that separate a good result from a stunning transformation, especially when installing baseboards on uneven surfaces or sealing shower niches to prevent leaks.
Tools and Resources That Elevate My Work
- Moisture meter: Critical for assessing moisture levels in subfloors and materials before installation, helping prevent warping, buckling, or mold issues.
- High-quality pneumatic nailer: Reliable tools like the Bostitch RN46-1 allow for consistent, firm fastening, reducing future maintenance or repairs.
- Seam sealing products: Using the appropriate silicone caulk instead of latex ensures longevity in areas exposed to water, such as shower seams or kitchen backsplashes.
- Educational guides and industry blogs: Regularly following trusted sources and tutorials keeps me updated on emerging techniques and standards—see how our detailed tips on flooring or shower installations can make all the difference.
What’s Next for Your Home Transformation Journey
Remember, every home project is an opportunity to learn and perfect your craft. Don’t shy away from trying advanced techniques or exploring new materials—your efforts will pay off with stunning results that last. Envision the satisfaction of a perfectly installed carpet or a flawless bathroom shower that not only looks great but functions seamlessly for years to come.
Now, I’d love to hear from you. Have you ever faced a tricky baseboard corner or struggled with a stubborn carpet seam? Share your experiences or ask questions below—your next success story begins now!