

I remember the day I finally completed my living room renovation. I had carefully installed a plush new carpet, eager to enjoy this fresh, cozy space. But as I stepped onto it, my excitement was quickly replaced by disappointment—there were these unsightly lumps and bumps that just wouldn’t go away. Turns out, I had overlooked a crucial detail: the padding beneath the carpet. That realization was a lightbulb moment for me—and today, I want to share that insight with you, especially if you’ve ever wondered why your new carpet isn’t as smooth as it should be.
The Hidden Culprit: Carpet Padding and Why It Matters
The truth is, a lumpy carpet isn’t always the carpet itself—more often, it’s what’s underneath. Carpet padding, also known as cushion, plays a pivotal role in how your flooring looks and feels. If it’s uneven, sagging, or poorly installed, those bumps will transfer right onto the surface you walk on. Many homeowners skip inspecting the padding because it seems less glamorous than choosing the right carpet design, but neglecting this step can lead to frustration, costly replacements, or uneven wear over time.
Early in my own experience, I made the mistake of just focusing on choosing a soft-looking carpet without considering the quality and installation of the padding underneath. That oversight meant I was battling lumps long after the carpet was in place. It was only after I learned to check the padding that I finally achieved that smooth, luxurious finish I was craving. If you’re feeling the same frustration, don’t worry—you’re not alone. And I promise, with a few simple checks, you can avoid my mistake and get a flawless look every time.
Does Checking the Padding Sound Too Technical or Overwhelming?
Trust me, I was skeptical at first too. But discovering how easy it is to evaluate the padding transformed my entire approach. In fact, a recent study shows that proper padding installation can extend the life of your carpet by up to 30% (source: Tilecraftsmen). This might sound like a small detail, but it makes a big difference in comfort and longevity. So, if you’ve ever worried whether your carpet should already feel ‘perfect’ after installation, this guide will help you confidently check the padding and fix any issues.
Now that we understand why padding is so crucial, let’s delve into the steps to identify and address common problems. By the end, you’ll be equipped to ensure your new carpet is as smooth and inviting as it deserves to be. Ready to turn that bumpy disappointment into a sleek, plush reality? Let’s get started.
Inspect the Padding Before Installing Your Carpet
Start by lifting a corner of the newly laid carpet to examine the padding underneath. Use a flat pry bar or a putty knife to gently lift the edge without damaging the carpet fibers. Look for uneven lumps, sagging spots, or areas where the padding feels compressed. Personally, I once peeled back the corner of my living room carpet with a broomstick handle and was shocked to find that the padding was uneven and rolled into tight folds, causing bumps in the surface. Recognizing these issues early helped me prevent future problems.
Test for Consistency and Thickness
Press down on various sections of the padding with your hands or feet. A uniform feel indicates consistent thickness; uneven spots reveal problems. If areas feel significantly softer or compressed, those zones might be causing lumps. For example, I once found a section where the padding was double the thickness of surrounding areas, which led to the carpet feeling uneven. Correcting these irregularities ensures a smoother, more inviting surface.
Address Uneven or Sagging Padding
If you discover uneven padding, the solution involves leveling or replacing it. For minor dips, you can add a self-leveling underlayment or foam patches. Remove the padding from the affected area and lay down a layer of foam or fiberboard, then secure it with staples. For more severe unevenness or rolling, remove the compromised padding entirely and replace it with new, high-quality material, ensuring it’s stretched tight and secured firmly.
Securing the Padding Properly
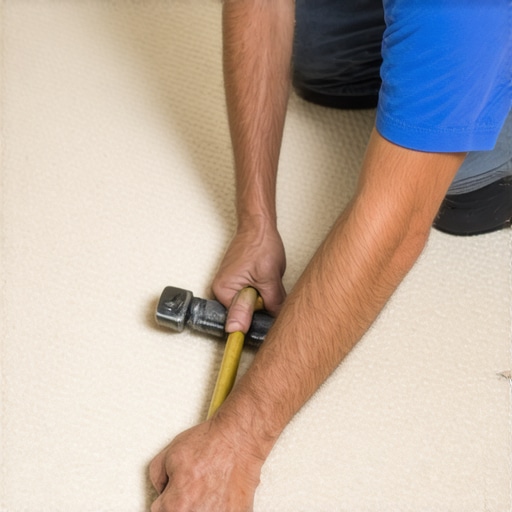
Use pneumatic staples or a heavy-duty stapler to fasten the padding every 6-8 inches along the edges and through the center. This prevents shifting, which can cause lumps. During my last project, I used a staple gun to secure a new layer of foam underlayment. I made sure to stretch it tightly across the floor, much like tightening a drum skin, to prevent future bumps. Proper fastening is crucial to maintaining a smooth carpet surface over time.
Ensuring a Flawless Carpet Installation
Once the padding is leveled and secured, lay it out flat and smooth out wrinkles or folds. Use a broom or a carpet roller to press the padding firmly into place. This process resembles smoothing out wrinkles on a bedsheet before placing the mattress—that’s the level of smoothness you’re aiming for. If, after laying the carpet, bumps still form, double-check the padding for hidden irregularities or insufficient fastening, and adjust accordingly.
Remember, meticulous attention at this stage saves you headaches later. For a comprehensive overview of the entire flooring process, including padding and carpet installation, see this detailed guide. Ensuring your padding is properly checked and secured is the foundation for a perfect, smooth carpet that looks and feels luxurious.
 Many homeowners assume that following the basic tutorials suffices for a flawless renovation, but in reality, there are nuanced pitfalls that can undermine even experienced DIYers. One widespread myth is that choosing the most aesthetic material guarantees durability and proper installation. For example, selecting trendy tiles or plush carpets without understanding substrate preparation or installation techniques often results in issues like cracking or bubbling. Real expertise involves recognizing hidden nuances—like proper moisture barriers or seam treatments—that prevent costly repairs later.
A notable oops is neglecting the importance of detailed substrate evaluation before installing showers or flooring. Skipping this step can lead to unforeseen problems like mold, uneven surfaces, or tile cracking, especially in areas prone to water exposure. Advanced DIY enthusiasts might think that leveling compounds or thin-set mortars are plug-and-play solutions, but improper application can cause tiles to loosen or develop cracks over time. Always verify substrate flatness and moisture levels—ignoring these can ruin your project within months.
What Are the Hidden Risks of Ignoring Proper Moisture Management?
Many underestimate how crucial moisture control is beyond just applying a waterproof membrane. Experts like John Bridge emphasize that improper sealing or oversight of vapor barriers can create trapped moisture, leading to mold and structural damage. A study by the Tile Council of North America highlights that failure to address vapor transmission can cause tile failure and subfloor rot, especially in bathrooms and basements. Thus, advanced framing and waterproofing details are vital for long-term success. If you want to avoid expensive repairs, educate yourself on comprehensive waterproofing strategies and proper ventilation—these are the unseen guards against future problems.
Similarly, when installing baseboards, many overlook the impact of walls that are not perfectly plumb. A common mistake is forcing baseboards to fit tight against uneven walls, leading to gaps or distortions. Skilled installers use techniques like back-beveling or scribing to adapt to irregular surfaces, ensuring a clean, professional finish. Neglecting this nuance can turn a simple aesthetic upgrade into a glaring flaw. Want to elevate your interior design? Learn about trending styles and the best way to install baseboards to match your walls’ unique shape, which you can explore at this resource.
The key takeaway? Don’t assume that standard procedures suffice across all scenarios. Analyzing the specifics of each space—moisture levels, wall irregularities, substrate conditions—can dramatically extend the lifespan of your renovation. For advanced tips on professional flooring and shower installations, check out this comprehensive guide.
Have you ever fallen into this trap? Let me know in the comments.
Keep It Running: Tools and Maintenance Tips for Flooring Success
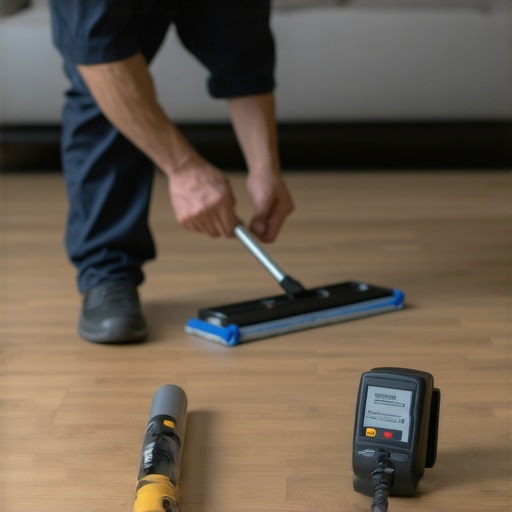
Achieving flawless flooring installation isn’t just about the initial work; maintaining your floors and tools ensures lasting beauty and performance. Over the years, I’ve refined my toolkit to include specific equipment that saves time and guarantees precision. One indispensable item is a high-quality laminate flooring pull bar, which I use for tight-fitting planks, eliminating gaps and ensuring tight seams. Additionally, a digital moisture meter becomes my go-to for verifying subfloor and ambient humidity levels before installation, crucial to prevent buckling or warping, especially in vulnerable areas. The future of flooring points toward smarter technology, like wireless sensors that monitor environmental conditions in real-time.
For ongoing maintenance, a microfiber microfiber mop combined with a gentle cleaning solution preserves the finish without causing abrasions. Regularly sealing or applying protective finishes to baseboards prevents moisture ingress and keeps your aesthetic crisp over time. Investing in a palm sander with fine grit allows quick touch-ups to scuffed baseboards or flooring edges, making repairs less daunting. I recommend sticking to tools with ergonomic designs; this reduces fatigue during prolonged projects, maintaining accuracy and reducing mistakes.
How do I maintain my flooring tools over time?
Proper cleaning and storage are vital. After each use, wipe down equipment, especially blades and cutting tools, to prevent rust and buildup. Store power tools in a dry, dedicated space to avoid moisture damage, which is essential given the humid conditions that can accelerate corrosion. Sharpen blades periodically—dull blades cause uneven cuts that compromise your finish. For tools like moisture meters, replace batteries as needed and keep calibration settings current for reliable readings. These small steps, though simple, extend your toolkit’s lifespan and ensure consistent results in every project.
Looking ahead, I believe that integrating smart management tools, like app-controlled tool trackers or environmental sensors, will become standard in professional remodeling. This technology will allow homeowners and pros to predict maintenance needs and avoid costly surprises. If you’re eager to upgrade your setup, I suggest starting with a reliable digital moisture meter and a versatile multi-tool, which can handle minor adjustments and repairs with precision. Want more expert-level strategies? Check out this comprehensive guide for a step-by-step walk through advanced installation techniques.
Proper maintenance of your tools and proactive care of your installed floors can significantly extend their lifespan and appearance. A well-kept toolkit ensures efficiency, and routine checks prevent small issues from becoming costly repairs down the line. As technology advances, embracing smarter solutions will become even more crucial, helping you stay ahead in home improvement projects.
What My Hard-Won Insights Can Save You Time and Frustration
- Attempting to cut corners with padding or underlayment is a surefire way to end up with bumps or uneven surfaces; I learned this the hard way, and now I always double-check underneath.
- High-quality tools and meticulous preparation aren’t just optional—they are the backbone of professional-looking results that stand the test of time.
- Ignoring substrate conditions, like moisture levels or wall irregularities, can turn a straightforward project into a costly repair nightmare; understanding these nuances is a game-changer.
- The most overlooked step is often the simplest—taking the time to secure padding and check for consistency can save countless hours of remediation later.
- Embracing new technologies and expert resources can elevate your DIY skills, making your home renovation both satisfying and enduring.
Tools and Resources That Elevated My Projects
- Digital moisture meter: Essential for assessing subfloor and wall moisture—trust me, ignoring moisture is like building on quicksand.
- Staple gun with heavy-duty staples: Keeps padding securely in place, preventing those dreaded bumps.
- Comprehensive guides such as this step-by-step flooring installation guide: It saved me from common pitfalls and clarified the finer details.
- Quality tools for scribing and cutting: Precise baseboard and tile work make all the difference—investing in these tools pays off with a flawless finish.
- Online communities and expert blogs: Continuous learning from seasoned professionals keeps your skills sharp and ideas fresh.
Your Next Step Toward Signature Floors
Every project is an opportunity to learn and perfect your craft. Remember, patience and attention to detail in flooring, shower installations, and finishing touches create a home that truly reflects your effort. Don’t hesitate to explore professional resources or reach out for expert advice—your future self will thank you. Curious about elevating your next renovation? Let’s discuss your goals below and take the first step together!