

It was a cold Saturday morning when I finally finished installing my new hardwood floors, only to be greeted the next day by an irritating squeak near the wall. That unmistakable, creaking sound made me realize I had overlooked something crucial. I had laid down the planks perfectly, following all the tips from the pros, but that squeak? It was driving me crazy! If you’re reading this and nodding along, you’re not alone. Many homeowners face this sneaky issue right after installing new floors, and it can really dampen the satisfaction of a job well done.
Getting to the Root of the Squeak Near Your Walls
A common problem I encountered early on was neglecting to account for how hardwood expands and contracts with temperature and humidity changes. Often, the noise isn’t just about the flooring itself but how it interacts with the surrounding structures, especially walls. When your floor isn’t allowed to breathe, the boards rub against each other or against wall base moldings, creating that telltale squeak. Interestingly, studies show that temperature fluctuations can cause hardwood to expand or contract by up to 0.15% (source: Wood Science & Engineering Lab), which, over large areas, adds up to significant movement.
Now, if you’ve encountered this issue, you might be worried about whether it’s caused by a installation flaw or a temporary glitch. The good news is, this squeaking can often be fixed without ripping up the entire floor or major renovation. But understanding why it happens is the first step toward a lasting solution.
Have you faced squeaky floors right after installation and wondered whether you did something wrong? Trust me, I’ve been there. Early on, I made the mistake of assuming the squeak was inevitable and didn’t explore proper fixes. That mistake nearly cost me more time and money in the long run.
In this guide, I’ll walk you through the practical steps I used to silence my squeak near the wall once and for all. From inspecting the issue to applying simple, effective fixes, I’ve learned what works—and what doesn’t. Ready to end that irritating noise? Let’s dive into the details and get your floor whisper-quiet again.
Inspect the Source of the Noise
Start by locating exactly where the squeak originates. Gently walk over the area near the wall, pressing down on different spots while listening for the precise location of the creak. I once used a helper to mark the squeaky spots with chalk—this kept my focus clear and prevented unnecessary panic. Once identified, look for gaps or movement between the floorboards and the wall base moldings. These voids are often the culprits.
Tighten Loose Floorboards
If you find loose boards near the wall, secure them with finishing nails or screws. For example, I used a hammer and finishing nails, carefully driving them at an angle into the joist beneath, then countersinking them with a nail set. Be cautious to avoid damaging the wood surface. Countersink the nails and fill the holes with wood filler for a seamless look. Ensuring the boards are secured eliminates much of the movement responsible for squeaks.
Apply Lubricant or Sealant to Reduce Friction
Sometimes, the squeak results from friction between boards or between a board and the wall molding. Applying a silicone-based lubricant into the seams can provide immediate relief. I used a syringe to inject the lubricant into the gaps, then wiped away excess. This method is especially useful if nailing isn’t feasible. Remember, avoid over-saturating, as excess can cause ongoing issues.
Secure the Floor to the Wall Molding
To prevent future movement causing squeaks, attach shim wedges or adhesive under the base molding. Carefully tap small shims behind the molding where needed, then reattach any loose trim with finishing nails. For a cleaner finish, I used painter’s caulk around the moldings after nailing. This step stabilizes the edge, making it harder for the floor to shift when humidity changes.
Check for Humidity and Temperature Effects
Hardwood expands in humid conditions and contracts in dry cold, which can induce squeaks. Use a hygrometer to monitor indoor humidity; ideally, keep it between 35-50%. During winter, consider running a humidifier. I installed a small portable humidifier in the room, which helped minimize board movement and eliminated squeaks over time.
Preventive Measures for the Future
When installing new floors, ensure proper acclimation of the wood in your environment, and leave appropriate expansion gaps near walls. Using a high-quality underlayment can also buffer temperature fluctuations. For comprehensive guidance, check out the detailed tips on flooring installation trends—proper preparation saves headaches down the line.
Remember, patience pays off
Sometimes, multiple applications or adjustments are necessary. In my case, after these steps, I repeated the process over a few days, and the squeak finally disappeared. Keep in mind that persistent issues may require professional help or considering more extensive reinforcement options, such as adding bridging or reinforcing subfloors. For now, carefully executing these steps should give you a significantly quieter floor.
**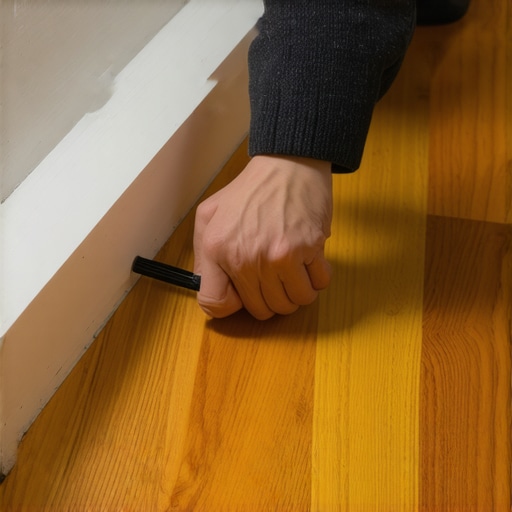 **Many homeowners and DIY enthusiasts believe that flooring, carpet installation, showers, and baseboards are straightforward tasks, often assuming that sticking to the basic steps guarantees a perfect result. However, this oversimplification can lead to costly mistakes and subpar finishes. Let’s explore some nuanced pitfalls and myths that many get wrong, so you can elevate your project with confidence.
Are All Flooring Materials Created Equal for Easy Installation?
Contrary to popular belief, not all flooring types are suited for DIY installation or forgiving of common mistakes. For example, laminate flooring is often marketed as DIY-friendly, but without proper acclimation and expansion gaps, it can develop gaps and buckles over time. Similarly, while hardwood adds value and aesthetic appeal, improper subfloor preparation or failing to account for humidity changes can cause squeaks or gaps later. Rushing through the planning or ignoring manufacturer guidelines often leads to uneven surfaces and long-term issues. To truly get the best results, delve into expert-level tips on comprehensive flooring installation plans, ensuring every nuance is covered.
The Carpet Install Trick You’re Missing
Many assume that stretching during carpet installation is a simple step, but overlooking tensioning techniques can cause ripples or wrinkles that undermine durability and appearance. A common myth is that using just a knee kicker is enough — in reality, employing power stretchers with proper head pressure yields a flawless, flat finish. Overlooking the importance of tack strip alignment and seam sealing also leads to visible seams and premature wear. Skilled installation involves balancing tension and precise cutting, which is why professional secrets can make all the difference.
Secrets Behind Seamless Showers and Tile Work
Many DIYers believe that applying grout carefully is the key to perfect showers. But the nuance lies in waterproofing details, such as ensuring the membrane is properly sealed, slopes are consistent, and joints are offset correctly. A common mistake is neglecting to pre-slope the shower pan or assuming that surface waterproofing alone is sufficient. These oversights can cause leaks and mold over time. Advanced installation involves meticulous pre-slope preparation, as detailed in expert shower tips. Understanding these nuances can save you from disastrous bathroom leaks.
Debunking Myths About Baseboard Installation
One widespread misconception is that baseboards are just decorative. In fact, they play a crucial role in covering gaps and securing wall finishes. Many think that nailing them directly to drywall is sufficient, but this often leads to cracks or uneven spacing over time. The hidden nuance is in using the right fasteners, shim techniques, and allowances for wall irregularities. For a polished look, professional installers often use a combination of adhesives, nails, and flexible caulk. To master these subtle skills, explore baseboard upgrade strategies. Properly installed baseboards elevate your interior and prevent future issues.
Understanding and avoiding these advanced mistakes can significantly improve your results and save you money and frustration. The key is not just following the basic steps but paying attention to the detailed nuances that separate good from exceptional craftsmanship. Have you ever fallen into this trap? Let me know in the comments and share your experiences with overlooked details in your projects!
Keeping your flooring, carpets, showers, and baseboards in top shape requires the right tools and a consistent maintenance routine. Investing in quality equipment not only prolongs their lifespan but also ensures your home maintains its aesthetic appeal over time.
Invest in the Right Power Tools for Precision Work
When tackling installations or touch-ups, I highly recommend a high-quality finish nailer and a cordless oscillating multi-tool. The finish nailer allows for quick, clean nailing of baseboards and trim without damaging the material, especially important for delicate surfaces. I personally use the Paslode Cordless Finish Nailer because it provides consistent power and reduces setup time. The oscillating multi-tool is versatile, helping me cut precisely around outlets or for intricate tile adjustments. It’s invaluable for making quick modifications without pulling out heavy equipment.
Keep Monitoring Tools for Longevity and Safety
Maintaining the longevity of your flooring and fixtures also involves proper monitoring. A digital hygrometer is essential to keep indoor humidity between 35-50%, preventing wood from gapping or warping. I check mine weekly, especially during seasonal changes, to catch humidity swings early. This simple step can significantly reduce squeaks or buckling in hardwoods and laminate flooring. Additionally, using a laser level during installations ensures your surfaces stay perfectly aligned, reducing long-term issues and rework.
Adopt Regular Cleaning and Inspection Routines
Routine care involves more than sweeping or vacuuming. For flooring, periodic deep cleaning with manufacturer-approved solutions preserves the finish. For showers, inspecting grout and seals regularly prevents leaks and mold buildup. I recommend a handheld steam cleaner for deep cleaning tiles—it’s effective and uses minimal chemicals, aligning with eco-friendly practices. Baseboards should be checked for cracks or loose nails; a quick fix with a nail gun or flexible Caulk preserves a seamless appearance and structural integrity. By consistently reviewing these elements, you prevent small problems from escalating into costly repairs.
Plan for Future Upgrades
Anticipate how your home may evolve by investing in tools that support scaling. For example, if you plan to add new flooring or reconfigure rooms, a portable oscillating tool and a multi-cutter allow you to handle different materials with ease. Staying prepared empowers you to undertake projects confidently, avoiding unnecessary delays or hiring costly professionals for minor adjustments.
Where do I find maintenance routines that last?
Creating a routine tailored to your specific materials is key. For more detailed advice, I recommend checking the comprehensive step-by-step flooring installation guide, which includes long-term maintenance tips. Remember, consistency is your best ally in preserving your home’s beauty and functionality. Try implementing a monthly inspection schedule—it’s a simple step that yields significant benefits over years. If you’re unsure about specific tools or methods, reaching out through our contact page can connect you with expert advice tailored to your projects.
The Hidden Wisdom I Gained from Breakthroughs in Flooring and Finishing
One of the most significant lessons I learned is that perfection often lies in the details many overlook. For instance, I once thought that simply nailing baseboards was enough—until I realized that shimming behind the moldings created a seamless appearance and prevented cracks over time. Another discovery was regarding humidity control; maintaining optimal moisture levels truly minimizes squeaks and gaps in hardwood flooring, a small adjustment that made a huge difference. Lastly, I found that pre-slope preparation in shower installations, though seemingly tedious, vastly reduces future leaks and mold issues—a clear reminder that thorough planning and attention to nuance are invaluable.
Tools and Resources That Transformed My Approach
Equipping yourself with the right tools can elevate your projects from good to exceptional. A high-quality finish nailer, such as the Paslode cordless model, speeds up baseboard installation and avoids damaging delicate materials. A laser level provides precision for tile and shower wall alignment, ensuring everything is perfectly straight. For learning, I recommend exploring comprehensive guides like the detailed flooring installation plan—it covers all nuances from preparation to finishing touches. Books like “The Complete Guide to Bathroom Renovations” also offer in-depth insights that save costly mistakes. Lastly, subscribing to expert blogs and forums helps keep me updated on evolving best practices and new tools, making every project smoother and more satisfying.
Your Next Step Toward Flawless Floors and Finishes
Remember, mastering these finishing details isn’t just about aesthetics—it’s about creating a home that’s both beautiful and durable. Each project you undertake is a chance to learn, adapt, and improve. With patience, the right tools, and a keen eye for detail, you can achieve results that stand the test of time. Don’t hesitate to embrace the learning process; every mistake is a stepping stone toward mastery. Your home transformation is within reach, and every careful step you take today builds a more comfortable, stylish space for tomorrow.
What specific challenge have you faced in your flooring, shower, or baseboard project? Share your experience below—I’d love to hear how you tackled it!