

Ever had that moment where you’re walking barefoot across your brand-new hardwood floor, only to feel a strange hollow sensation in the center? I remember my own frustration vividly—thinking I must have made a terrible mistake or that the installer skipped a crucial step. The lightbulb finally went off when I saw the gentle curve forming right in the middle of my floor, and I realized it wasn’t just a cosmetic issue, but a sign of underlying problems that could worsen if left unaddressed.
Understanding the Common Culprit Behind Floor Cupping
Many homeowners overlook the importance of proper moisture control during installation. When wood absorbs excess moisture from the environment or moisture leaks from below, it swells and warps, often resulting in cupping. This isn’t a rare phenomenon—according to the National Wood Flooring Association, improper moisture management is among the top causes of cupping and buckling in hardwood floors.
Is Cupping Worth Worrying About or Just a Cosmetic Nuisance?
Initially, I dismissed my cupping as a minor flaw. But I soon learned that persistent moisture issues can lead to irreversible damage. Early on, I made the mistake of ignoring small signs, thinking I could just sand it out later. That was a mistake. Addressing cupping promptly can save you from costly repairs or replacements down the line. Want to know how I turned this problem around? Stick with me, and I’ll share proven ways to fix and prevent cupping effectively.
,
Act Quickly to Mitigate Damage
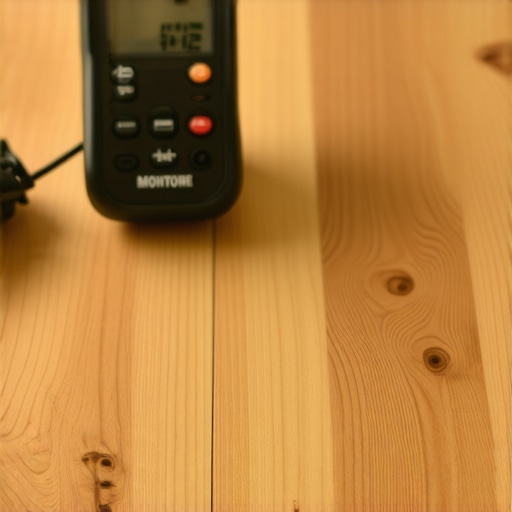
When you notice your floor starting to cup, the first step is to identify the moisture source. Use a moisture meter to assess the wood and the subfloor beneath. If the moisture is coming from leaks or spills, address those immediately. For example, I once discovered a leaking pipe beneath my laundry area; fixing it stopped the ongoing moisture problem. While waiting for repairs, increase ventilation with fans and dehumidifiers. This can slow the cupping progression and prevent further warping.
Control Indoor Humidity Effectively
- Identify humidity levels: Keep indoor humidity between 30-50% using a hygrometer. Overly humid environments accelerate wood swelling.
- Use dehumidifiers during humid seasons or if your home tends to retain moisture. I installed a dehumidifier in my basement, which dramatically reduced ongoing cupping issues.
- Ensure proper ventilation in high-moisture areas like kitchens and bathrooms, especially during and after showers.
Improve Flooring Installation Practice
Prepare the Subfloor Properly
Ensure your subfloor is dry, level, and free of debris before installation. I learned this lesson the hard way when I skipped leveling the subfloor in my living room; my new hardwood soon cupped near the vents. Use a self-leveling compound for uneven surfaces and allow adequate drying time.
Control Moisture During Installation
Acclimate your hardwood planks in the environment where they’ll be installed for at least 48-72 hours. This reduces the risk of expansion or contraction after placement. Moreover, apply a moisture barrier between the subfloor and the wood, especially in basements or areas prone to humidity. I’ve found that a quality vapor barrier significantly lowers moisture transmission, ensuring longer-lasting results.
Address Existing Cupping Effectively
Gentle Sanding and Restoration
If cupping is mild, carefully sand the raised edges of the planks using a floor buffer with a fine-grit pad. Follow up with a wood finish to restore the surface. Be cautious—taking off too much can weaken the floor or cause gaps.
Use Moisture Reducing Methods
In cases of persistent cupping, apply wood blockers or moisture absorbers in the subfloor to draw out excess water. For example, I laid down silica gel packs in the crawl space to absorb lingering moisture, which helped flatten the floor over time.
Prevent Future Problems with Strategic Measures
Install proper ventilation vents and exhaust fans in moisture-prone areas. Regularly check for leaks, spills, and humidity spikes. Consider finishing the installation with a controlled ambient environment—using humidifiers or dehumidifiers to keep conditions stable. For additional tips on flooring installation, visit this comprehensive guide.
 When homeowners embark on projects like shower remodeling, carpet installation, or flooring upgrades, they often fall prey to misconceptions that can compromise the final result. Let’s dig deeper into these pitfalls, challenge popular beliefs, and uncover the nuances that only seasoned professionals understand.
Why DIY hype about shower waterproofing can backfire
Many believe that sealing the shower pan or niche with generic waterproofing products guarantees a leak-proof bathroom. However, experts advise that understanding the specific requirements of each shower component is crucial. For instance, the importance of proper slope and membrane integration often gets overlooked, leading to water ingress despite surface sealing. According to industry standards, a well-implemented waterproofing system must encompass all potential water paths, not just the visible joints. Relying solely on surface sealants without addressing these fundamentals is a common myth that can cause costly repairs. For insights on modern shower designs and waterproofing strategies, visit this guide.
Avoid the trap of rushing carpet transitions in high-traffic areas
Many assume that simply nailing down or gluing the transition strip is enough to handle everyday wear. But the hidden nuance lies in selecting the right type of transition strip and proper subfloor preparation. Using cheap alloy strips or neglecting subfloor smoothing can lead to fraying, gapping, or even tripping hazards over time. A common mistake is forgetting to consider expansion gaps for temperature fluctuations, especially in rooms with large windows or near entrances. Advanced installers often use tackless strips combined with strategic stretch techniques to ensure long-term seamlessness. Want flawless results? Check out these professional secrets.
How advanced baseboard installation avoids future gaps
Many homeowners and even some contractors focus on aesthetic matching when installing baseboards. What’s often missed is the critical role of controlling expansion and contraction, especially in climates with significant temperature swings. Improper nail placement or failure to use flexible caulk in joints can cause cracks and gaps over time. Another advanced tip is to scribe baseboards accurately against uneven walls using the scribe and block method, rather than forcing a tight fit. This preserves the integrity of the installation and maintains a polished look. For comprehensive strategies, see this article.
Flooring installation myths that trip up even professionals
The most pervasive myth about flooring is that using the right adhesive alone guarantees a durable, long-lasting surface. In reality, correct subfloor preparation, moisture management, and acclimation are equally vital. For example, neglecting to check for moisture content can lead to plank warping or delamination. Additionally, many underestimate the importance of staggered seams and proper expansion gaps, which prevent buckling over seasonal changes. Advanced installers are meticulous about these details, often employing techniques like the staggered seam rule or the wet shim method for heavy substrates. To avoid these pitfalls, review these expert tips.
Have you ever fallen into this trap? Let me know in the comments.
Maintaining Your Floors and Installations for Longevity
Keeping your flooring, shower systems, and baseboards functioning flawlessly over time requires the right tools and a proactive approach. I swear by specific equipment and methods that have helped me avoid costly repairs and enjoy durable results. For example, I always use a high-quality moisture meter, like the Tramex Matic, to regularly check moisture levels in the subfloor and hardwood before and after installation. This ensures that moisture content stays within safe ranges (usually below 12% for hardwood), preventing warping or cupping down the line.
Similarly, I rely heavily on precision tools during installation, such as the Hitachi NV45AB2 brad nailer for baseboards. Its adjustable depth and minimal recoil give me clean, secure joints without damaging the material. For flooring, I prefer a specific underlayment like QuietWalk Premium, which not only dampens sound but also acts as a moisture barrier—perfect for long-term protection.
Beyond tools, software management helps me plan projects efficiently. I use Bluebeam Revu for digital layout planning, especially when dealing with intricate tile patterns or custom transitions. It helps visualize the final look before laying the first tile or installing the last baseboard, reducing errors and waste. As industry standards evolve—like the recommendations from the Tile Council of North America for waterproofing my shower—adapting modern techniques is crucial for sustainable results.
Looking ahead, I predict that automation in moisture monitoring and smart sensors embedded in flooring will become standard. These innovations will alert homeowners in real time, allowing for immediate intervention and preventing damage. It’s an exciting trend that will make long-term maintenance more manageable.
How do I keep my installations effectively maintained over time?
One of my favorite maintenance practices is routine visual inspections combined with some targeted tools. For example, I check for signs of gaps in baseboards or shifting tiles, which often indicate underlying moisture or structural issues. Using a moisture meter periodically, especially after seasonal changes, helps catch potential problems early.
Additionally, I use a damp, soft cloth to gently clean surfaces—avoiding harsh chemicals that can degrade finishes and sealants. For shower systems, I apply a silicon-based sealant like GE Silicone II, which remains flexible and resists mold. Regularly maintaining these features with proper tools preserves their integrity, saving you from major repairs down the road.
Remember, investing in the right equipment and routine checks not only prolongs the life of your installations but also provides peace of mind. For example, implementing the Wet Shim method when leveling heavy shower trays—recommended by experts—can significantly simplify future maintenance. Why not try that advanced tip during your next bathroom upgrade? It’s a game-changer!
If you want personalized advice or need professional assistance, don’t hesitate to reach out here. Staying diligent with maintenance tools and techniques today ensures your home remains beautiful and functional for years to come.

What I Wish I Knew Before Starting My Flooring Journey
- Lessons Learned: I underestimated the importance of proper moisture management, which led to cupping and warping. Investing in a quality moisture meter early on could have saved me time and money.
- Handling Mistakes: I used to believe that quick fixes were enough, but I discovered that patience during acclimation and preparation yields durable results that stand the test of time.
- Professional Tips: Sharing the wet shim method for leveling heavy shower trays was a game-changer; it prevented future leaks and improved installation precision.
- Beauty and Function: I found that choosing the right baseboard style and scribing accurately against uneven walls created a polished look that complements the overall design.
Tools and Resources That Elevated My Work
- Moisture Meter: The Tramex Matic helped me keep moisture levels in check, preventing future issues like buckling or mold growth.
- Underlayment Options: I trust QuietWalk Premium because it combines sound dampening with moisture protection, extending the life of my flooring.
- Planning Software: Bluebeam Revu allowed me to visualize layouts, reducing errors and material waste, especially for intricate tile or pattern work.
- Informative Guides: The comprehensive articles on TileCraftsmen provided insights on installation techniques, myths to avoid, and maintenance strategies, making me a more confident DIYer.
Your Next Step Starts Now
Embarking on or improving your showers, carpet, baseboards, and flooring installation journey is an ongoing process. With patience, the right tools, and continuous learning, you can achieve results that — not only look stunning — but also stand the test of time. Don’t let common misconceptions hold you back; instead, embrace each project as an opportunity to master new skills and create a space that truly reflects your home’s personality.
Are you ready to take your home improvement skills to the next level? Share your experiences or ask for advice in the comments below — I love hearing from fellow DIY enthusiasts!
