

I remember the exact moment I noticed it: after a long shower, just as I stepped out and reached for my towel, a strange gurgling sound echoed from the drain. It was like the shower was protesting, saying, “Hey, I didn’t forget you!” Honestly, it caught me off guard—something so mundane shouldn’t have such a dramatic sound, right? But there I was, puzzled by this mystery noise that seemed to appear out of nowhere.
That little gurgle became a mini pet peeve, bubbling up every time I enjoyed a relaxing shower. I started questioning whether I had installed my plumbing incorrectly, or if something more sinister was happening beneath the surface. Little did I know, this is a surprisingly common issue many homeowners face, and the culprit is often something fixable.
Today, I want to share what I learned from personal experience about this quirky phenomenon. If your shower drain makes gurgling sounds after you’ve stepped out, you’re not imagining things—and there’s definitely a way to troubleshoot and solve it. Understanding why it happens can save you a ton of frustration and even prevent bigger plumbing headaches down the line.
Why does my shower drain gurgle after I shower?
Many folks don’t realize that a gurgling drain is a sign that air isn’t moving smoothly through your plumbing system. When water drains, it creates a vacuum or negative pressure that needs to be balanced with fresh air entering the system. If there’s a blockage or an improperly vented pipe, this air can’t flow freely. As a result, you hear that familiar gurgling sound—kind of like your plumbing trying to breathe.
In my case, I initially thought it was just a minor issue. I overlooked the importance of proper ventilation when installing my shower drain, a mistake I later discovered is quite common among DIY enthusiasts. Early blunders like ignoring venting systems can turn small problems into recurring nuisances.
The good news? Fixing this usually involves simple steps like checking the vent pipes or cleaning out minor clogs. But before jumping into fixes, it’s essential to understand the root cause.
For a more comprehensive overview, you might want to explore ideas on shower renovation [here](https://tilecraftsmens.com/shower-renovation-ideas-modern-designs-for-a-luxury-feel) or learn about common plumbing mistakes [here](https://tilecraftsmens.com/your-guide-to-durable-flooring-installation-for-a-stylish-home). These resources can help you spot other related issues before they escalate.
So, have you experienced that unsettling gurgle coming from your shower drain? If so, you’re not alone—and the good news is, there’s a straightforward solution waiting for you. Let’s delve into what you can do to silence that noisy drain once and for all.
Check the Venting System
My first step was to inspect the vent pipe that helps air flow through the plumbing. I accessed the attic where the vent pipe runs and used a flashlight to spot any blockages like leaves or debris. A clogged vent causes negative pressure, making your drain gurgle. Clearing it with gloves or a plumber’s snake often solves the issue immediately. Remember, proper venting is crucial for smooth drainage and preventing unpleasant noises.
Clear Any Obstructions in the Drain
Next, I focused on the drain itself. I removed the drain cover and used a plumbing snake to break through any buildup or hair clogs. Pourting boiling water mixed with baking soda down afterward helped dissolve residual gunk. This is similar to how a clean baseboard trim looks after a good scrub—nothing blocking the flow. Regular maintenance like this can prevent future gurgles from sneaking in again.
Test for Proper Airflow
After cleaning, I ran water through the shower to observe the drain’s behavior. A steady flow without bubbling or gurgling indicated successful venting. If problems persist, inserting a garden hose into the vent pipe temporarily and running water might reveal deeper blockages. Like troubleshooting a carpet installation that doesn’t sit right, ensuring airflow requires patience and methodical steps.
Install or Repair Air Vents
If venting is missing or damaged, installing a vent uni or repairing existing pipes is next. I used pipe cement to secure the new vent pipe and checked connections for tightness. Just as a well-installed baseboard aligns perfectly around corners, a properly fitted vent ensures unobstructed airflow, eliminating gurgling sounds.
When it comes to home renovation, many believe there is a one-size-fits-all approach, especially regarding baseboards, showers, flooring, and carpets. However, some of the most common misconceptions can lead to costly mistakes. For example, the idea that installing wider baseboards automatically elevates a room’s style overlooks the importance of proportion and wall height. Striking a balance requires understanding current trends and the nuances that make a design successful, such as the latest baseboard trends in 2025.Maintaining your home’s flooring, baseboards, showers, and carpets requires not only careful installation but also the right tools and ongoing upkeep strategies. Investing in high-quality equipment ensures your projects stand the test of time and minimizes costly repairs down the line. For example, I personally rely on a cordless brad nailer for baseboard installation, which provides precision and reduces the risk of splitting wood. When working on shower renovations, a good silicone sealant gun helps create watertight joints that last for years. Additionally, a digital moisture meter is invaluable for checking subfloor dryness before laying new flooring, avoiding warping and buckling over time.
In my experience, regular inspection and proactive maintenance are key. For flooring, scheduling annual deep cleaning and promptly addressing minor damages can prevent deterioration. Likewise, for showe rs, inspecting seals and grout annually helps prevent leaks or water damage. Don’t overlook the importance of proper tools—like a quality grout float or a carpet stretcher—which make these tasks more manageable and professional-looking. This approach not only preserves the aesthetic appeal but also enhances the durability of your home investments.
Looking ahead, I believe the trend will move toward smarter, more integrated home maintenance systems. IoT-enabled sensors that monitor humidity, moisture, and structural shifts could alert homeowners to issues before they escalate, saving money and stress. Until then, mastering the basics with recommended tools remains essential.
How can I maintain my flooring and shower installations over time?
Consistent upkeep is critical. For flooring, check the manufacturer’s guidelines on cleaning products and routines—using the right products preserves finish and prevents premature wear. For showers, clean grout lines regularly with specialized brushes and pH-balanced cleaners to prevent mold. Applying a sealant to grout and stone surfaces every 1-2 years extends their lifespan and keeps them looking fresh. For baseboards and carpets, regular vacuuming with the appropriate attachments helps remove debris that can cause wear or damage. Additionally, inspecting for signs of moisture or gaps and sealing them promptly prevents larger issues from developing, aligning with expert advice found in tile installation resources.
To enhance your maintenance routine, I recommend trying out a magnetic tool holder for your workbench—it keeps essential tools within reach and organized, saving time during repairs or upgrades. Make a habit to schedule quarterly inspections, and you’ll find that small issues won’t snowball into major problems. Remember, using a high-quality sealant and proper application techniques, such as those discussed in detailed guides on [showers](https://tilecraftsmens.com/shower-renovation-ideas-modern-designs-for-a-luxury-feel), can dramatically improve long-term performance.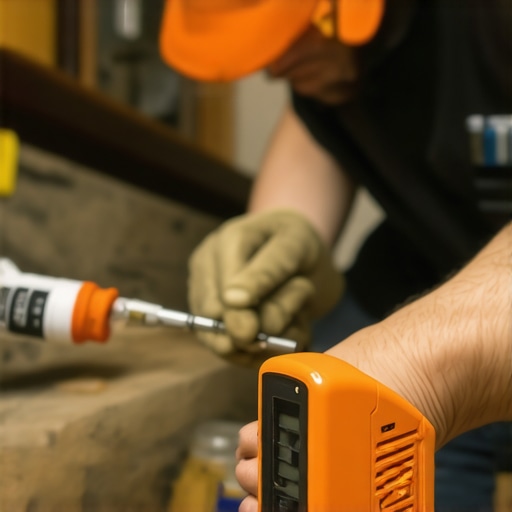
Tools like a digital moisture meter and a quality caulking gun are vital for ensuring your installations are protected against water damage. I encourage you to experiment with one of these advanced tips—perhaps sealing grout with a top-tier impregnating sealer—and observe how it extends the life of your project. It’s all about making smart, informed investments in your home maintenance arsenal so your upgrades stay pristine for years to come.
Lessons Hidden in the Smallest Details of Home Renovation
Sometimes, the most memorable lessons come from overlooked details like properly sealing a shower niche or choosing the right baseboard profile. I learned the hard way that rushing through these small steps often leads to costly fixes later, making patience and attention to detail invaluable. For example, a tiny misstep in grouting can result in water seepage—something I experienced firsthand—highlighting the importance of meticulous work. By embracing the nuances of these seemingly minor aspects, you cultivate craftsmanship and prevent future headaches.
Tools and Resources That Transformed My Approach
Over the years, I found that leveraging high-quality tools and trusted sources dramatically improved my outcomes. The waterproofing guides taught me about essential membrane techniques, while my cordless brad nailer simplified baseboard installation, ensuring a clean, professional look. Browsing through trend reports like 2025 baseboard styles keeps me inspired and up-to-date. These tools and insights have become my secret arsenal for creating enduring, beautiful spaces.
Your Journey Starts Today—Small Steps Lead to Big Confidence
Embarking on home renovation might seem daunting, but remember, every expert was once a beginner taking that first step. Prioritize mastering details like proper ventilation or seamless transitions; these are investments in your home’s longevity and your peace of mind. Stay curious, keep learning, and don’t hesitate to take on those projects you’ve been postponing. Your home is a reflection of your effort and creativity—so get started and enjoy the transformative process!