

It was a typical Saturday morning when I stood in my bathroom, brushing my teeth, only to be hit by that unfortunate, stale odor wafting up from the shower drain. I immediately thought, “Did I forget to clean it again?” But upon closer inspection, I realized the smell was persistent—worse after every shower. That was my lightbulb moment. Like many homeowners, I had no idea that the culprit was a simple misadjustment in the P-trap, a small component that plays a big role in preventing sewer gases from creeping into your home.
Understanding the Hidden Culprit Behind Shower Drain Odors
That morning, I discovered that a quick fix could turn my bathroom from a source of embarrassment into a fresh, inviting space. The key, I learned, was optimizing the P-trap, a U-shaped pipe under your shower drain. This tiny, often-overlooked detail is the unsung hero of bathroom plumbing, blocking foul gases from entering your home. If you’re dealing with that persistent smell, chances are your P-trap isn’t functioning as it should. Today, I promise to walk you through how a simple adjustment can eliminate odors once and for all, based on my personal experience and DIY success.
Could This Fix Be Too Good to Be True?
I remember the early days of my handyman adventures, making a mistake I see many others repeat: neglecting regular maintenance of the P-trap. I thought it was a complicated repair, but it turned out to be surprisingly straightforward. If you’re skeptical, I get it. But often, homeowners overlook this small component, assuming the problem is more complex than it actually is. You’re not alone—many of us have been there—and I can assure you that with the right guidance, you can fix this yourself without calling in costly professionals. For additional tips on plumbing and DIY fixes, check out this comprehensive guide.
In the next sections, I’ll share the exact steps I took to correct my P-trap and reclaim my bathroom’s fresh scent. Trust me, once you understand how this small tweak works, you’ll wonder why you didn’t address it earlier. Let’s get started.
Accessing and Inspecting the P-Trap
Start by removing the drain cover with a screwdriver or pliers, depending on your setup. Place a bucket beneath the pipes to catch any water. Carefully unscrew the slip nut holding the P-trap in place, then gently slide it out. During my last fix, I discovered a buildup of debris and mold, which was causing the foul smell. Clean the trap thoroughly with an old toothbrush and a mixture of baking soda and vinegar to remove stubborn residue. This step is crucial because a clogged or dry P-trap allows sewer gases to escape into your bathroom. For a more comprehensive approach, check out this guide on plumbing tactics.
Re-establishing Proper Water Seal
Ensure that the trap contains enough water to block gases. If the water level is low, pour in warm water until it reaches the specified level or slightly above the outlet. Sometimes, evaporation causes the water to recede, especially in unused bathrooms. To prevent this, periodically top up the water, or consider installing a trap primer system for continuous sealing. I made this mistake in my guest bathroom, forgetting about the water level, which resulted in odors returning after a few days. This simple check can save you from recurring issues. For detailed water seal maintenance tips, see this article.
Sealing and Securing the Drain Assembly
Replace the drain cover and tighten all slip nuts securely but avoid over-tightening, which could crack the pipe or deform the seal. Use plumber’s thread seal tape around the threads for a more watertight fit. During my repair, I wrapped the threads with tape and snugly assembled the components, which prevented leaks and further odors. Remember, a loose fitting can cause sewer gases to seep through. If you notice leaks or persistent odors despite these efforts, revisit the connection points and ensure the seal is tight. For advanced sealing techniques, visit this resource.
Testing for Success and Preventing Future Odors
Run hot water through the drain for a few minutes to flush out any remaining debris and ensure the water flows freely. Use a small amount of dish soap or enzyme cleaner to help break down grease or organic buildup on the interior surfaces of the pipes. To prevent future odor issues, consider installing a backup vent or a moisture trap if your plumbing system allows. Regular maintenance, such as periodic cleaning and checking water levels, can save you from unpleasant surprises. I do this every few months now, and my bathroom smells fresh constantly. For more tips on maintaining your plumbing system, explore this guide.Many homeowners assume that installing new flooring, showers, or baseboards is straightforward, but the reality is often more nuanced. A common myth is that all flooring options are equally durable and easy to install; in truth, each material has specific requirements and pitfalls. For example, many neglect the importance of proper subfloor preparation, which is crucial for a seamless, long-lasting finish. Skipping this step can lead to uneven surfaces and crackling tiles, despite following the visible installation process correctly. For a deeper understanding of these critical mistakes, check out these top flooring pitfalls and learn how to avoid them.
Let’s talk about showers—everyone focuses on the tile but overlooks the vital waterproofing layer. Mistakes like improper membrane installation or using the wrong sealants can cause leaks that damage substructures over time. I’ve seen DIYers fail by nailing the liner directly through the curb, which compromises waterproofing integrity. Choosing the right materials and installation methods is essential; for advanced tips, visit this expert guide on shower enclosures.
Baseboards are often considered decorative extras, but their installation directly affects interior acoustics and aesthetics. A frequent error is scribing them incorrectly to uneven walls, resulting in gaps and an unprofessional look. Using special tools like a coping saw or the back-bevel technique can make a significant difference for complex angles. Moreover, many underestimate the importance of sealing at the corners—this prevents dust and bugs from slipping in. For modern styles, check out this latest trend overview.
When it comes to carpet installation, the most overlooked nuance is choosing the right padding. Many believe thicker is automatically better, but studies show, like the one from the Carpeting Institute, that the optimal padding density enhances durability and comfort without excessive sagging (source). Improper stretching is another common mistake; rips and wrinkles occur when the carpet isn’t tensioned correctly. The reverse roll trick, for instance, can help achieve a flat, professional finish. For comprehensive advice, review these carpet installation secrets.
**Have you ever fallen into any of these traps?** Understanding these subtle yet critical details can save you time, money, and headaches. Remember, every step — from subfloor prep to sealing the final corner — impacts the durability and appearance of your project. Let’s dig deeper into these intricacies so your home renovation turns out flawless. Your future self will thank you for paying attention to the nuances.
Keep It Working: Essential Tools and Maintenance Strategies
Maintaining your flooring, showers, baseboards, and carpet installations is crucial to ensuring their longevity and appearance. Over time, even the best materials need periodic care, and having the right tools at hand makes this process more manageable and effective. One of my go-to tools is a high-quality cordless oscillating multi-tool, which I use for precision cutting and sanding in tight corners or delicate areas, such as scribing baseboards to uneven walls. Its versatility allows me to address minor repairs or adjustments without the need for multiple devices, saving time and effort. For detailed baseboard modifications, I rely on a micro-sanding attachment to smooth out imperfections, ensuring a seamless finish.
Another must-have is a professional-grade moisture meter. Something like the Tramex Moisture Encounter pinless meter helps me monitor the moisture levels in subfloors and hardwoods. This is especially vital for preventing issues like buckling or mold growth, which can seriously compromise your flooring over the long term. Regular checks using this device can reveal hidden problems early, allowing for timely interventions.
When it comes to cleaning, I swear by enzyme-based cleaners specifically formulated for organic buildup. These products break down grease, soap scum, and organic residues without harsh chemicals, helping maintain shower seals and drain traps. Incorporate gentle scraping tools, like plastic putty knives, to remove stubborn debris from grout lines or tile surfaces without risking damage.
As for future trends, the integration of smart maintenance sensors is on the rise. These devices can detect changes in moisture or air quality, alerting homeowners before significant problems develop. I foresee more DIYers adopting such technology, coupled with apps that provide step-by-step guidance for routine upkeep, making maintenance smarter and more proactive.
How do I maintain my flooring and bathroom features over time?
One effective strategy is to establish a regular inspection routine. For flooring, check for loose tiles, gaps, or signs of wear every few months. For showers and drains, ensure water levels in P-traps are maintained and seals are intact. Use the moisture meter mentioned earlier to catch early signs of excess moisture that could lead to mold or wood warping. Avoid common installation mistakes by revisiting best practices periodically. Also, applying a sealant or protective coating to grout lines and baseboards annually can help prevent staining and damage. Keep tools like a microfiber mop, soft brushes, and a spray bottle filled with a vinegar solution handy for quick touch-ups, which preserves the appearance of your finishes without harsh chemicals.
For carpets, periodic professional cleaning with vapor steamers can remove deep-seated dirt, extending their lifespan. Don’t forget to address issues like wrinkling or uneven seams promptly—refer to these expert tips for flawless results. With consistent maintenance and the right equipment, your home improvements can stay beautiful and functional for years to come.
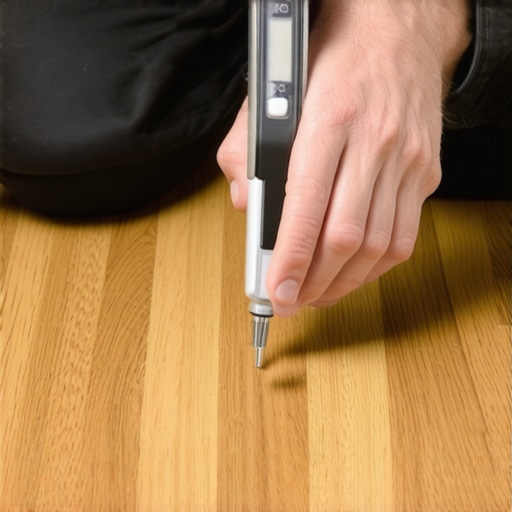
Advanced Maintenance: Using a moisture meter to monitor your subfloor’s health is vital for long-lasting results, especially in moisture-prone areas like bathrooms and basements.
The Hard-Earned Truth About Details That Save Your Home
One lesson I learned the difficult way was that nitpicking the small stuff—like water levels in P-traps or sealing baseboards thoroughly—can prevent huge headaches later. Overlooking these subtle nuances might seem insignificant initially but can lead to lingering odors, water leaks, and uneven finishes that tarnish your entire project. The real victory lies in embracing patience and attention to detail, understanding that perfection often resides in these tiny adjustments which many homeowners overlook. Trust me, these incremental gains compound into a home that feels truly polished and professionally finished, without the sky-high price tag.
Tools and Resources Powering My Home Makeover Journey
My essential toolkit has been pivotal in achieving flawless results. I swear by a high-quality moisture meter, like the Tramex Moisture Encounter, to keep my subfloor and walls in check—an underrated hero in preventing future damage and ensuring longevity. For intricate cuts around irregular shapes or stubborn corners, a versatile oscillating multi-tool with various attachments has been a game-changer, making what once felt impossible surprisingly straightforward. Books like “Creating a Spa-Like Shower Experience” or guides on proper installation techniques have enriched my understanding, empowering me to troubleshoot confidently. Trusting these resources has turned my DIY endeavors into satisfying successes, and I believe every homeowner can benefit from adopting similar tools and knowledge sources.
Your Future Starts Now—Transform Your Home with Confidence
Remember, every expert was once a beginner—your journey into mastering flooring, showers, and trim details is just beginning. By applying these lessons learned and leveraging the right tools, you’re not just making repairs—you’re crafting a space that exudes pride and comfort. No matter where you are in your renovation path, embracing continuous learning and meticulous care will elevate your home beyond mere aesthetics into a true sanctuary. So, take that first step today; your future self will thank you for the effort and dedication. Dive into your project with confidence, knowing that every small improvement adds up to something extraordinary. The key to success in home renovation is in the details—are you ready to start turning your vision into reality?