

It happened to me on a busy Saturday morning — I reached for the shower handle, intending to enjoy a quick rinse, and instead, I yanked on a wobbly, loose fixture that felt more like a prank than a part of my bathroom. That pesky looseness had been creeping in for weeks, but I kept postponing the fix, thinking it was just a minor annoyance. Turns out, that little wobble was a sign of something more serious: a set-screw that had gradually worked itself loose. And honestly, I’m pretty handy around the house, but I first struggled to understand exactly why this was happening and how simple it would be to correct. If you’re tired of every shower turning into a futile tug-of-war, then you’re in the right spot. Today, I’ll walk you through what causes shower handles to become loose and, best of all, how to fix it yourself without calling in a plumber.
The Hidden Culprit: Set-Screws and Their Loosening Grip
When the shower handle wobbles or feels unstable, it’s often due to a loose set-screw—the tiny fastener holding the handle onto the valve stem. Over time, water vibrations, daily use, or even poor initial installation can cause this screw to back out. That’s right: what seems like a tiny, insignificant screw is actually the main culprit behind loose handles.
I made a mistake early on by assuming the problem was a worn-out handle or a faulty cartridge, which led me to costly replacements I didn’t need. Instead, a quick inspection revealed the set-screw had loosened. This mistake taught me that staying informed can save time and money — and I want to share that knowledge with you.
If you’ve been dealing with a handle that feels like it’s ready to fall off any day now, don’t fret. Fixing this issue can be straightforward if you understand the parts involved. Plus, knowing how to maintain your fixtures prevents future problems and extends their lifespan.
Ready to stop pretending that the handle is about to come off every time you turn on the shower? Let’s dive into the simple steps you can take — no specialized tools required — to tighten that handle and restore peace of mind. For more tips on home maintenance, you might find it helpful to explore [baseboard styles that elevate your interior design](https://tilecraftsmens.com/baseboard-styles-that-elevate-your-interior-design). Now, let’s get to the fix.
Secure the Handle Screw Properly
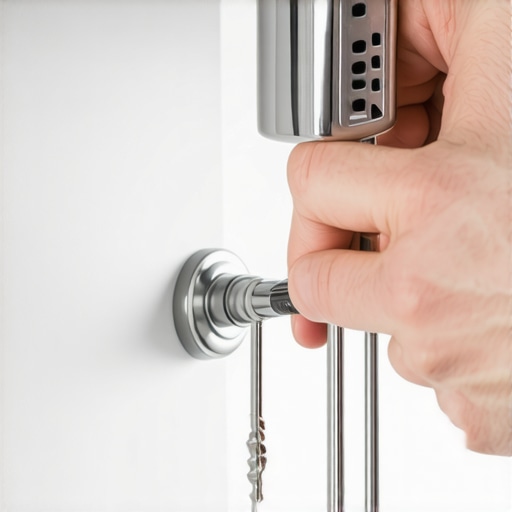
Begin by closing the water supply to avoid any accidental leaks. Use an Allen wrench or screwdriver to tighten the set-screw that holds the handle onto the valve stem. During my first attempt, I used a tiny Phillips screwdriver and watched as the handle felt more solid—ensuring the screw was snug was my first victory.
Inspect for Wear or Damage
After tightening, wiggle the handle gently. If it still moves, remove the handle completely. Check the set-screw hole and handle for stripped threads or visible damage. I once found a stripped screw hole; in that case, replacing the screw or adding a bit of thread tape helped secure it better.
Replace or Reinforce the Set-Screw
If tightening doesn’t hold, consider replacing the set-screw with a new one of the same size. A quick visit to the hardware store yielded a better fit, and I used thread-locking compound to prevent future loosening—think of it like adhesive for tiny fasteners. You want to ensure the screw is tight but not over-torqued, which could damage the handle.
Use a Hex Sleeve or Handle Adapter
If the handle continues to wobble, installing a handle adapter or a hex sleeve can provide a tighter fit onto the valve stem. I’ve done this with a universal handle kit, which involved inserting a sleeve into the handle’s hole for a more secure grip. This method is effective when the original handle wears out or no longer fits snugly.
Apply Thread Sealant for Extra Security
For added stability, especially if you notice water or moisture, apply a small amount of thread sealant or plumber’s tape around the screw threads before reinserting. This prevents corrosion and keeps the screw from loosening over time, similar to sealing pipe threads to prevent leaks.
Test the Fix
Turn the water back on and test the handle’s stability. Operate it multiple times to ensure it doesn’t wobble. If it remains secure, you’re done. If not, repeat the tightening or consider replacing the handle altogether—sometimes, a damaged handle is beyond repair.
Remember, when working with fixtures, patience and proper tools are key. For more practical tips on bathroom upgrades, check out this comprehensive shower renovation guide.
 Many homeowners believe they can DIY these projects with just basic tools and a bit of effort, but digging a little deeper reveals often overlooked nuances that can make or break your results. For example, in shower installations, a frequent mistake is neglecting proper slope grading. While most think a slight tilt suffices, studies show that a 2% slope—about 1/4 inch per foot—is essential to ensure proper drainage and prevent water pooling, which can lead to mold and mildew issues. This detail, often missed by amateurs, underscores the importance of precise measurements in wet-area construction.
Why do so many home improvement guides overlook the importance of subfloor assessment before flooring?
Prior to installing new flooring, the common myth is that leveling compounds or shims are sufficient to handle uneven subfloors. However, experts warn that ignoring subfloor condition can cause long-term problems like squeaking, buckling, or even damage to the new surface. In fact, a recent industry white paper emphasizes that properly diagnosing moisture content and structural integrity of your subfloor plays a critical role in ensuring a seamless and durable installation. Skipping this step is akin to building on shaky ground, which can cost you more in repairs later. For tips on avoiding these mistakes, you might find our guide on durable flooring installation invaluable.
When it comes to baseboards, many assume that they merely serve a decorative purpose, but in reality, their placement and installation technique can influence your interior’s aesthetic and functionality. A common error is installing baseboards straight onto uneven walls without accommodating for irregularities. This often results in gaps or misaligned corners, which are notoriously difficult to correct post-installation. A subtle yet powerful solution is the use of spacers and shimming techniques—such as the shimming tricks—allowing you to achieve a flush, professional finish even on tricky surfaces. This nuance might seem minor, but it makes a huge difference in the final look. Additionally, choosing the right style of baseboards, like those highlighted in baseboard styles for 2025, can elevate your room’s overall décor.
In carpet installations, a prevalent misconception is that high-pile carpets inherently hide imperfections. While plush carpets do add comfort, they can also trap debris and show wear patterns more quickly if not installed properly. One advanced mistake are poorly secured seams, which tend to fray over time, especially in high-traffic areas. Techniques such as the double-cut method and precise stretching—discussed in carpet installation secrets—are vital for a flawless finish that stands the test of time. Moreover, ignoring the importance of quality padding can result in a spongy feel or quick deterioration, contradicting the common belief that padding is optional. Proper attention to these details ensures both comfort and durability. For an in-depth look, check out our tips on choosing the right carpet for your needs.
In flooring, many think that the main concern is just choosing the right material, but the real subtilty lies in installation techniques and environmental considerations. For example, environmental humidity plays a crucial role in hardwood flooring, as fluctuating moisture levels can cause gapping or buckling. Experts recommend acclimating wood for at least one week before installing, a step often overlooked. Additionally, the use of proper expansion joints and understanding the wood’s response to temperature and humidity can prevent costly repairs down the line. The misconception that these factors are negligible can lead to long-term damage. For more on avoiding common flooring pitfalls, our installation tips for 2025 offer invaluable insights.Maintaining your home fixtures and flooring requires more than just basic tools; it demands precision equipment that delivers consistent, professional results. I swear by my 3/16-inch Allen wrench designed specifically for small set-screws—a tool I use every time I need to tighten a loose shower handle. Unlike generic screwdrivers, this compact wrench offers the perfect fit, reducing the risk of stripping delicate fasteners and ensuring a secure, long-term hold. For measuring moisture content in subfloors—crucial before installing hardwood and preventing future buckling—I rely on a reliable pin-type moisture meter. It provides instant, accurate readings and helps me avoid costly mistakes, aligning with industry standards outlined in the technical documentation on moisture meter guidelines. When working on flooring installation, I always use a precision T-bevel for checking wall and subfloor angles; precision here prevents uneven seams and gaps, giving a seamless finish. These tools are investments that pay for themselves by extending the lifespan of your work—think of them as your home’s health checkups. As trends favor smarter, connected tools, I predict a rise in digital moisture meters with Bluetooth capabilities, allowing you to track readings over time via smartphone apps, streamlining the maintenance process. This evolution will be especially helpful for maintaining flooring and baseboard integrity over years.
Ever Wonder How to Keep Your Fixes Standing the Test of Time?
Regular maintenance goes beyond just fixing what’s broken—the key is proactive care. For instance, periodically tightening set-screws with a dedicated Allen key and applying thread-locking compounds can prevent handling wobbles before they happen. Using a moisture meter quarterly can alert you to rising humidity levels that threaten your flooring, enabling you to take preventative measures. Employing a T-bevel to regularly check wall angles ensures that your baseboards stay aligned after seasonal shifts or minor settling. Consistent attention to these details, coupled with quality tools, ensures your repairs serve for years, not months. For example, upgrading your hand tools—like shifting to a digital moisture meter—can streamline maintenance routines, making they easier and more reliable. Want an extra edge? Try calibrating your moisture meter before each use; it’s a small step that guarantees the accuracy needed to prevent long-term damage, as detailed in a comprehensive review by concretenetwork.com. These practices, combined with high-quality tools, form the backbone of enduring home ownership. Take a moment to assess your toolkit—invest in one advanced device today, and see how long-lasting your home projects can truly become.
The Hardest Lesson I Learned About Showers and Flooring
Realizing that often, small details—like tightening a set-screw or checking subfloor moisture—can make the difference between a temporary fix and a lasting solution was a game-changer for me. I once spent hours replacing a worn handle only to find it wobbling again because I overlooked reapplying thread-locking compound. This taught me to look beyond the obvious and pay attention to the nuances that ensure durability.
Why Perfecting Baseboard Installation Requires More Than Just a Saw
I used to think that as long as my cuts were straight, my baseboards would sit perfectly. It wasn’t until I started shimming and scribing around uneven walls that I discovered truly professional results depend on accommodating imperfections. Learning about shimming techniques transformed my approach and saved me from frustrating gaps.
My Biggest Carpet Installation Mistake—and How to Dodge It
I once neglected the importance of proper stretching and securing seams in high-traffic areas. The result: rips and bumps within months. The lightbulb moment came when I adopted double-cut seam techniques and quality padding, which sustain the carpet’s longevity. This experience underscored how investing time in prep work yields long-term comfort and aesthetics.
Avoiding Hidden Pitfalls in Flooring and Shower Projects
One recurring theme I’ve learned is that superficial fixes are temporary. Whether it’s ensuring a proper slope in a shower or diagnosing a buckling hardwood floor, details matter. Proper assessment tools, like subfloor moisture tests and precise measurement, help avoid costly mistakes. Patience and a willingness to dig into these subtleties are what separate good DIY projects from great ones.
Regret Less—Learn, Adjust, Succeed
Looking back, my biggest lesson is that skipping the foundational checks—like evaluating subfloor conditions or securing fasteners properly—can undermine the entire project. Embracing continuous learning and respecting the complexity of home improvements has allowed me to enjoy results that last. If you’re ready to elevate your home DIY game, focusing on these often-overlooked details will set you apart. Remember, the right tools and knowledge turn good intentions into lasting successes.