

I remember the first time I stepped into my bathroom after a tile installation, only to notice water pooling dangerously close to the door. That sinking feeling was instant—realizing my shower pan wasn’t just slightly off; it was sloping right toward the entrance. It was a lightbulb moment that made me rethink everything I understood about bathroom DIYs. Ever experienced that uncomfortable, unexplainable feeling when water seems to refuse to stay contained? If so, you’re not alone.
Spotting the Problem Before It Worsens
It turns out, many homeowners face this perplexing issue where their shower pans slope toward the bathroom door, leading to water leakage, mold growth, and even structural damage down the line. But why does this happen? Often, it’s a combination of improper initial installation, shifting subfloors, or settling foundations that cause the slope to lean the wrong way. If you’re like me, early on I assumed a slight incline was inevitable—until I saw how much water escaped into the rest of the bathroom.
Addressing this problem early is crucial, as a misaligned shower pan can turn into a costly nightmare. I wish I had known to check the initial slope during installation or understand how subfloor issues contribute. Early mistakes, such as ignoring manufacturer instructions or skipping proper leveling, can turn a minor flaw into a big renovation challenge later on. To learn more about avoiding common flooring missteps, check out https://tilecraftsmens.com/flooring-installation-mistakes-to-avoid-for-a-seamless-look.
Does Your Shower Pan’s Slope Actually Matter?
Absolutely. Proper slope ensures water flows toward the drain, not into your bathroom corners. A skewed incline causes puddles, slippery surfaces, and eventual damage to your subfloor. So, how can you tell if your shower pan is sloping the wrong way? Feel free to examine the edges for any water pooling or seek professional inspection if leaks become evident. Next, we’ll explore how to identify and correct this issue with confidence and precision, so your bathroom stays dry and safe for years to come.
Assess the Current Slope
Begin by inspecting your shower pan. Fill a few plastic cups with water and pour them at various points around the shower edges. Watch for water pooling in areas indicating improper slope. For example, I once poured water near the entrance and noticed it sloped directly toward the door, causing immediate concern.
Remove the Shower Drain and Detach the Pan
Shut off water supply and carefully remove the drain cover. Use a screwdriver to unscrew the drain assembly. Gently lift and detach the shower pan from the subfloor, ensuring no damage occurs to the waterproofing membrane. This step is crucial before making adjustments, much like disassembling baseboards before realigning them.
Evaluate and Prepare the Subfloor
Check the subfloor beneath for softness, rot, or unevenness. Use a straightedge to identify dips or slopes. If necessary, sand down high spots or fill low spots with a cement patch. I once had to level a sagging corner using Thinset mortar, which made a significant difference in achieving a proper slope.
Adjust the Subfloor to Correct Slope
If the problem stems from the subfloor, add shims or build up the low side with a self-leveling compound. For deep dips, apply a layer of leveling compound—spread evenly with a trowel, similar to how you might trowel in thinset for tiles. Allow it to cure fully before proceeding.
Use a Level to Confirm the Correct Slope
Once the leveling compound or shims are in place, lay a long carpenter’s level across the shower floor from front to back and side to side. Adjust shims or leveling as necessary until the slope directs water toward the drain, ideally at 1/4 inch per foot. Think of it as setting a tiny incline, like a ramp, so water flows naturally and efficiently.
Reinstall the Shower Pan
Apply a waterproof sealant along the edges of the shower pan to prevent leaks. Carefully lower the pan back onto the prepared subfloor, ensuring it sits flat and aligned. Secure the drain assembly back in place, following manufacturer instructions. During my project, I used a silicone-based sealant similar to the waterproofing techniques described in shower renovation tips for a perfect seal that last.
Test Water Flow and Seal Thoroughly
Pour water around the edges again and observe its flow toward the drain. Watch for pooling or slow runoff; if issues persist, revisit the leveling. Seal all edges with proper waterproof membranes, as detailed in flooring installation guide. This ensures your shower remains water-tight and functional for years.
When it comes to home renovation, many homeowners fall prey to misconceptions that can cost them time and money. For instance, a common belief is that the simplest installation methods always yield the best results, but in my experience, understanding the nuances makes a significant difference. A frequent pitfall in flooring is assuming that a good quality subfloor negates the need for meticulous preparation; however, even minor dips or deviations can lead to cracking or uneven surfaces, especially in large-format tiles. It’s crucial to remember that a perfectly leveled base is the foundation of a durable floor. For detailed tips, check out this guide.
Does everyone really understand the importance of expansion gaps? Many overlook the critical function these gaps serve in accommodating temperature-induced expansion and contraction. Failure to leave proper space can result in buckling or warping over time. Moreover, it’s a myth that sealing these gaps with excessive caulk solves the problem once and for all; instead, proper trimming and space management are essential. For tips on choosing the right baseboards that complement this approach, visit this article.
Considering shower installations, there’s a misconception that a sloped shower pan is always easier to install. In reality, a shallow or improperly sloped pan can lead to pooling and mold growth, despite quick fixes. Achieving the correct slope, usually around 1/4 inch per foot, requires precise measurement and attentiveness during the subfloor prep stage. Advanced homeowners and professionals understand that a small error in slope can compromise the entire water-tightness of the shower. For a comprehensive rundown on preventing these mistakes, see this resource.
### Are Bigger and Thicker Always Better?
Many assume that thicker grout lines or larger tiles automatically increase durability. However, a sophisticated approach recognizes that material compatibility and proper installation techniques matter more. Large-format tiles, while stunning, demand perfectly flat surfaces; otherwise, they are prone to cracking. Similarly, overly thick grout can crack under movement if not applied correctly, which is why expert technicians adjust their grout placement based on the specific context. Remember, the key is precision, not just size. For advanced tips on tile layout and grout application, explore this step-by-step guide.
Takebaseboards, flooring, and showers are more complex than they seem at first glance. Misunderstanding their intricacies often leads to avoidable mistakes and costly repairs. Do you know how to avoid these common pitfalls? If not, it might be time to seek expert advice or check out professional resources. Have you ever fallen into this trap? Let me know in the comments.
Keeping your home improvements in top shape over time requires the right tools and a disciplined maintenance routine. When it comes to flooring, baseboards, showers, and other installations, having precision equipment and proven methods ensures durability and beauty. One of my go-to tools is a high-quality digital level, which is indispensable for checking slopes—in particular, my favorite is the Johnson Digital Level. Its accuracy of ±0.1 degrees allows me to verify the proper 1/4 inch per foot slope in shower pans or determine if baseboards are flush against uneven walls, vastly reducing the need for future rework.
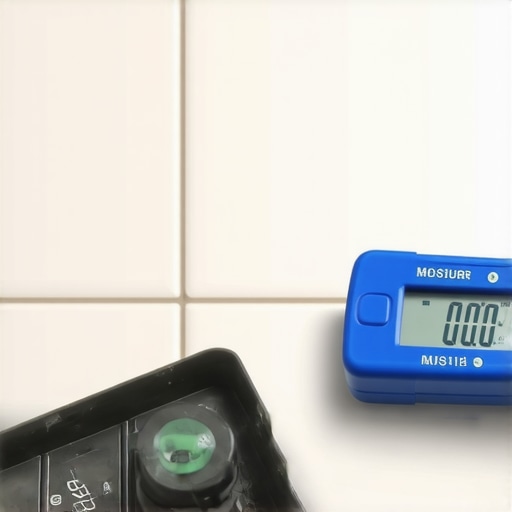
Another essential item is a moisture meter. Consistent moisture levels are critical for flooring longevity, especially in moisture-prone areas like bathrooms and basements. I personally rely on the Protimeter Surveymaster because it quickly provides accurate readings and helps me decide the best time to proceed with sealing or further installation steps. Proper tools save time, prevent mistakes, and extend the lifespan of your investments.
For long-term results, I also recommend investing in quality sealants and waterproofing membranes. Applying a liquid membrane like RedGard beneath tile installations or around shower niches creates an effective barrier against water intrusion. During my projects, I use a high-quality silicone sealant for baseboards and shower edges because it remains flexible, adheres well, and resists mold over time.
How do I maintain flooring and showers over time?
Regular inspections and cleaning are your best allies. Use a grout haze remover periodically to prevent build-up in tiled showers and floors. For baseboards, ensure they stay sealed against dust and moisture by reapplying caulk or sealing paint every few years. Moreover, keeping an eye on water drainage—by checking slope and sealing—can prevent costly repairs down the line. Advances in smart home tech may soon bring sensors that monitor humidity and leakage in real-time, promising even greater peace of mind in future maintenance routines.
To make this process easier, consider adopting a maintenance schedule that includes monthly inspections of grout, caulk, and seals, especially in moist environments. By staying proactive, you extend the life of your carefully crafted spaces, saving money and preserving their aesthetic. For detailed guidance on how to ensure your flooring remains durable and attractive after installation, I highly recommend reviewing this comprehensive guide.
Get into the habit of checking slopes with your digital level or moisture meter—these tools are game-changers. Why not challenge yourself today? Use your digital level to verify the slope of a future shower pan before installation, ensuring water flows perfectly and avoids the costly mistake of pooling or leaks later.
What Slip-Ups Taught Me About Flawless Finishes
One of the most valuable lessons I learned was that patience and attention to detail trump speed when it comes to installation. Rushing through the leveling process or ignoring the manufacturer’s instructions for shower pans can lead to problems that end up costing time and money. The importance of pre-inspection and proper planning became crystal clear—every small step, from checking subfloor flatness to verifying slope with a digital level, safeguards the longevity of your work.
I’ve also realized that understanding common misconceptions—like the belief that thicker grout or larger tiles automatically mean better durability—can save you from costly redesigns. Instead, focus on material compatibility and precise execution, which are the true drivers of a high-quality finish. This insight has transformed my approach, shifting my focus from aesthetics alone to those elements behind the scenes that matter most.
Tools That Changed My Perspective on Home Upgrades
Investing in a reliable digital level, such as the Johnson model, has been a game-changer. Its accuracy helps me verify slopes needed for proper water drainage in showers, preventing future leaks. A moisture meter, like the Protimeter Surveymaster, informs me when the subfloor is dry enough for tile installation, reducing the risk of mold or cracking. For sealing grout and edges effectively, I trust high-quality waterproof membranes and silicone sealants, which provide peace of mind in moisture-heavy areas.
Additionally, consulting comprehensive guides—like those found on trusted websites—has provided me with proven techniques for leveling dips, scribing baseboards, and managing expansion gaps. These resources serve as mentors, guiding me through complex tasks with confidence, and help me avoid typical pitfalls during DIY projects.
Embrace the Challenge—Transform Your Home Today
Ultimately, mastering home upgrades in flooring, baseboards, and showers involves a combination of learning, the right tools, and patience. Each successful project boosts your confidence and ensures your space remains durable and beautiful for years to come. Remember, perfection isn’t about perfection—it’s about persistent improvement. Why not start today? Use your newfound knowledge and tools to create a space you’ll love for a lifetime.
Have you ever struggled with properly leveling a shower pan or sealing baseboards? Share your experience below—I’d love to hear your stories and tips!